Using VeraCrypt, you can easily protect important files. This open-source software allows you to protect your files with passwords. You can create an encrypted file container with a password of your choice, save confidential files in it, and access the files later by decrypting the container. This article provides a step-by-step guide on creating an encrypted volume using VeraCrypt.
1. Create an Encrypted Container using VeraCrypt
Step 1: Download, Install and Launch VeraCrypt
VeraCrypt is available to download as freeware on the official website. It can be installed on Windows, Linux, and macOS. Choose a version that is compatible with your system.
https://www.veracrypt.fr/code/VeraCrypt/
Step 2: Create a New Volume via VeraCrypt Volume Creation Wizard
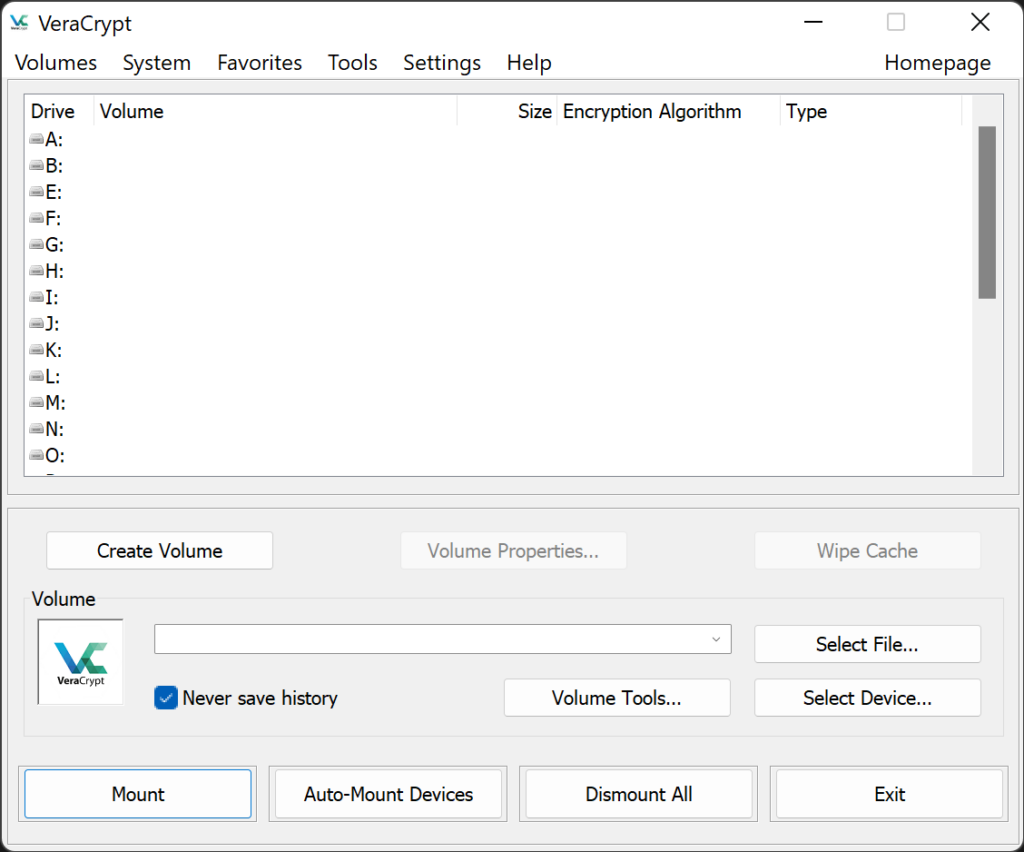
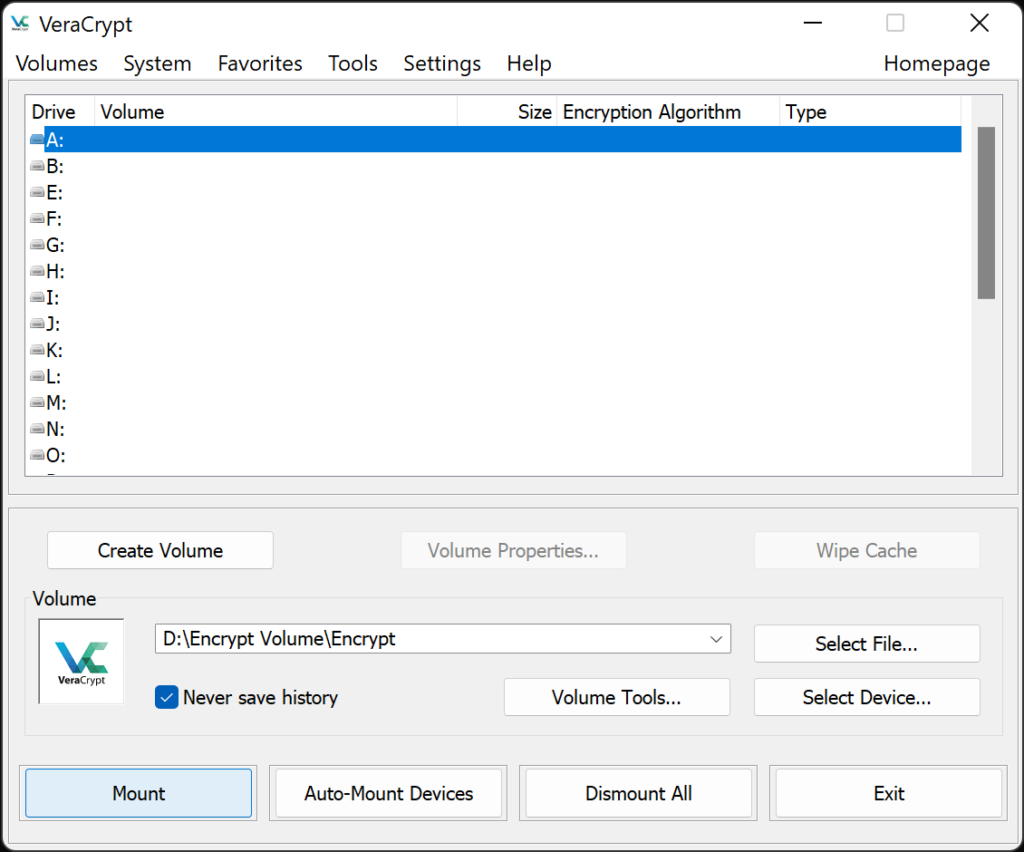
Upon opening VeraCrypt, a launch page will be displayed, whereas a user can perform different actions, including mounting a volume on a selected drive letter. Before that, we need to first create an encrypted volume.
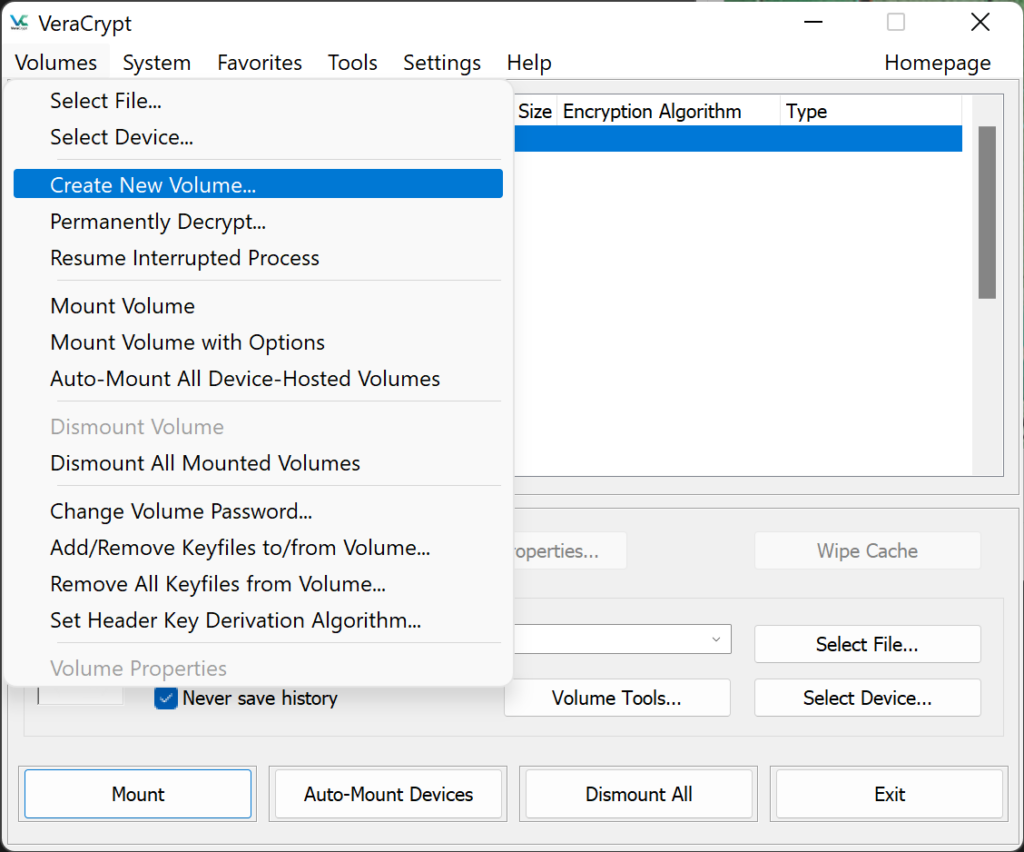
Start creating a volume by selecting the “Create Volume” button. You can also find it by navigating to the “Volumes” tab.
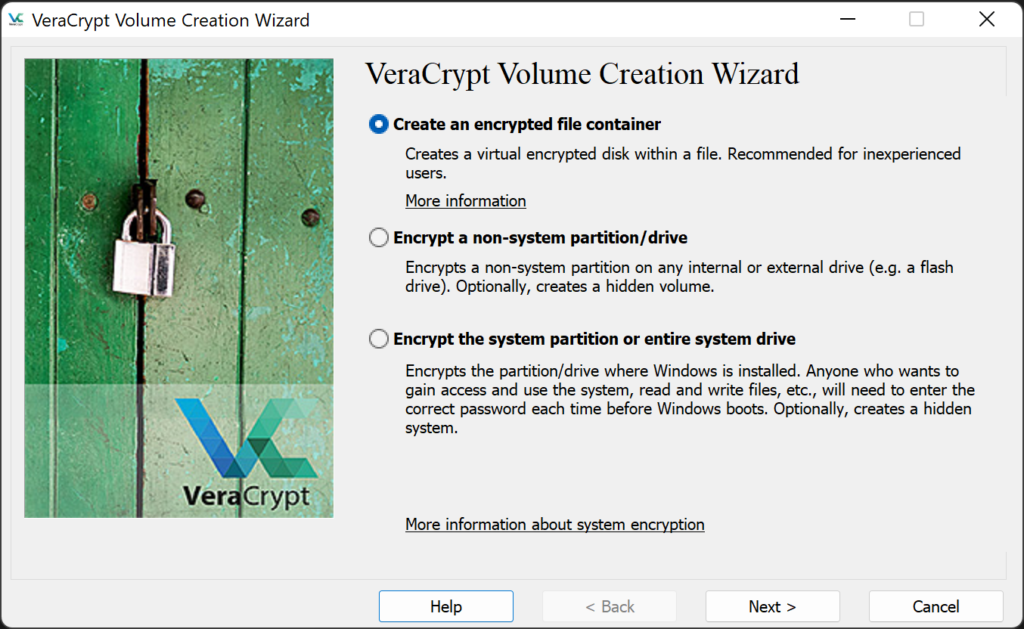
A Volume Creation Wizard will be displayed. For starters, leave the default option “Create an encrypted file container” selected.
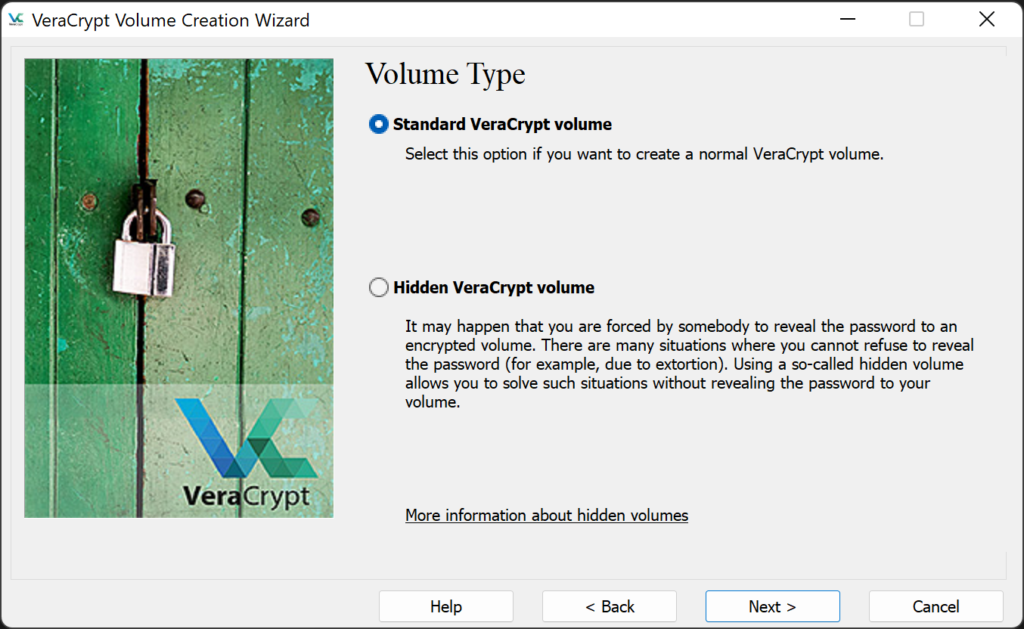
In this tutorial, we will create a standard VeraCrypt volume.
After that, you can select the initial location for storing the encrypted file. VeraCrypt will create an encrypted file on the specified path. You can mount a volume on VeraCrypt by specifying the encrypted file later on. Rest assured, the file can always be moved to another path or storage device after creation.
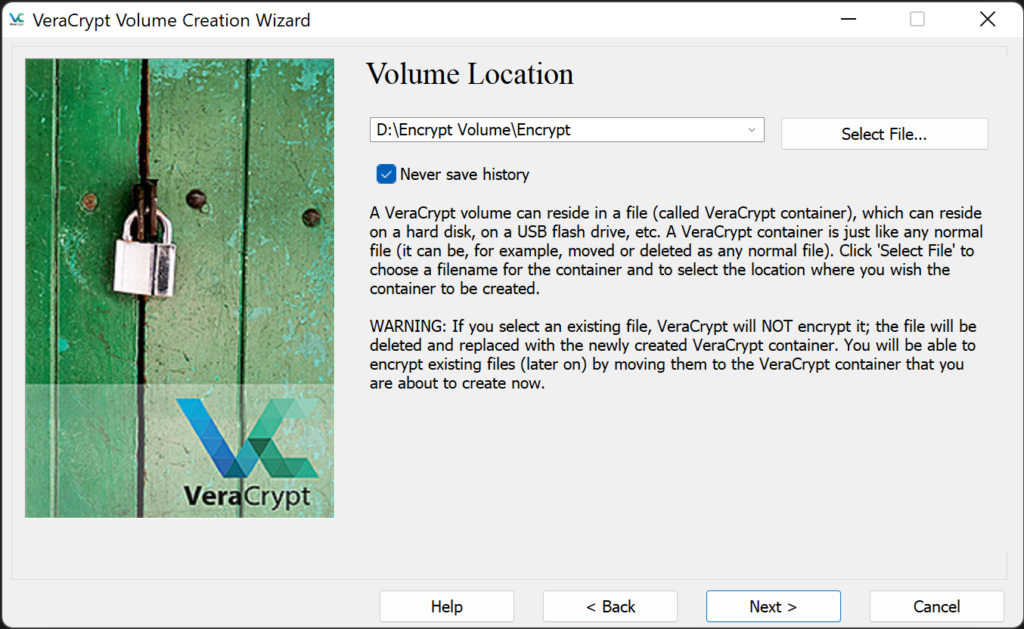
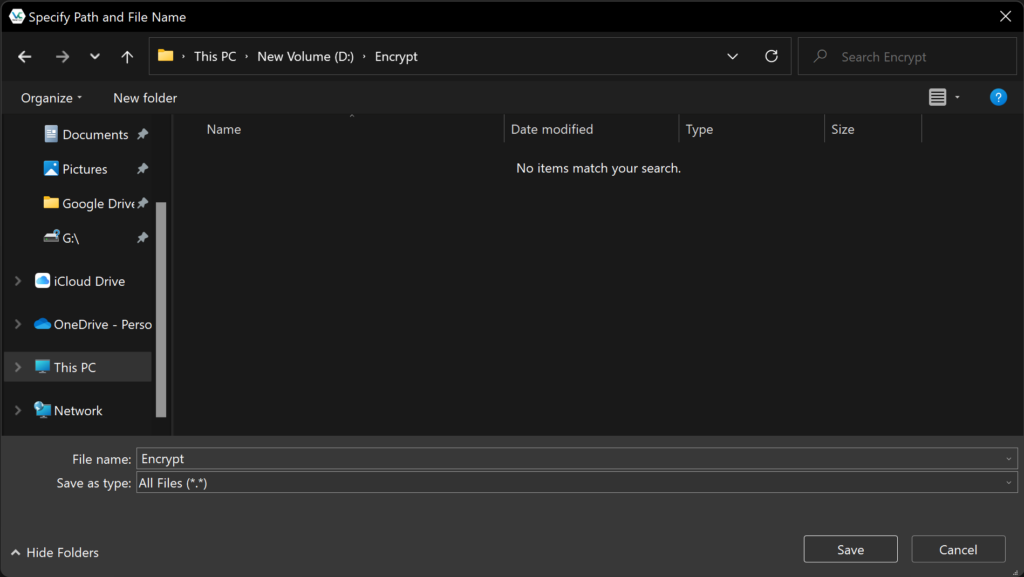
Provide a name and file path for the encrypted file. Both the path and the file name can be changed later on.
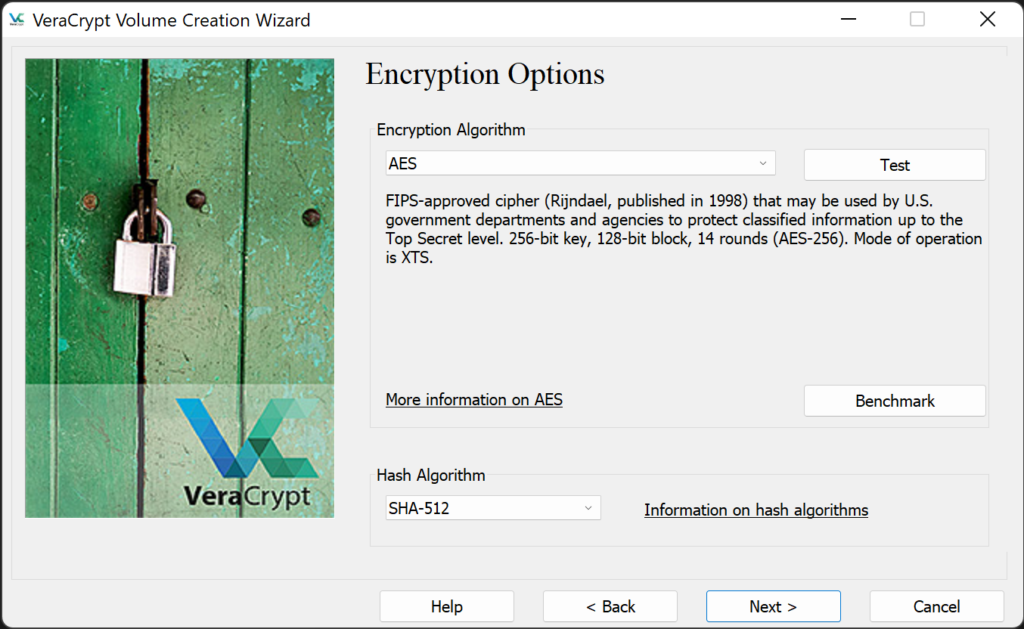
Step 3: Specify Encryption Options, Size, and Password
VeraCrypt allows you to select a cryptographic algorithm of your choice.
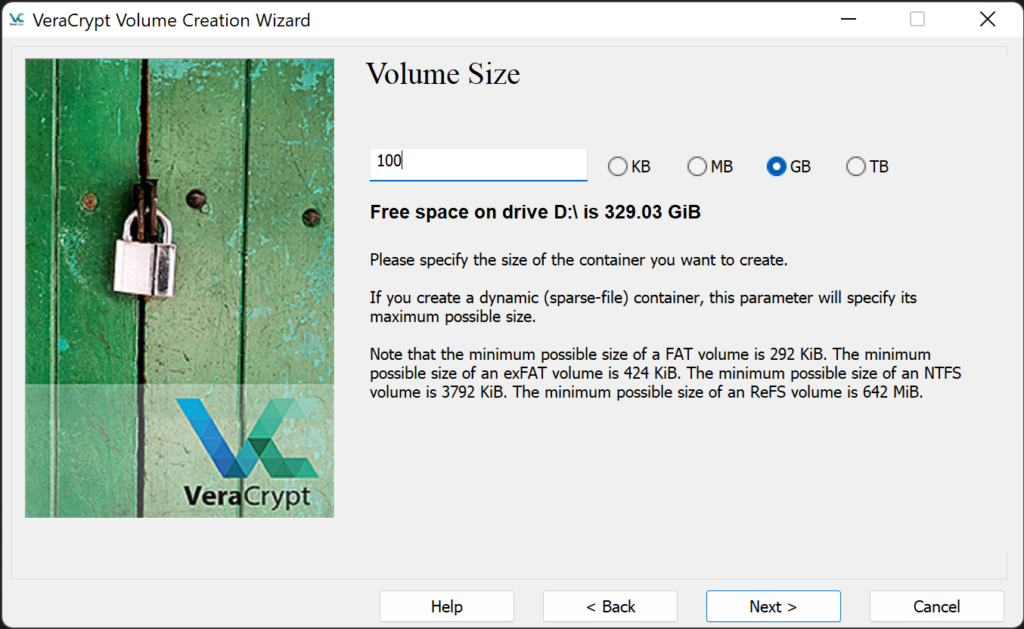
After selecting the encryption and hash algorithm, you can enter the volume size. VeraCrypt will create an encrypted file container with the size you specified. It will occupy your disk space, so it is recommended to select a size that is no larger than the storage space of the disk / removable drive where the encrypted file container will be kept.
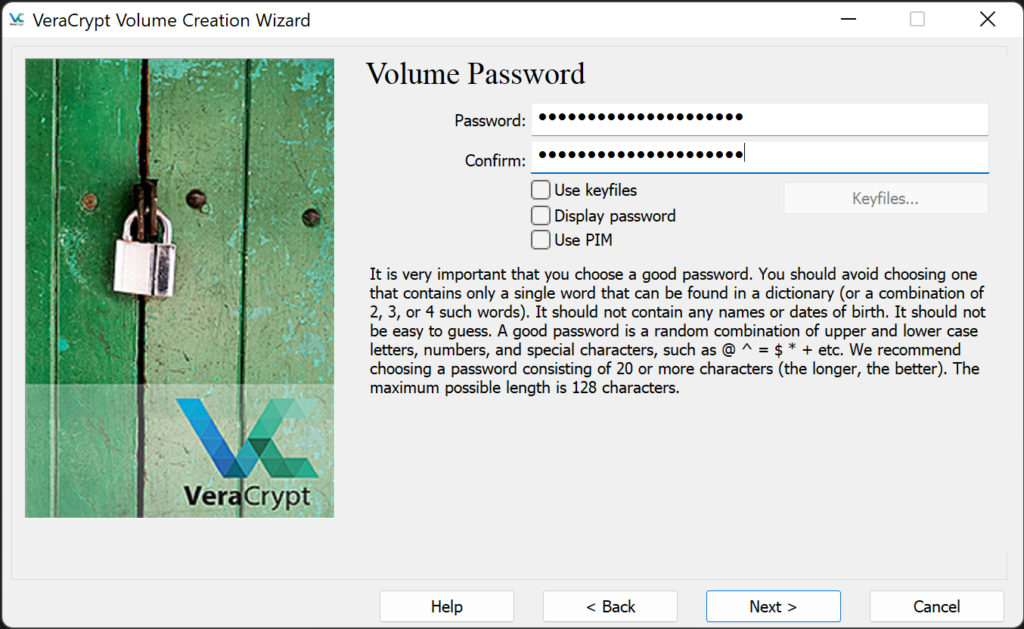
After that, you must provide a password for VeraCrypt to encrypt the file container. Remember to provide a strong password that comprises more than 20 characters, and with a combination of upper and lower case letters, and special characters.
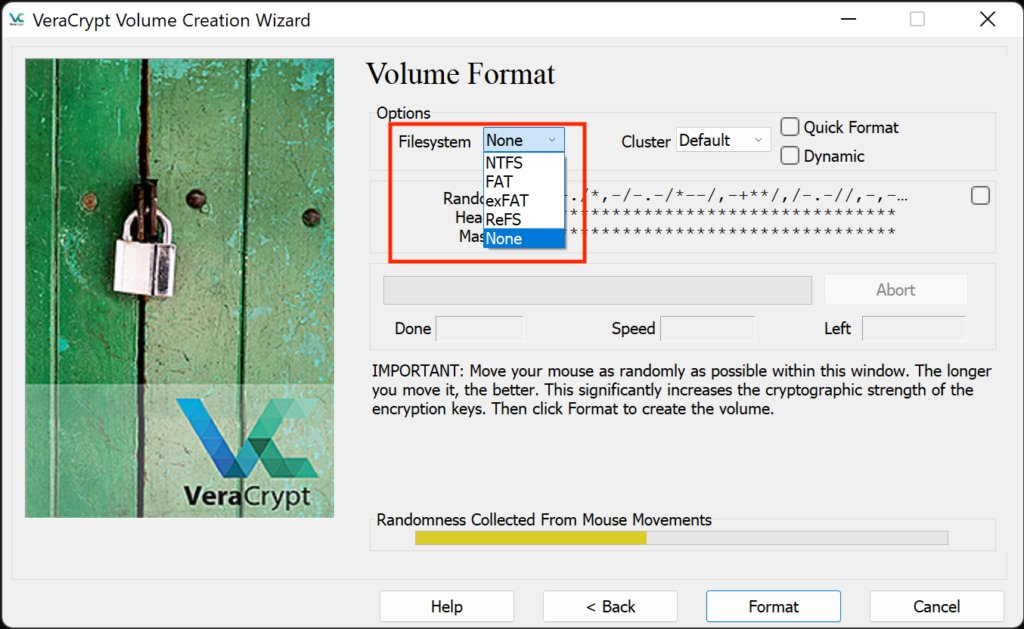
Step 4: Specify Volume Format and Begin Formatting
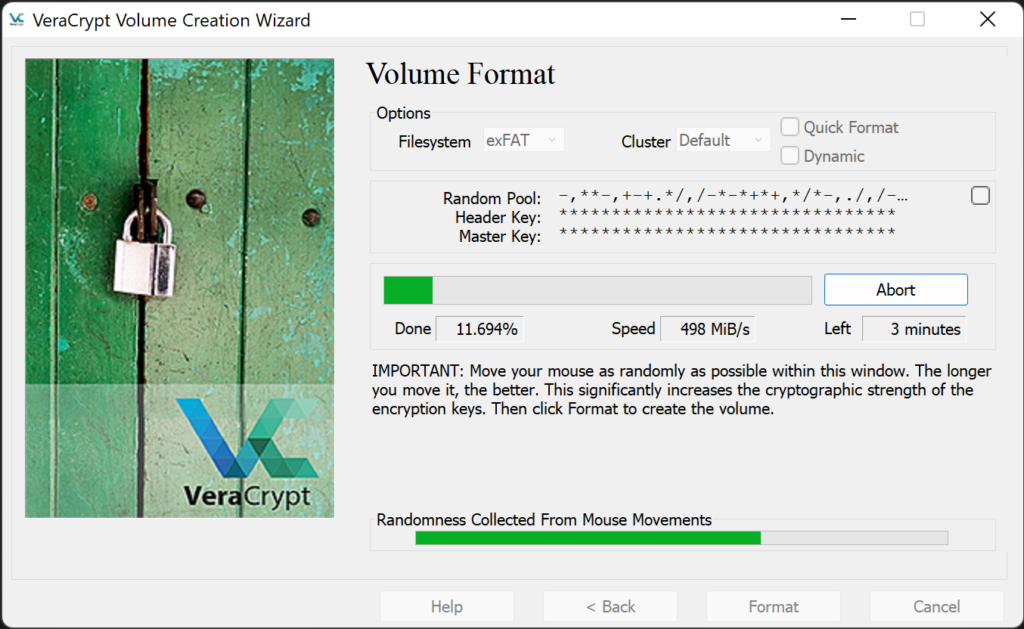
Finally, specify the file format of the volume. You are given several choices in terms of the filesystem. In short, you can choose exFAT if you would like to access the volume across different operating systems, and save a file larger than 4GB on the volume. Move your cursor till the bar above the “Format” button turns to green color.
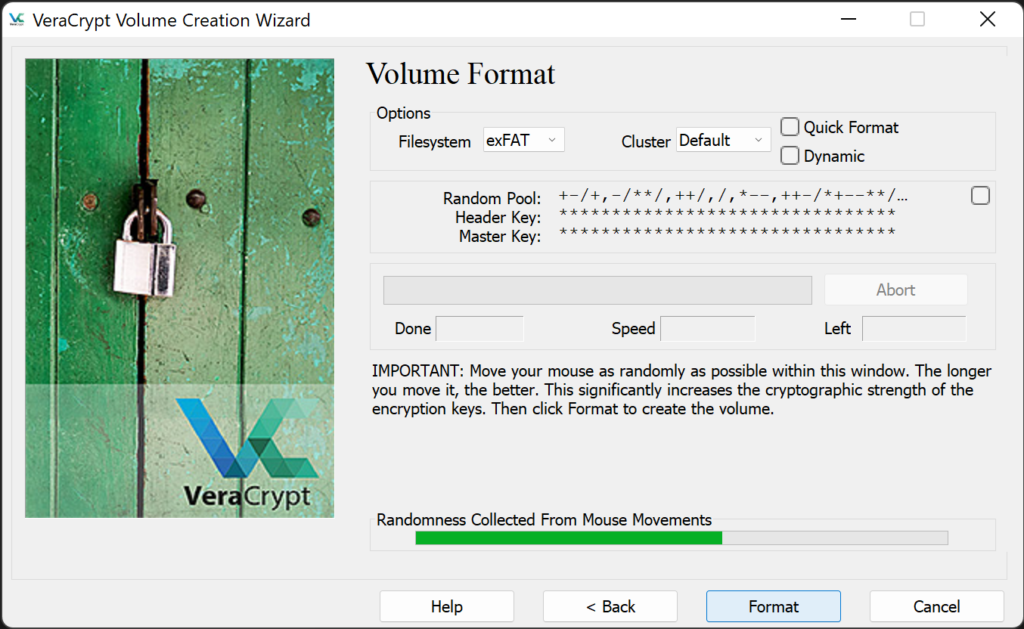
Click “Format” to begin the formatting process.
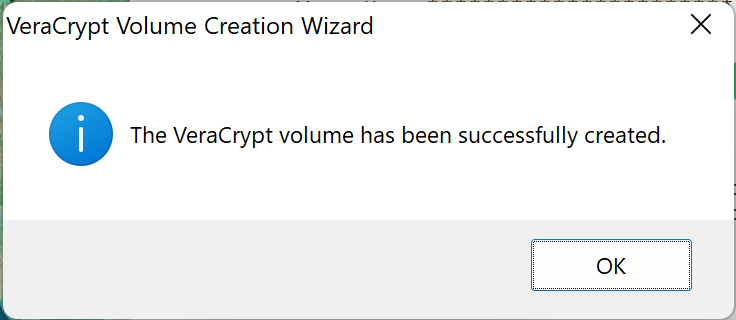
In the end, VeraCrypt will notify the user after successfully creating an encrypted volume.
2. Decrypt an Encrypted Volume using VeraCrypt
The process of mounting a VeraCrypt-encrypted volume is fairly simple.
First of all, navigate to the homepage, and select a drive letter.
Next, click “Select File” and choose an encrypted file container. After that, select “Mount.”
Then, you must enter the password for VeraCrypt to decrypt the content and mount the volume to the drive letter specified in the previous step.

Upon entering the password, VeraCrypt will start the decryption process and mount the volume. After the volume is successfully mounted in the operating system, you can save files and retrieve files in the volume. You can treat the volume the same as a removable storage device.
3. Troubleshooting Common VeraCrypt Issues
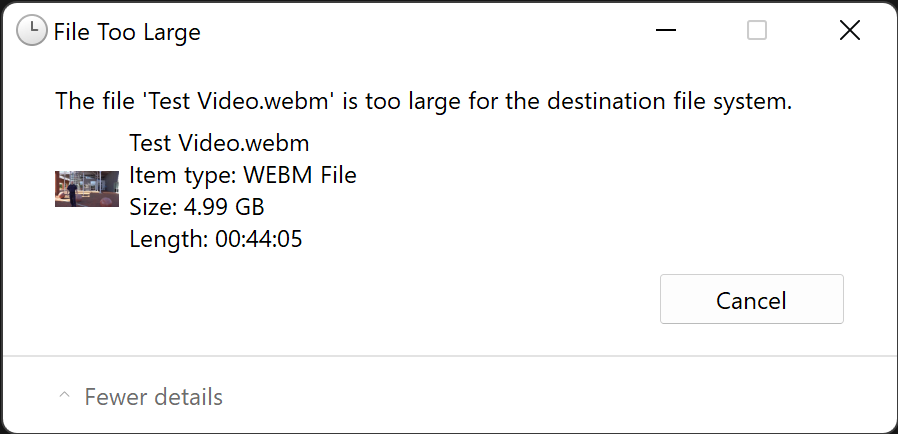
Error #1: A “File is Too Large” Warning Message is displayed when moving a file to the Volume
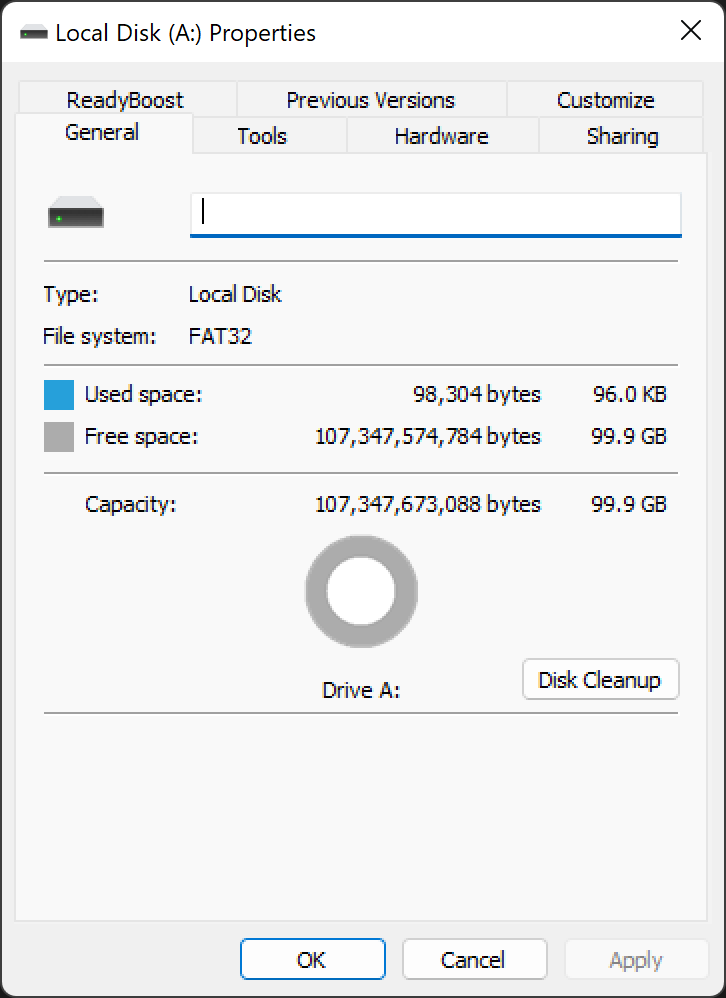
Contrary to a pre-formatted storage device, the volume created by VeraCrypt may not be of the filesystem which supports a large file. The most likely cause for the “file is too large” error is that the volume created by VeraCrypt is using the FAT32 file system.
To resolve the “file is too large” issue, you must format the VeraCrypt volume to a file system that supports the storage of large-sized files, including exFAT and NTFS file systems.
Alternatively, you can choose to format the VeraCrypt volume using other tools after it is created and mounted on the operating system.
Error #2: VeraCrypt shows “Windows Failed to Format the Volume” Error Message
During volume creation, it is possible for VeraCrypt to complain that it is unable to format the volume using a file system other than FAT32. A possible cause is that VeraCrypt does not have permission to perform the formatting action.
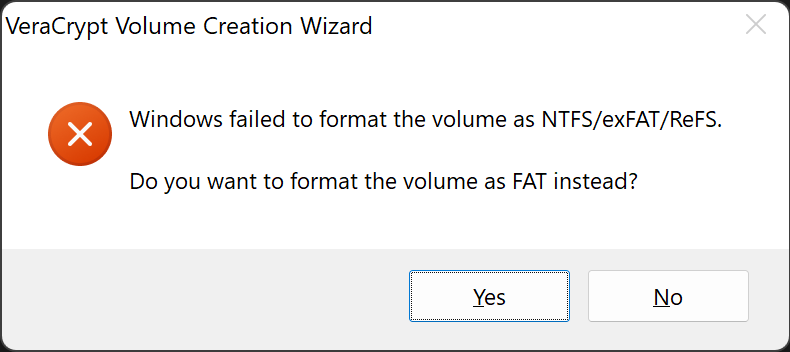
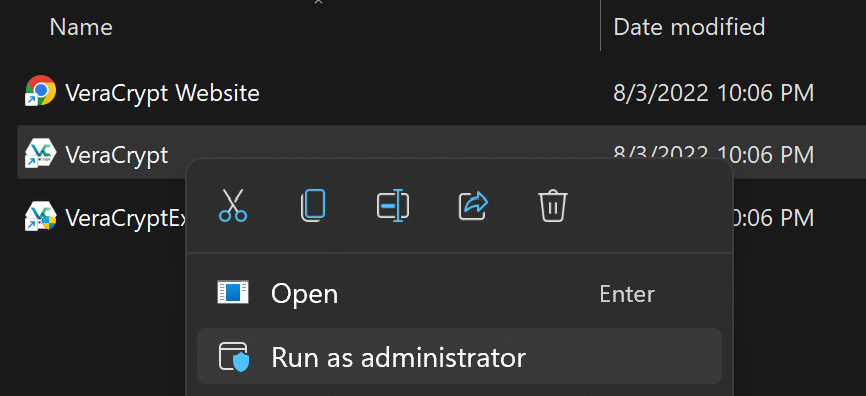
To resolve this issue, run VeraCrypt executable as administrator before creating the volume.
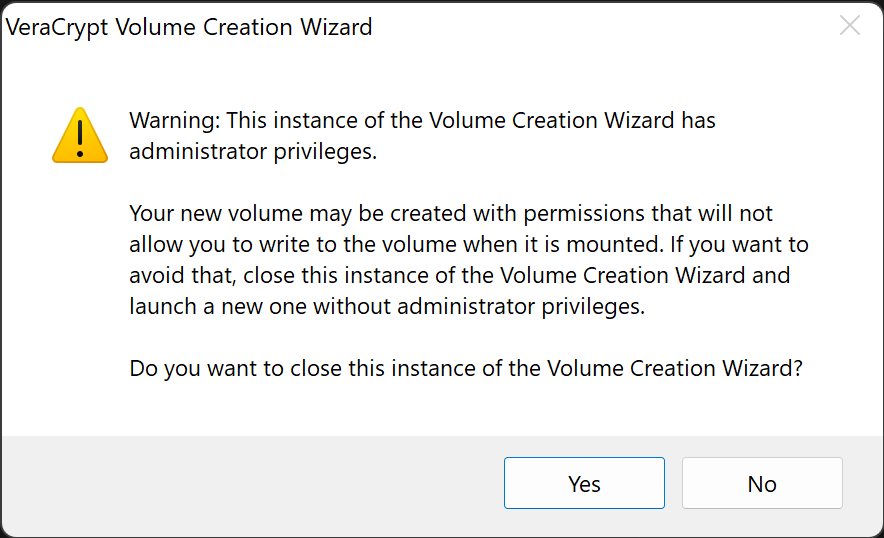
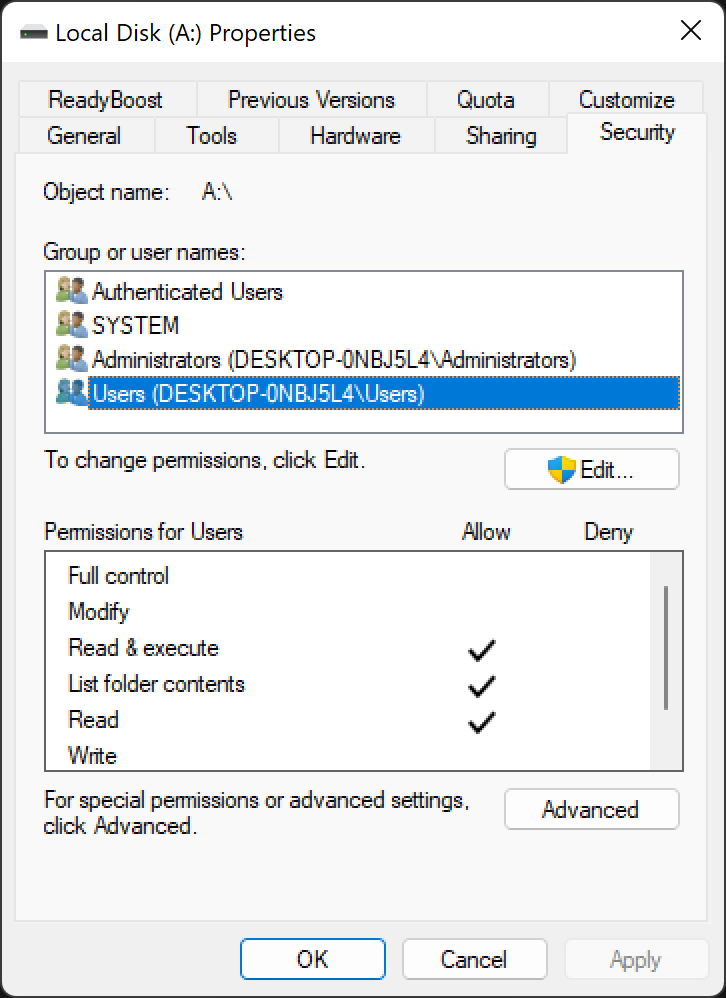
Although VeraCrypt will show a warning message suggesting users run the application in a non-administrative role, users shall still be able to mount the volume created by VeraCrypt with administrator privilege. Otherwise, edit the volume permission to include users who require accessing the volume.
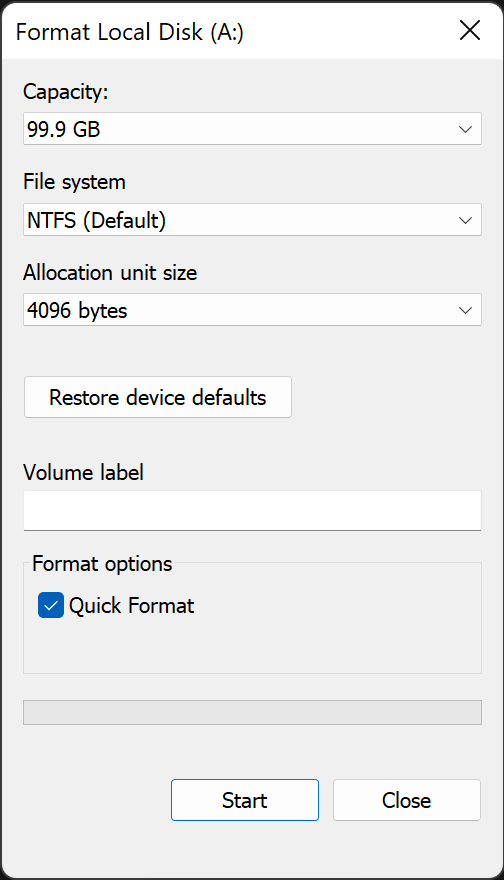
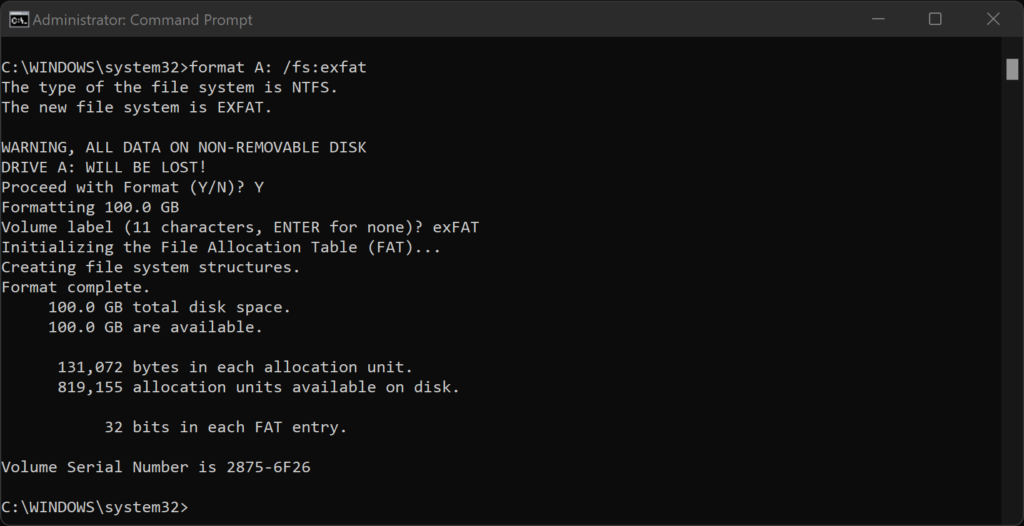
Alternatively, the volume can be re-formatted using a Windows command. All you have to do is to mount the volume using VeraCrypt and run the following command. Please be aware that you may need to run the CMD as an administrator.
format <drive letter of the volume:> /fs:<desired file system>
E.g. format A: /fs:exfat
Windows will perform disk formatting. Depending on the volume size and the speed of your storage device, the operation will take some time, ranging from minutes to hours. All of the files in the volume will be deleted during the formatting process.
Finally, the volume with the desirable file system will be ready for use.
