Websites are frequently targeted by hackers as they can be accessed by anyone on the Internet. Looking at the access logs of a web server, it is not unusual to discover that bad actors attempted to make multiple HTTP POST requests with query strings. Attackers may try to access your admin panel through brute force attacks if they can locate the system’s login page like wp-login. Furthermore, bots can brute force a website with <?=random string> in attempt to bypass caching and overload a server with numerous requests.
In light of the security implications, it is recommended to deploy a web application firewall to protect server resources and a CDN to speed up content delivery. Cloudflare is one of the major players in the cybersecurity field whereas webmasters can add sites to be protected by its service. It acts as a reverse proxy by providing distributed domain name server services, which means visitors retrieve your web content from Cloudflare servers and only Cloudflare IP ranges should be able to reach directly to your own web server. As a middleman, Cloudflare can identify IP addresses with bad scores and send a JS challenge to those visitors – or outright block them – to mitigate the risks of your server suffering from DDoS attacks.
To illustrate how a virtual security device can be helpful in terms of defensive security, the following section is the workflow of setting up Cloudflare as a CDN for a domain registered with AWS Route 53. You can see how implementing a name server service can improve security of a website.
Configure Cloudflare CDN
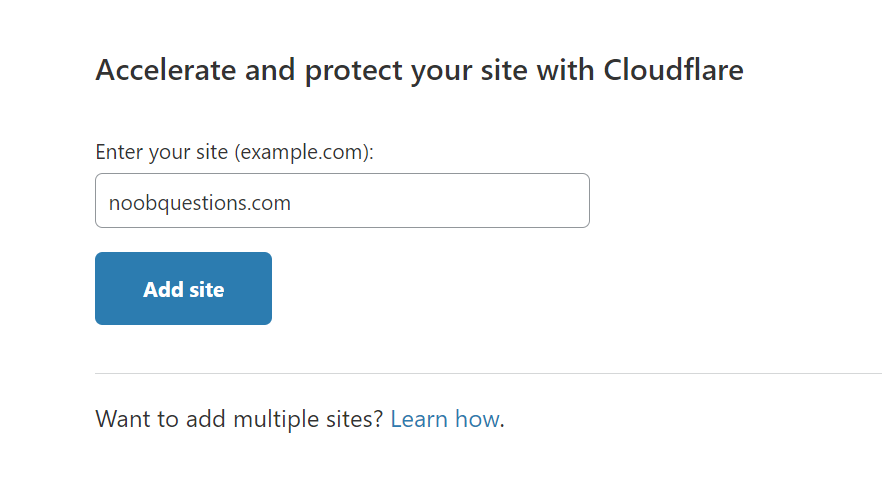
Step 1: Add your domain on Cloudflare web console.
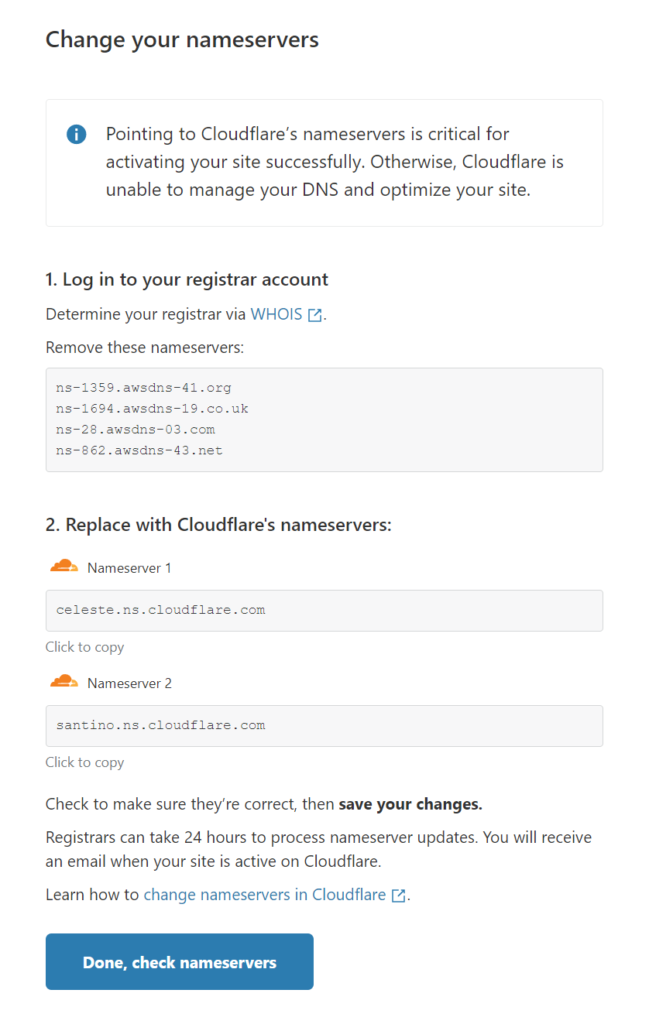
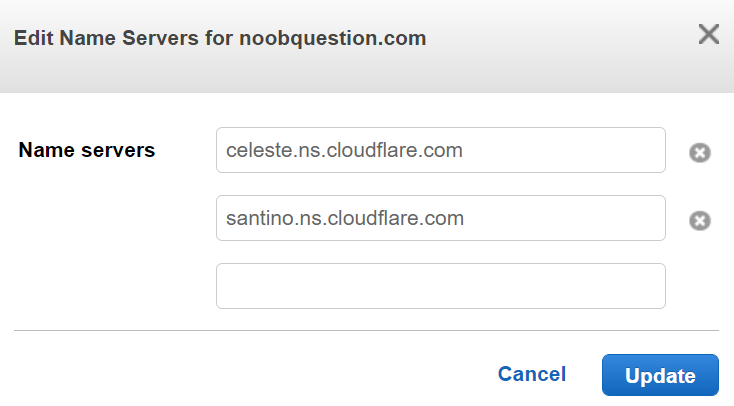
Step 2: Change the name server of your domain to Cloudflare’s.
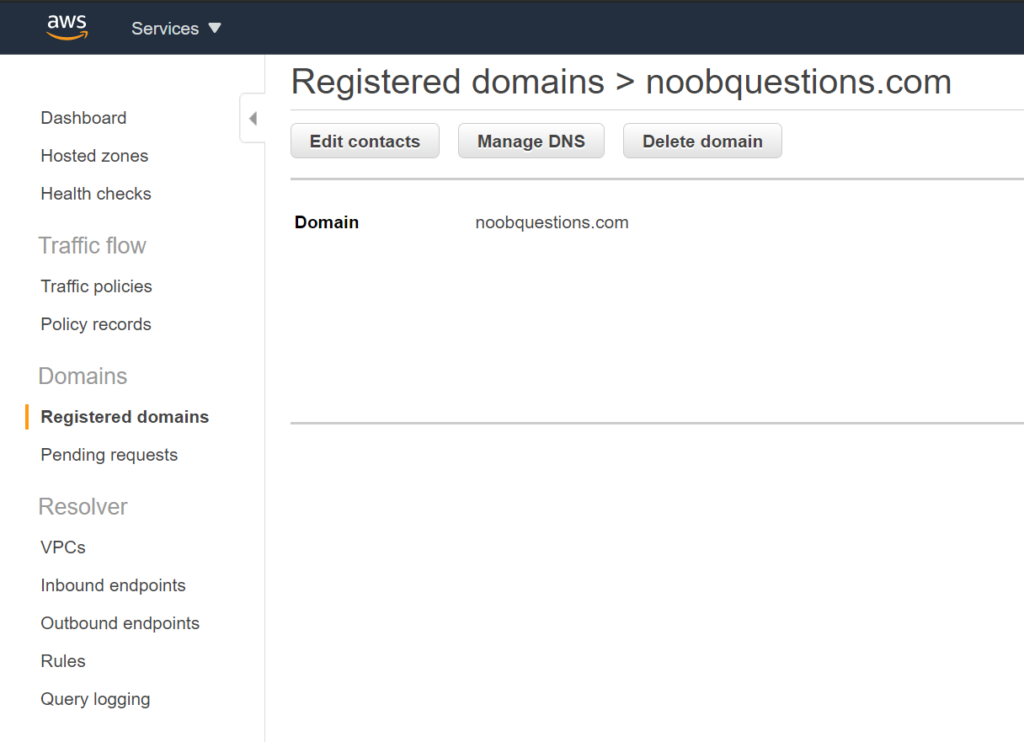
If your domain is registered with AWS Route 53, navigate to Domains -> Registered domains -> Add or edit name servers. Changing the name servers in the Hosted Zones container is not the same – AWS documentation mentioned the NS records in Route 53’s Hosted Zone container normally should not be changed because it is created automatically when registering a domain with Route 53.
https://docs.aws.amazon.com/Route53/latest/DeveloperGuide/SOA-NSrecords.html
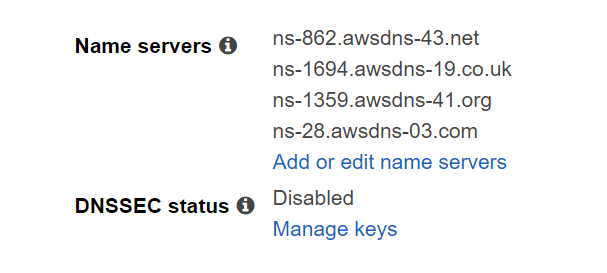
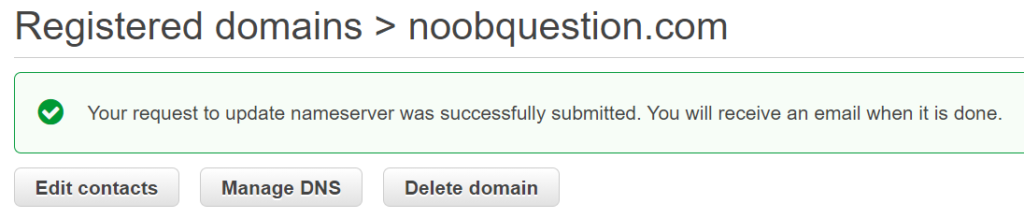
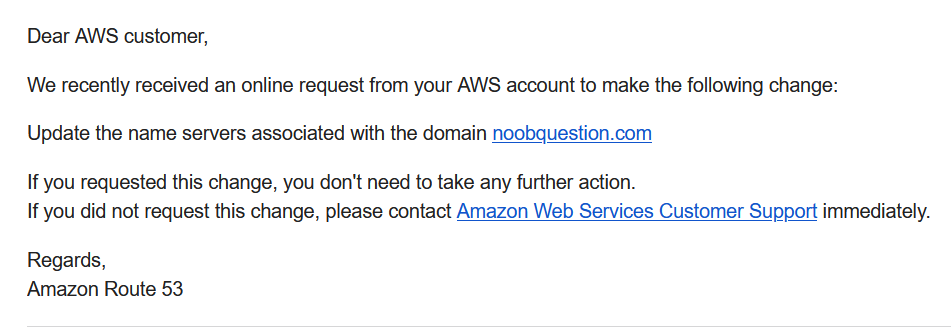
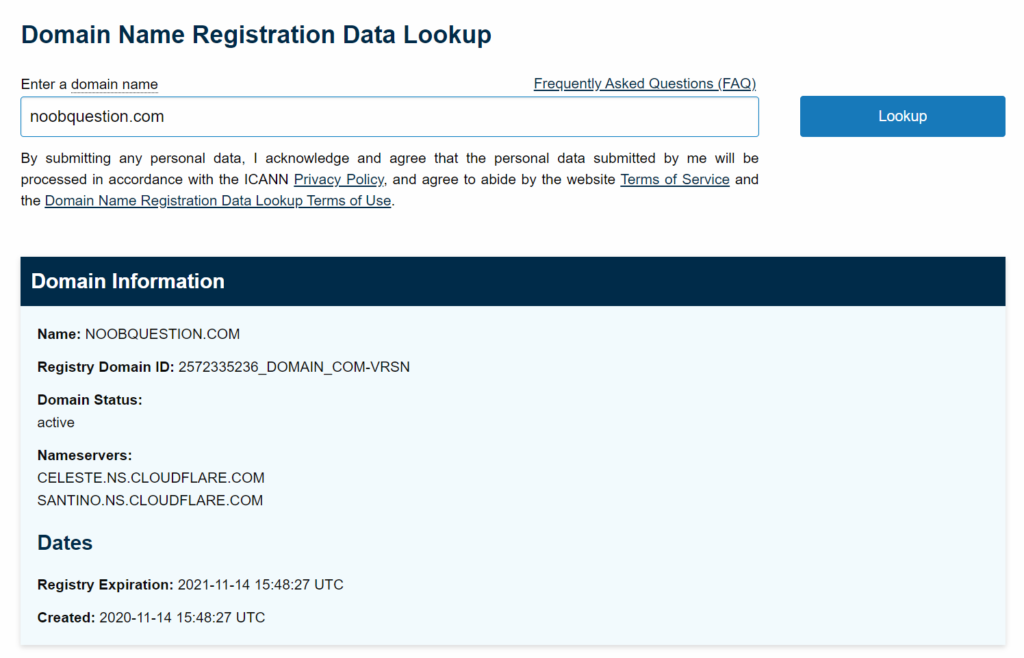
Step 3: Confirm the result of name server changes

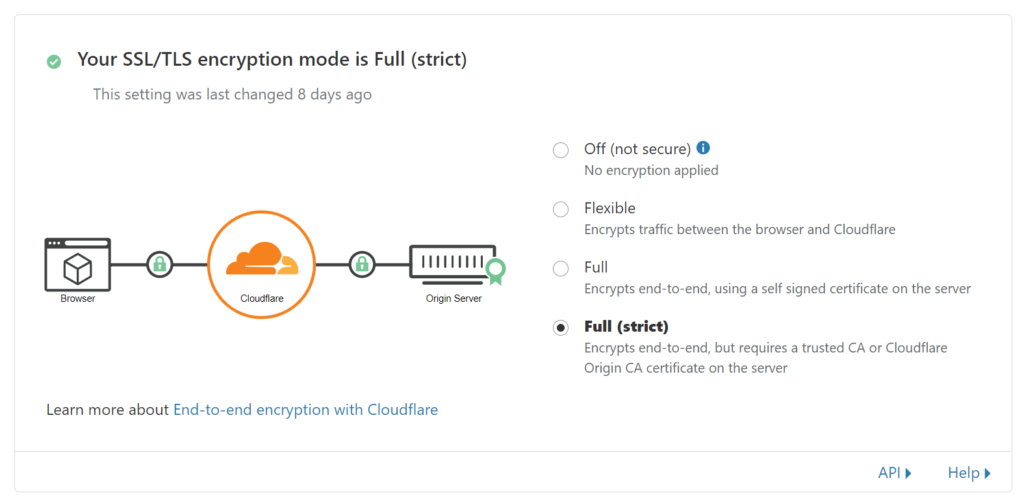
Step 4: Change the SSL/TLS encryption mode (if applicable)
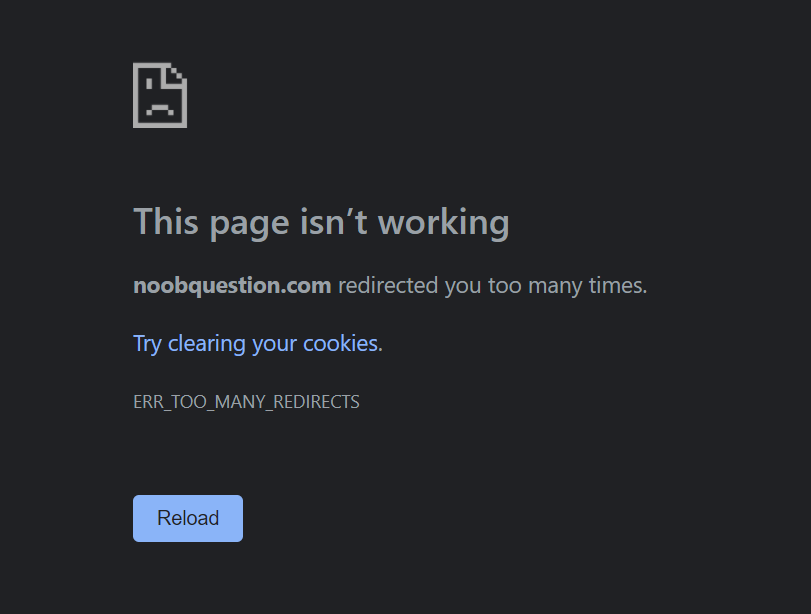
If you are using Let’s Encrypt certificates, The chances are that a redirect to HTTPS is configured during the certificate setup. You may get hit by a “redirected too many times” error due to a redirect loop, meaning Cloudflare redirects requests from HTTPS to HTTP but your web server do the opposite. You should head to the console titled SSL/TLS and change the encryption mode from Flexible to Full (strict) to resolve the issue.
If the Flexible SSL option is enabled, Cloudflare sends requests to your origin web server unencrypted over HTTP
https://support.cloudflare.com/hc/en-us/articles/115000219871-Troubleshooting-redirect-loop-errors
Step 5: Check if your website is now served from Cloudflare servers
You can use IP geolocation software / website to check the origins of the IP addresses.
-> nslookup noobquestions.com
Addresses: 2606:4700:3032::6812:3616
2606:4700:3031::ac43:89c3
2606:4700:3030::6812:3716
104.18.54.22
104.18.55.22
172.67.137.195
-> ping noobquestions.com
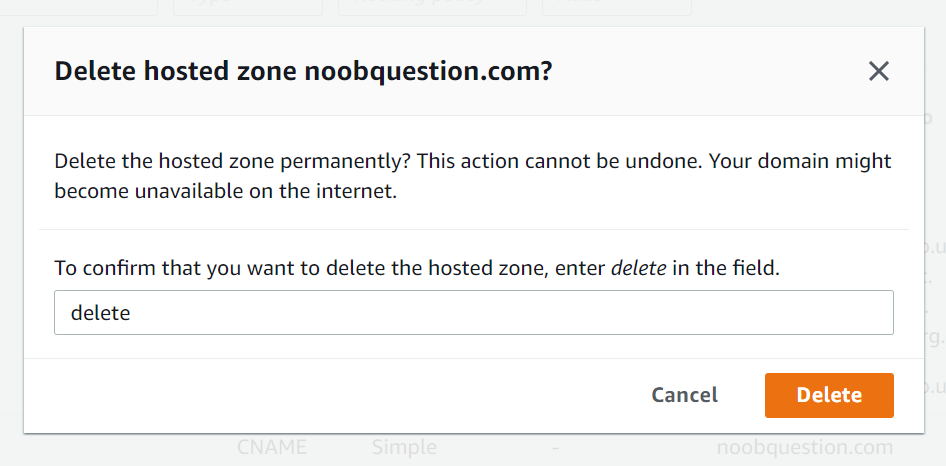
Reply from 172.67.137.195Step 6: Delete the original hosted zone in Route 53 (optional)
If your website is functioning as expected after switching name servers to Cloudflare, you may proceed to remove the hosted zone from Route 53 console since it is no longer needed. Prior to deleting the hosted zone with old name servers in Route 53, you should confirm that DNS queries are responded with Cloudflare name servers.
https://docs.aws.amazon.com/Route53/latest/DeveloperGuide/domain-name-servers-glue-records.html
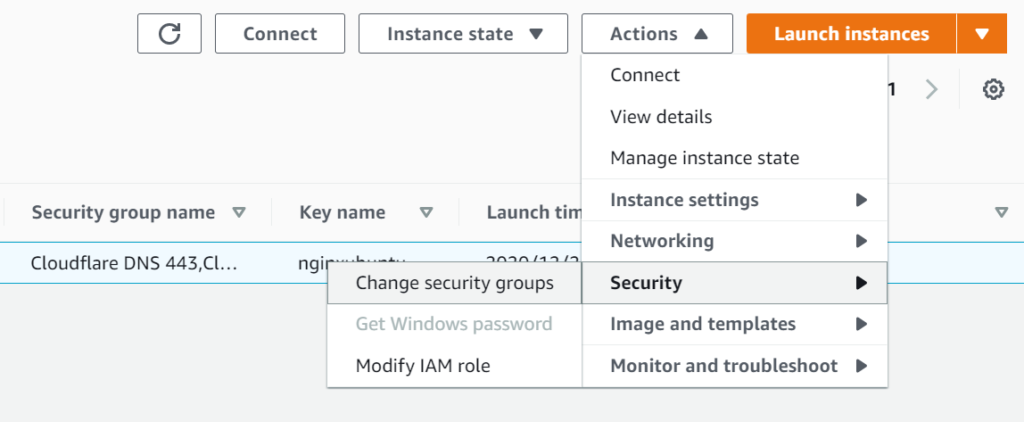
Step 7: Change the firewall rules to only allow inbound traffic from Cloudflare IP ranges
As Cloudflare is now configured to act as a reverse proxy whereas it acts as a middle-man to deliver content to visitors, you should limit allowed inbound IP addresses to Cloudflare’s IP ranges so as to prevent bots from attacking your server’s IP address. You should set allow rules to your instance from the IP ranges as per Cloudflare’s website.
https://www.cloudflare.com/ips/
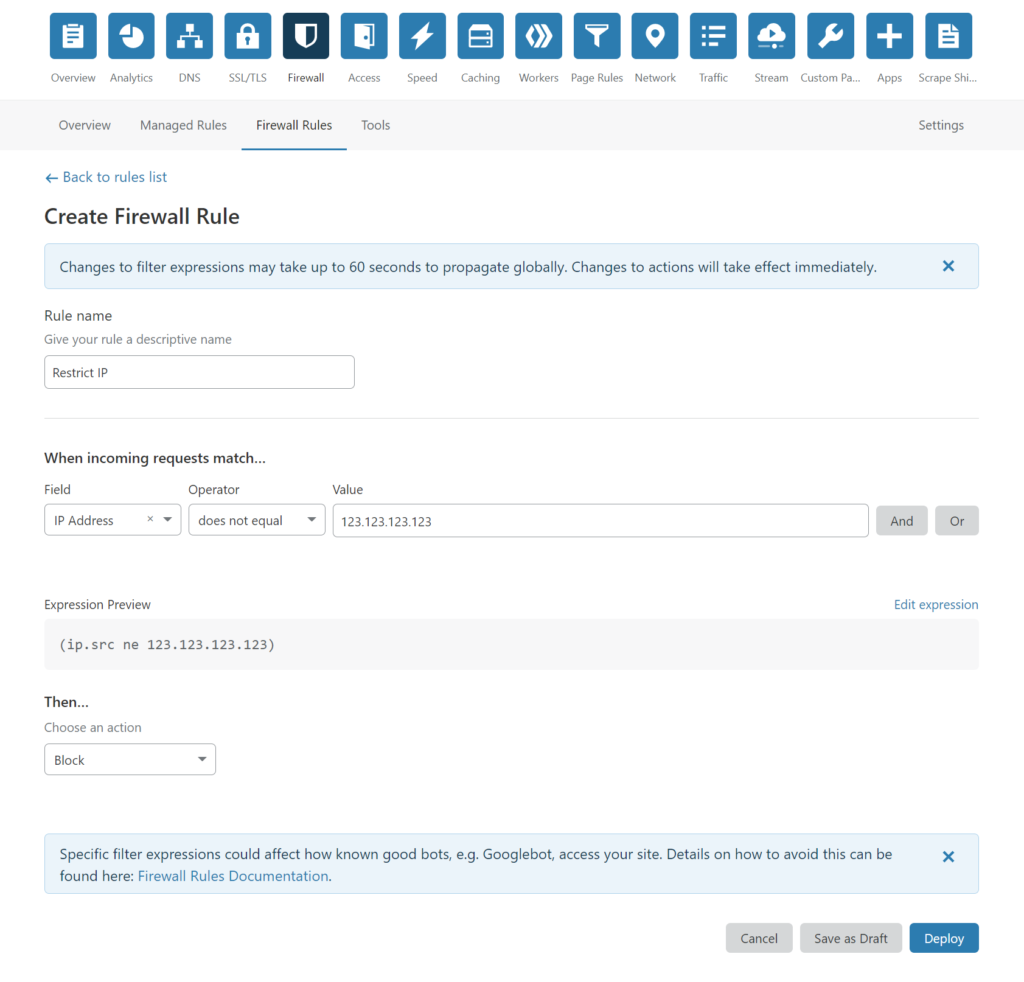
Step 8: Configure Web Application Firewall (WAF) in Cloudflare console
By default, Cloudflare Security Level is set to Medium, which means Captcha challenges will be presented to visitors with IP addresses that are flagged as moderate threat. You can change the security level ranging from ‘essentially off’ to ‘under attack’ mode, which is documented thoroughly on Cloudflare’s website. Cloudflare also provides 5 active firewall rules in its free tier so you can make use of the WAF to restrict access as per your needs.
Conclusion
It is essential to protect your resources with security devices, be it a physical or virtual firewall. There are additional measures you can take to further strengthen cybersecurity, including endpoint protection, rate limit, backup and password policy, disabling unused plugins, to name but a few. Security should be kept in mind when deploying any type of resources. It goes without saying that there are a myriad of service providers in the cybersecurity field. As an example, AWS CloudFront (CDN), WAF and Shield can be coupled to protect against web and DDoS attacks. You should evaluate which one best suits your needs through comparing their features against the types of protection you want. Most importantly, keep yourself be informed with security news and implement best security practices as per official guidelines!