VMware vCenter provides centralized management capabilities for ESXi hosts. It also enables additional functions like migrating virtual machines between hosts using vMotion. This tutorial provides an overview of installing VMware vCenter on an ESXi host.
Step 1: Check Requirements for installing vCenter Server
To begin with, you should ensure that the existing environment can fulfill the minimum requirements for running vCenter Server. You can check CPU, RAM, and storage requirements on VMware’s official website.
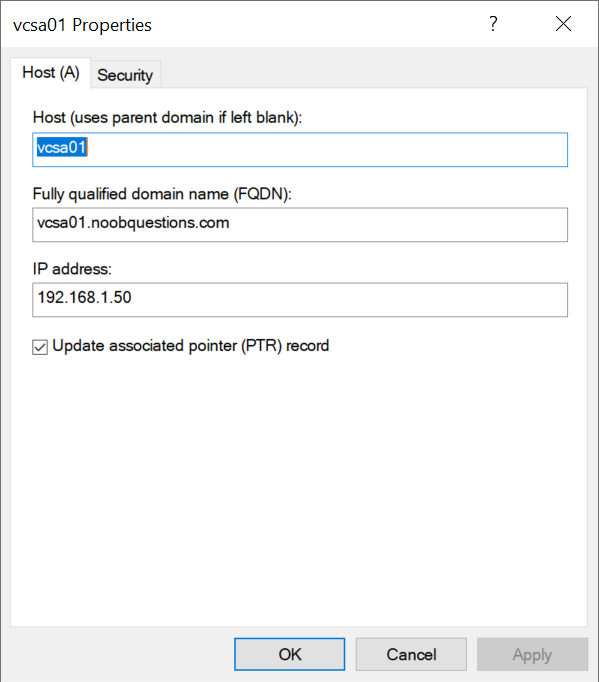
Step 2: Create Forward and Reverse Domain Name System (DNS) Records for the vCenter Server Appliance (VCSA)
As mentioned in VMware documentation, forward and reverse DNS records are pre-requisites for installing vCenter. In this tutorial, DNS records (vc01) are created using Windows DNS Manager.
Step 3: Mount vCenter ISO and Launch UI Installer
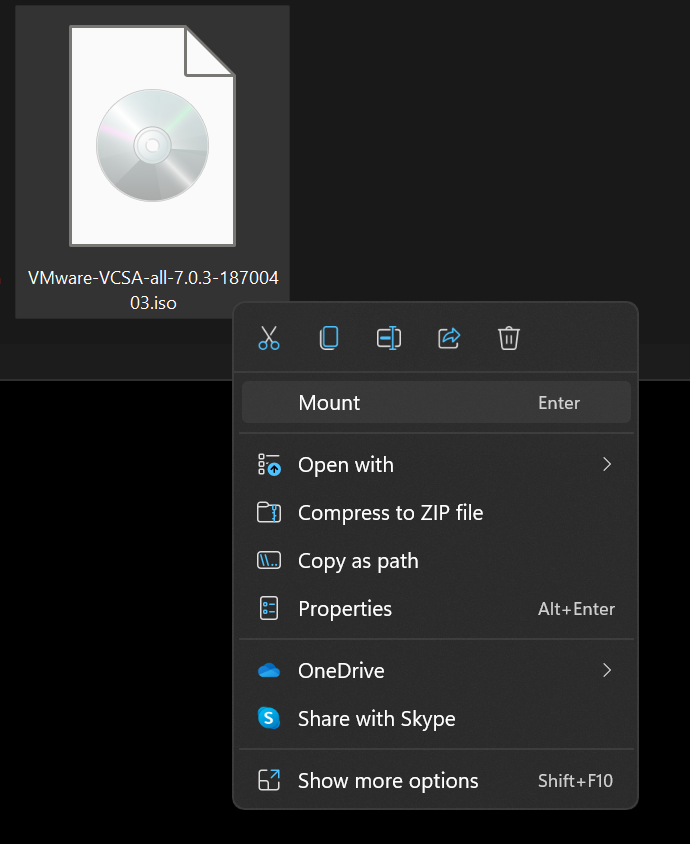
After that, mount vCenter (VCSA) ISO downloaded from VMware website on a jump host reachable to an ESXi host and launch the UI installer.
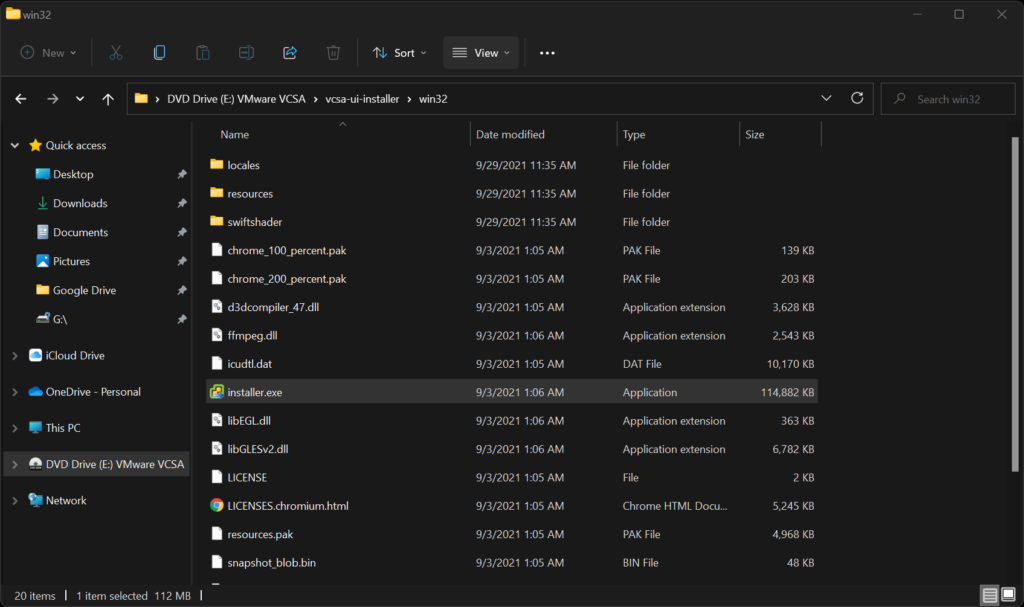
For deploying vCenter image to an ESXi host using a Windows client, you can find an executable file titled “installer.exe” located under /vcsa-ui-installer/win32.
A UI installer wizard will be displayed after opening installer.exe
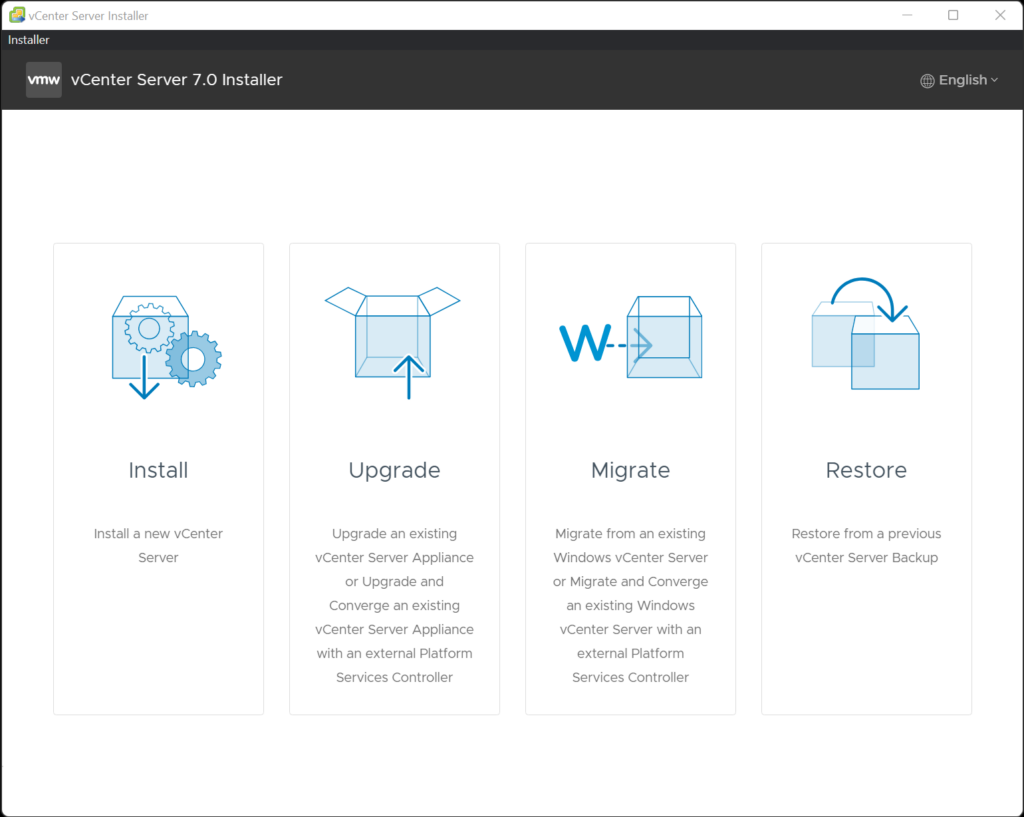
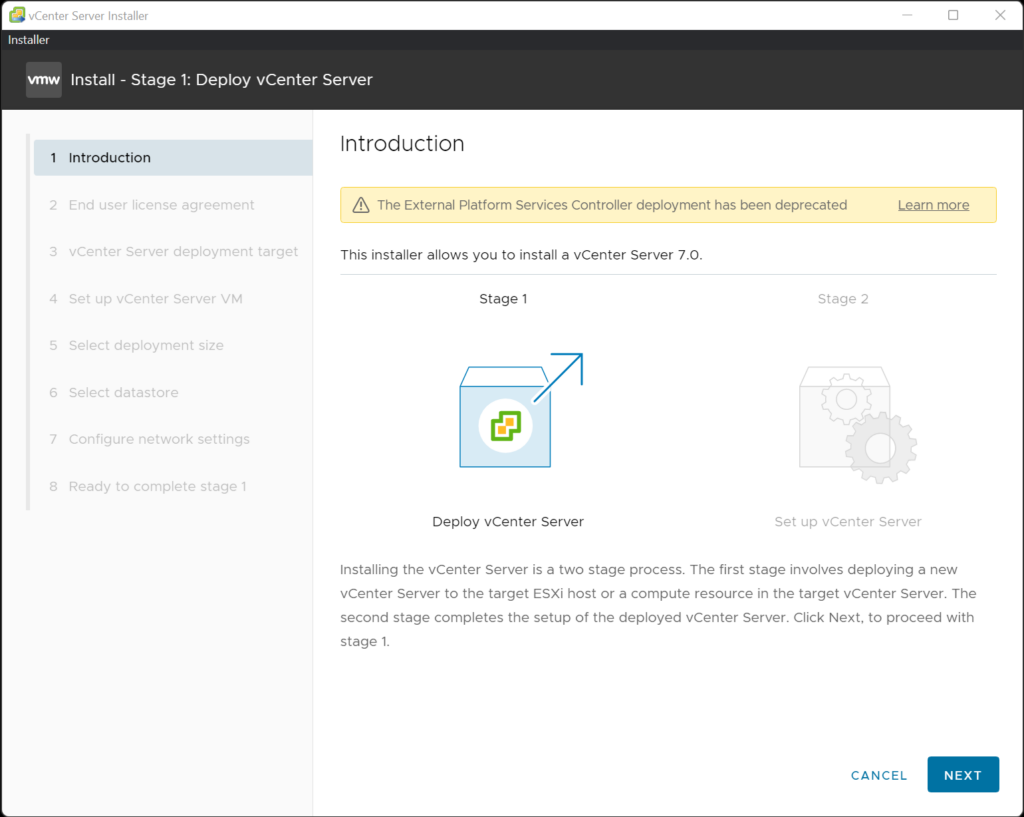
Step 4: Proceed with Stage 1 Installation
After choosing “install” on the UI installer, stage 1 of the installation process will begin.
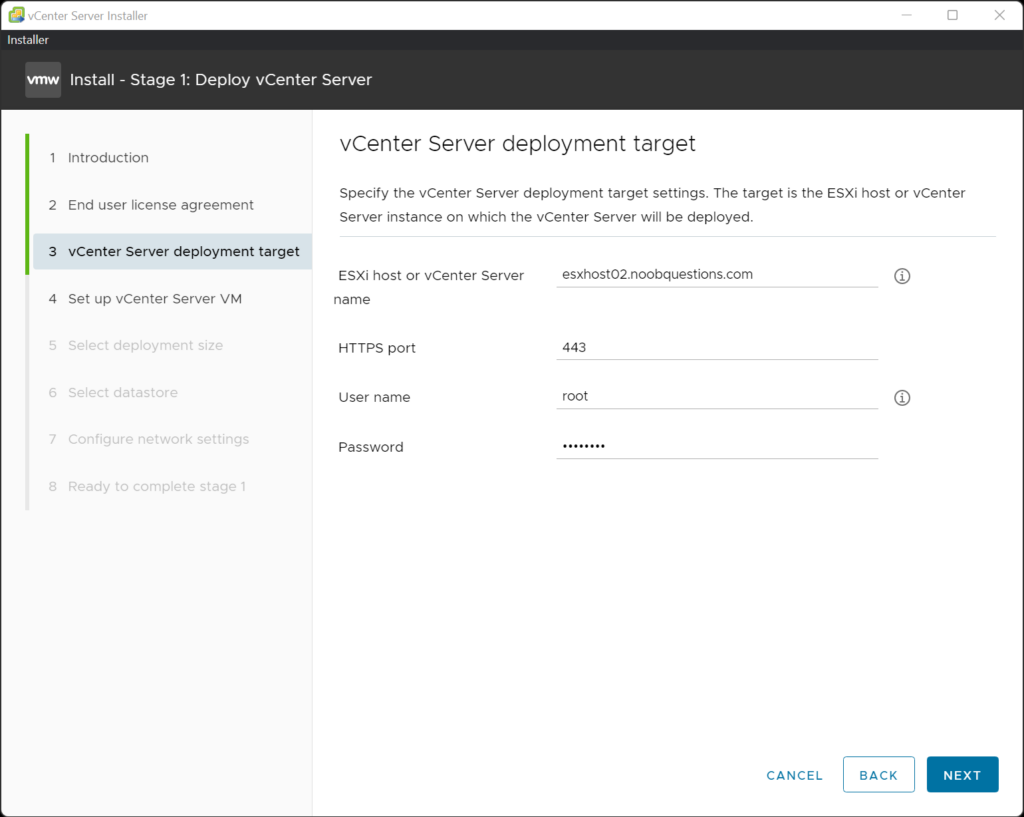
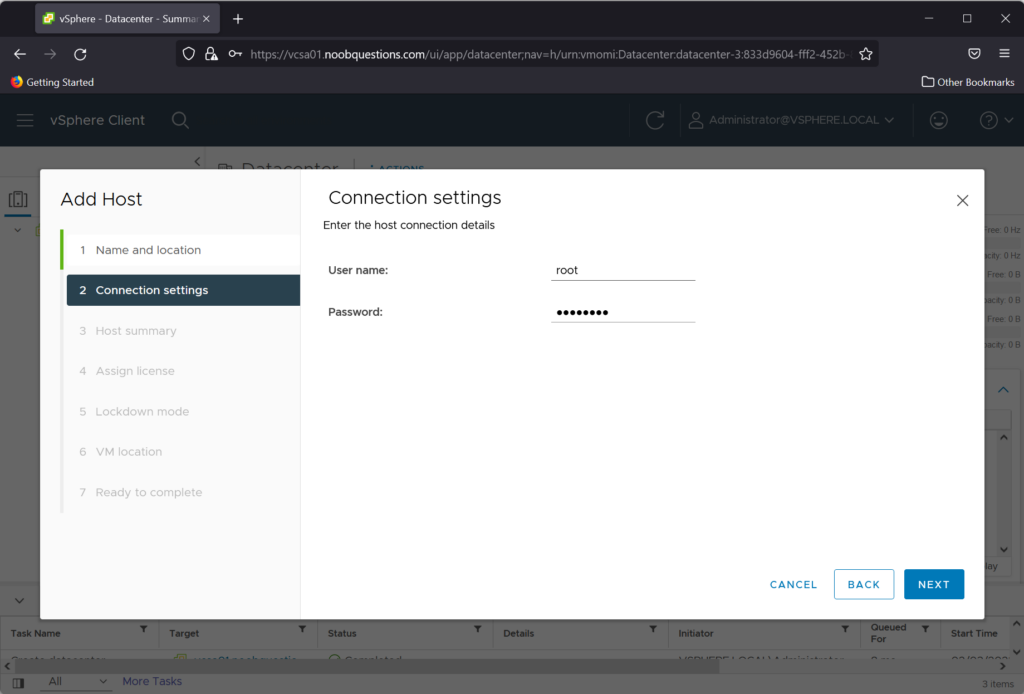
First and foremost, select a vCenter Server deployment target by specifying the hostname or IP of the ESXi host and providing the login credential. The installer will then attempt to connect to the ESXi host to deploy vCenter image.
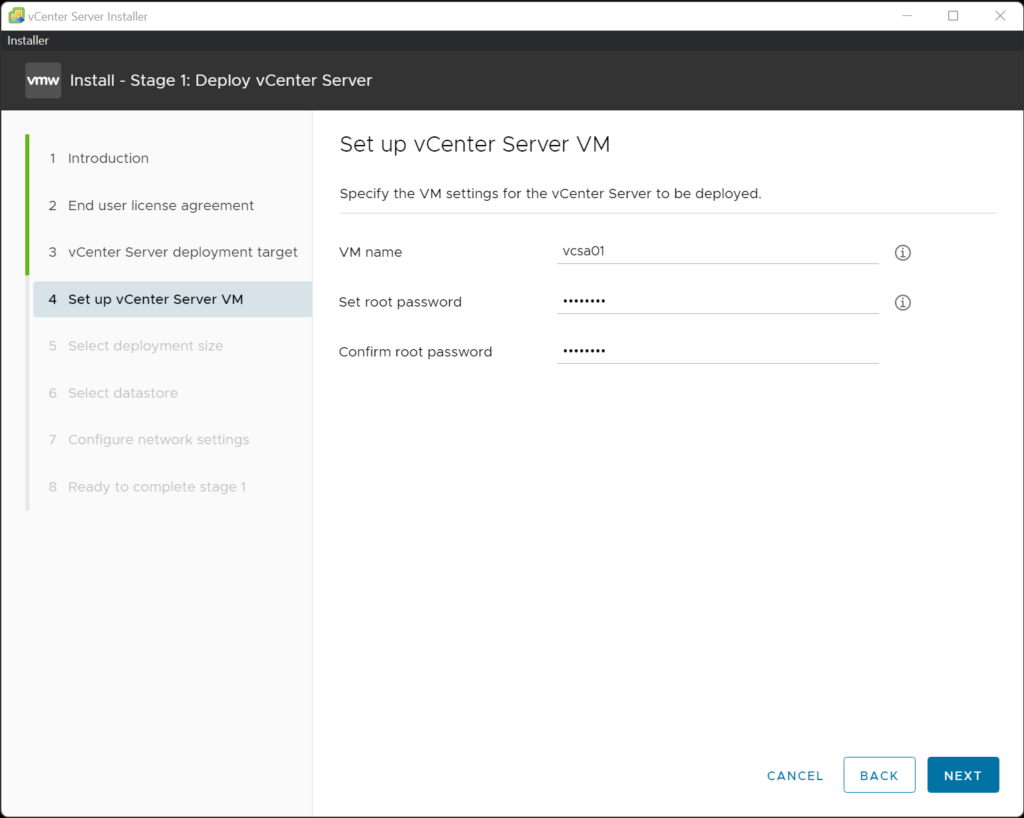
You can specify the root password for the vCenter Server Appliance on the UI installer. You can use this root password to login to vCenter Server Appliance Management interface on port 5480 later. Note that this root password by default will expire after 90 days.
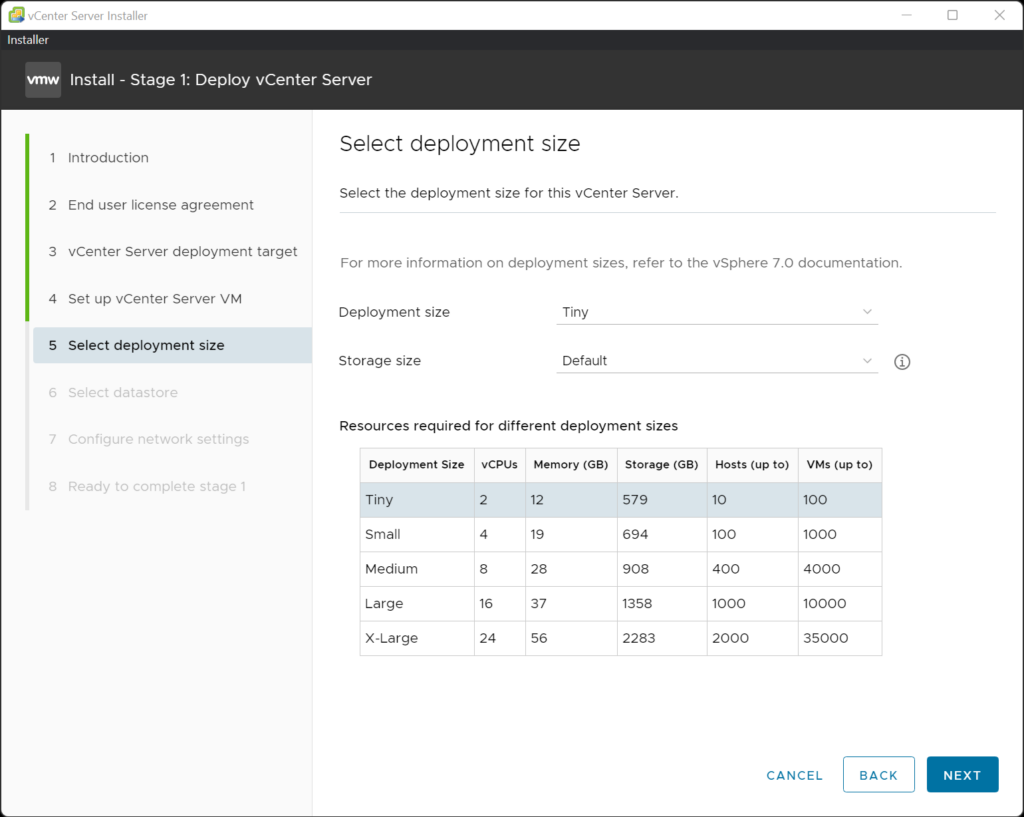
You also need to select a deployment size for vCenter Server. As shown on the screen capture, deployment size affects the number of hosts and VMs supported. As a proof of concept, this tutorial uses the “tiny” deployment size. However, tiny deployment size is not supported in a Production environment. Accordingly, please reserve enough hardware capacity when deploying vCenter Server as it requires a minimum of 4 vCPUs, 19 GB memory and 694 GB of storage space to deploy a small VCSA.
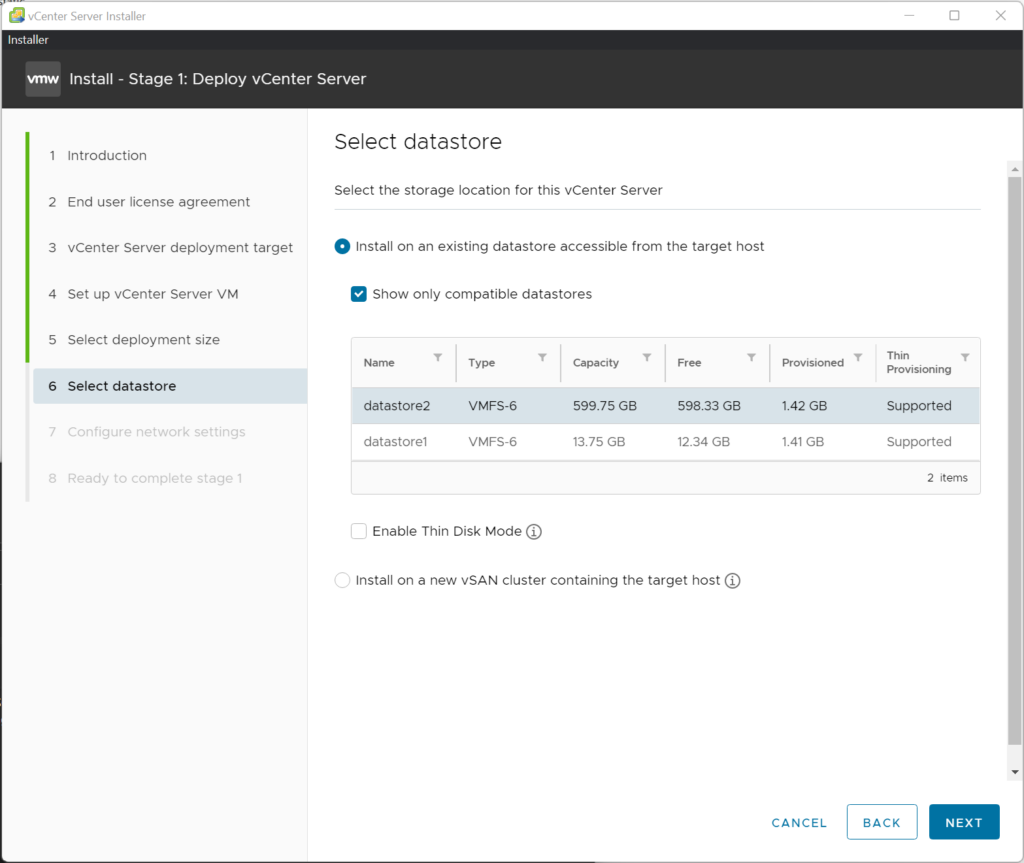
Upon selecting the vCenter deployment size, you need to select a datastore which hosts the appliance. In this example, a 600GB datastore is created to host the appliance as it meets the minimum storage space requirement for the “tiny” deployment size.
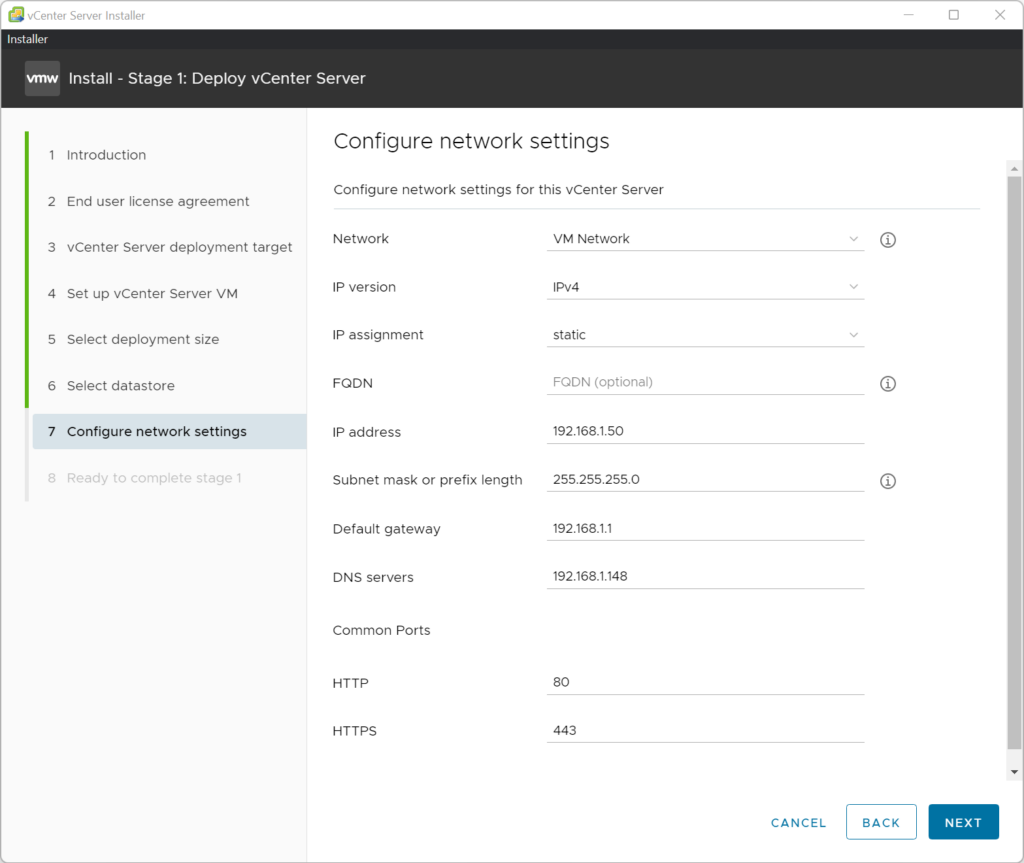
After selecting the datastore, you must specify the network settings for vCenter Server.
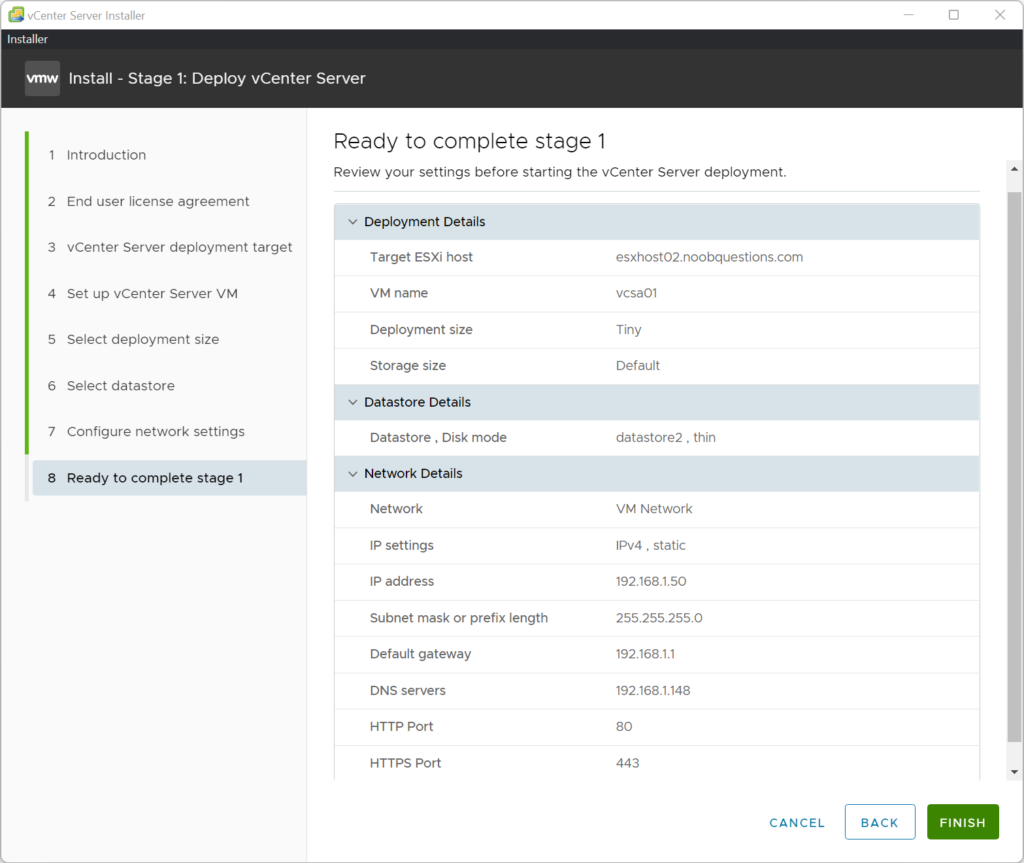
Confirm all the settings before deployment.
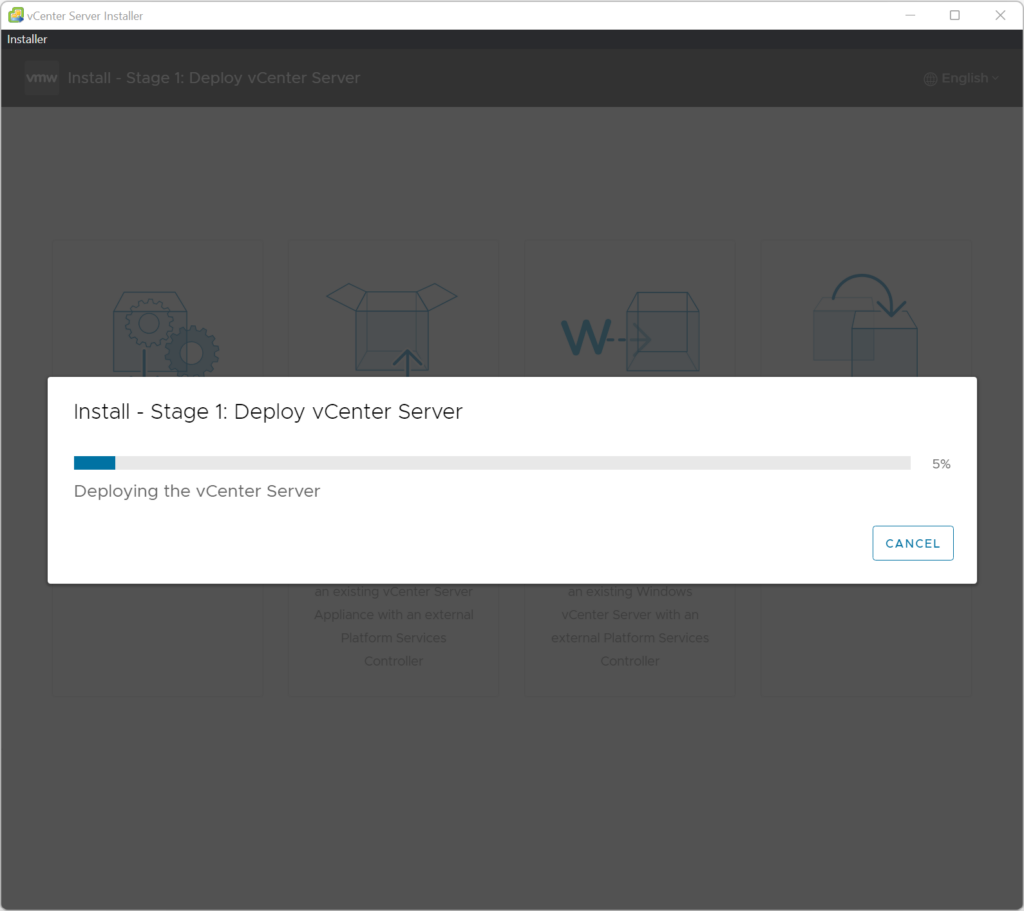
The installer will perform checking after you have confirmed all the details.

If there is no issue found during the pre-check, the installer will proceed to deploy the appliance to the ESXi host.
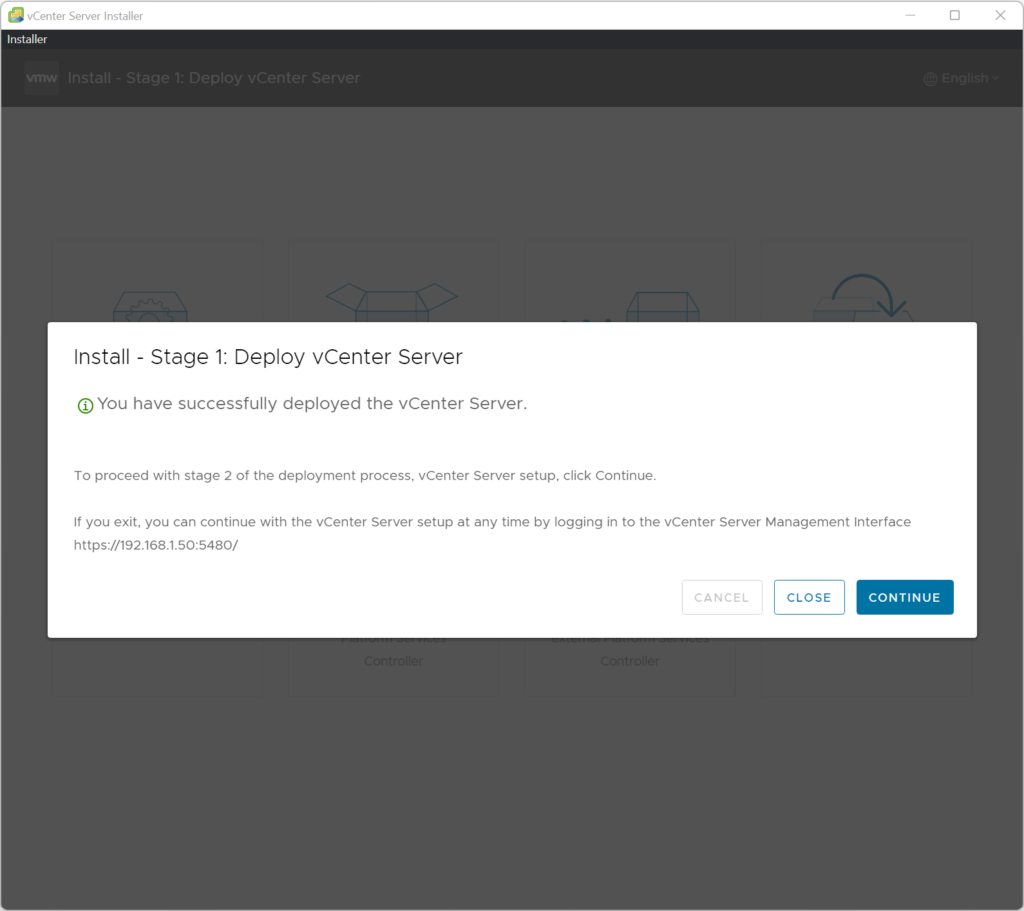
After successfully deploying the vCenter Server on the ESXi host, it will prompt you to proceed with stage 2 of the deployment process.
If you sign in to the ESXi host client, you can find a VM with the hostname specified in the installer appears.

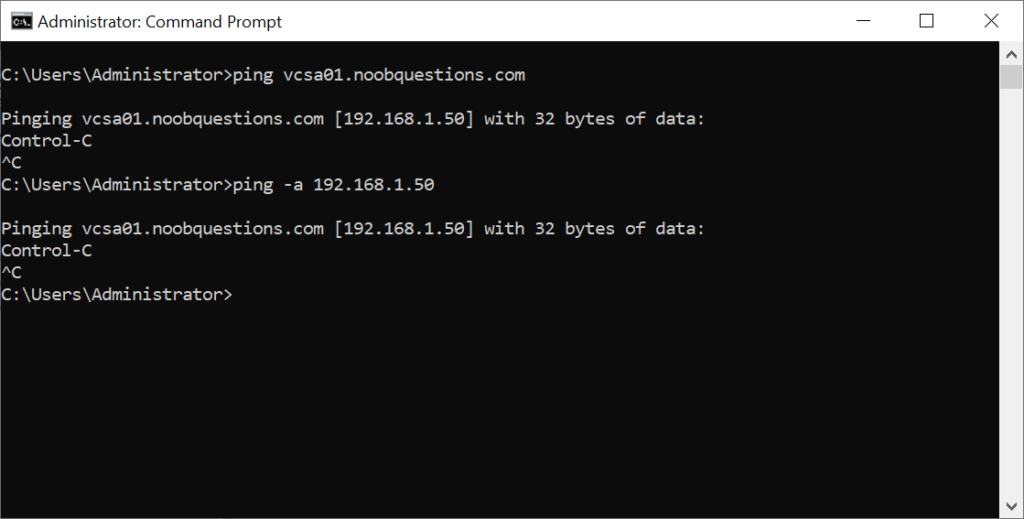
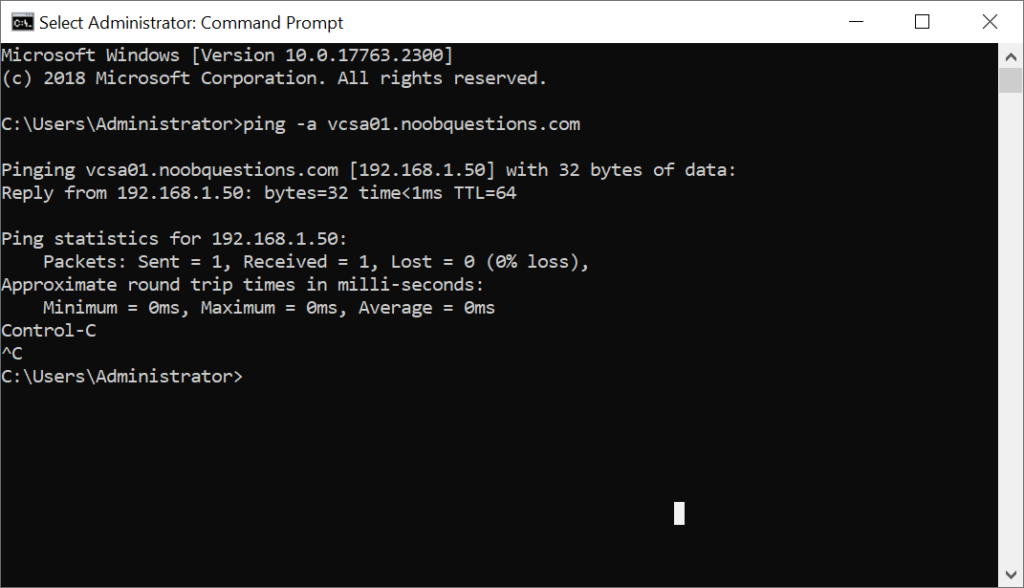
You can also perform ping test to see if the newly deployed appliance is responding.
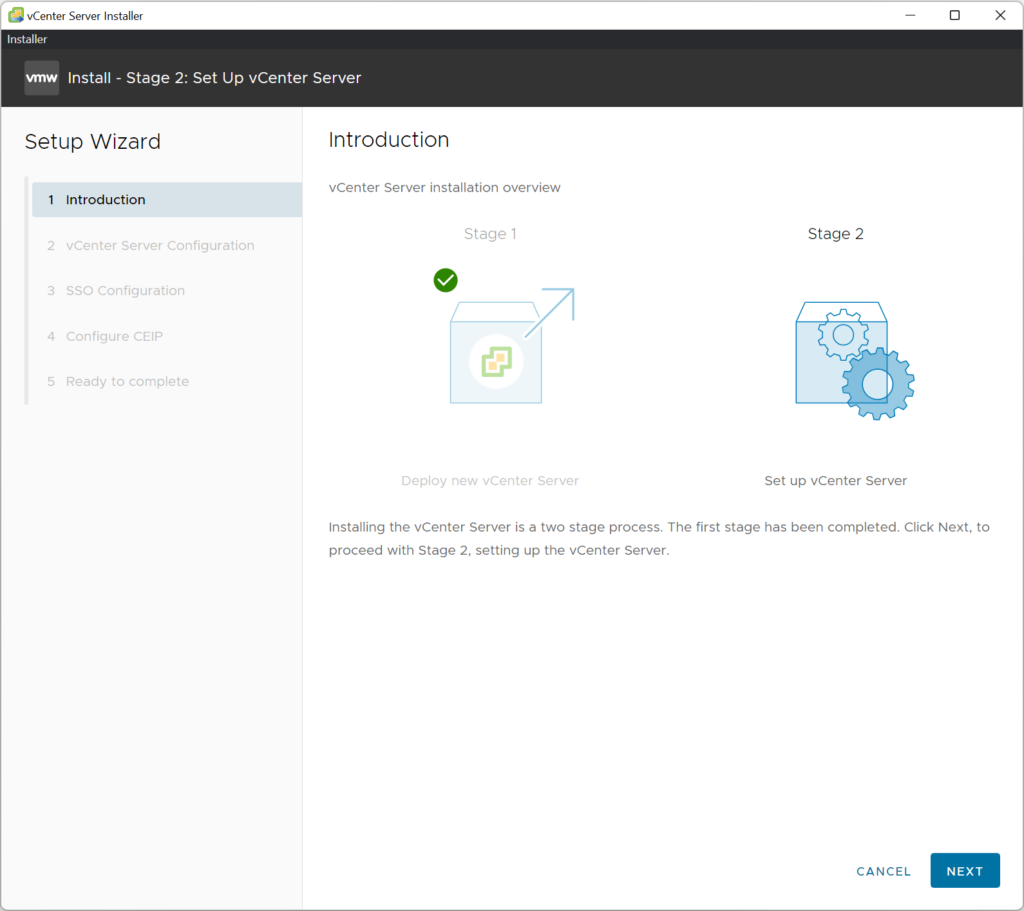
Step 5: Proceed with Stage 2 Configuration
After completing the Stage 1 deployment process, you need to proceed with stage 2 configuration process. The installer will connect to the appliance and help you configure settings like NTP server and single-sign-on (SSO).
You can let vCenter to NTP servers to conduct time-sync or make it sync time with the ESXi host. You can also optionally enable its SSH access. Note that the setting can be changed later by visiting the vCenter Appliance Management Interface (Port 5480).

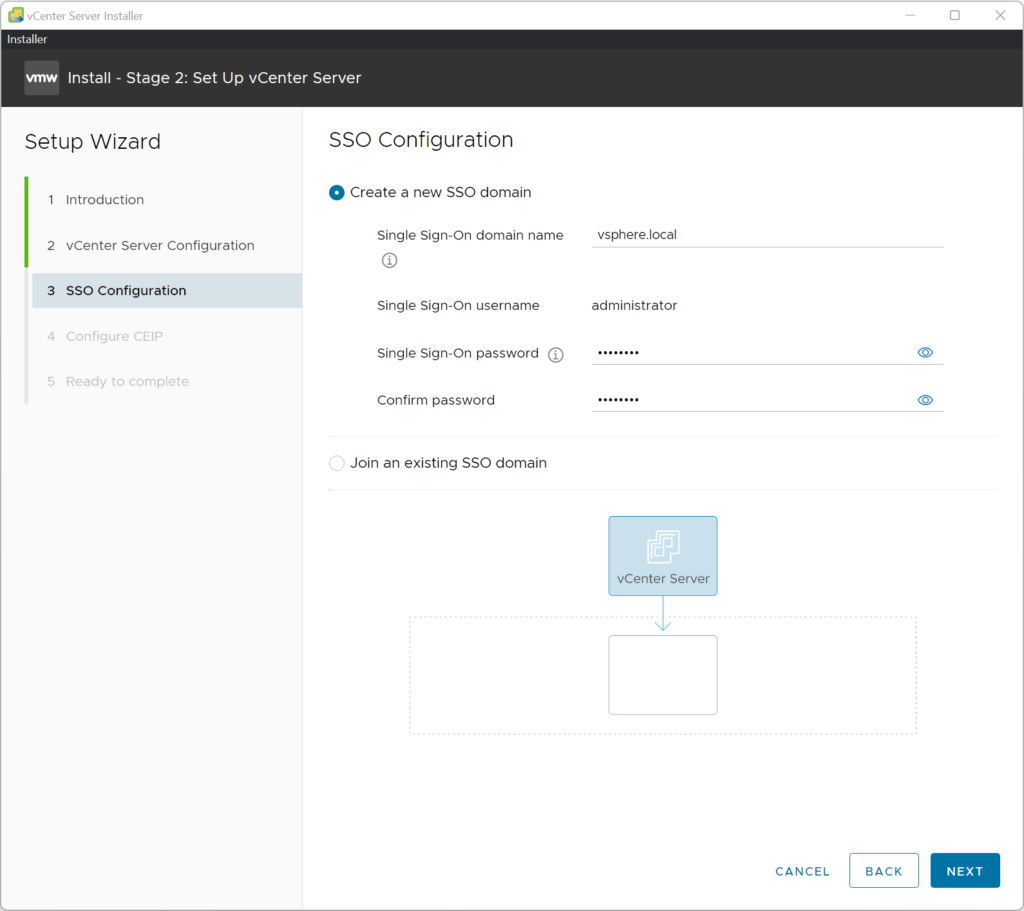
You need to specify whether the vCenter Appliance will create a new SSO domain or join an existing one. Since our existing testing environment does not have another appliance, we will create a new SSO domain for login.
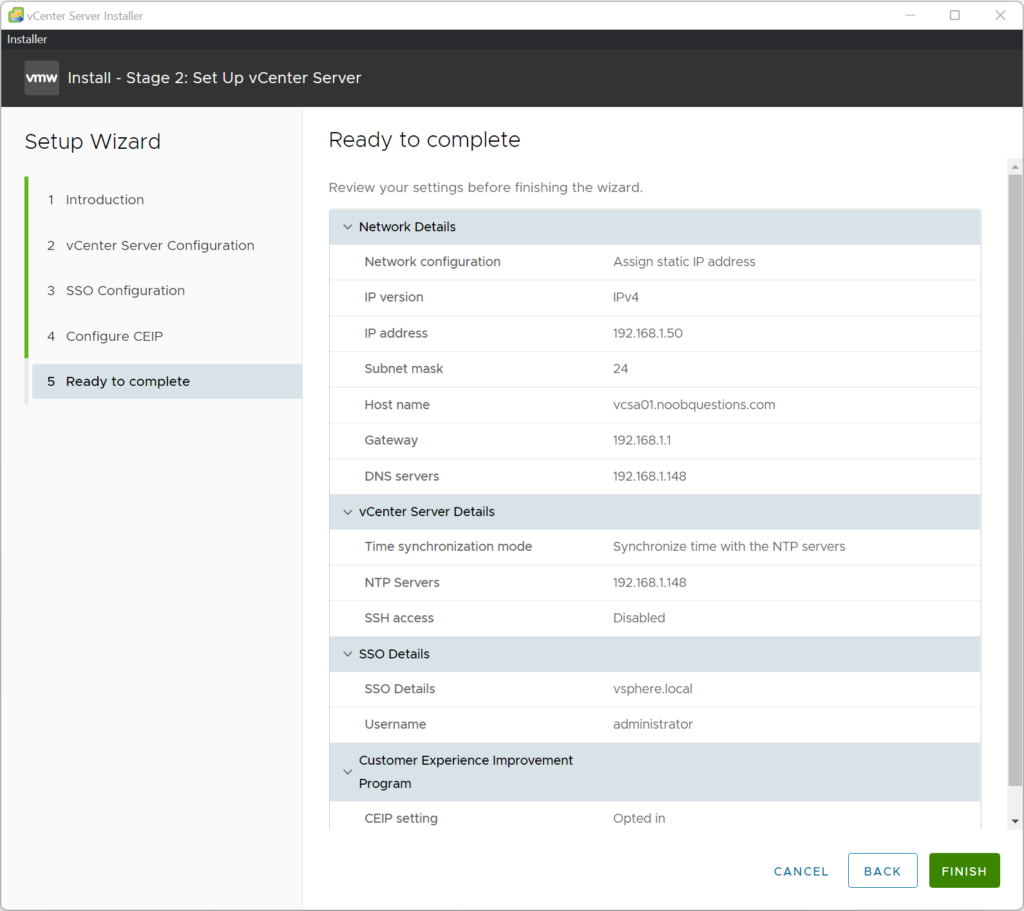
Confirm the settings to proceed with stage 2 configuration.
The installer will configure vCenter as per the input.
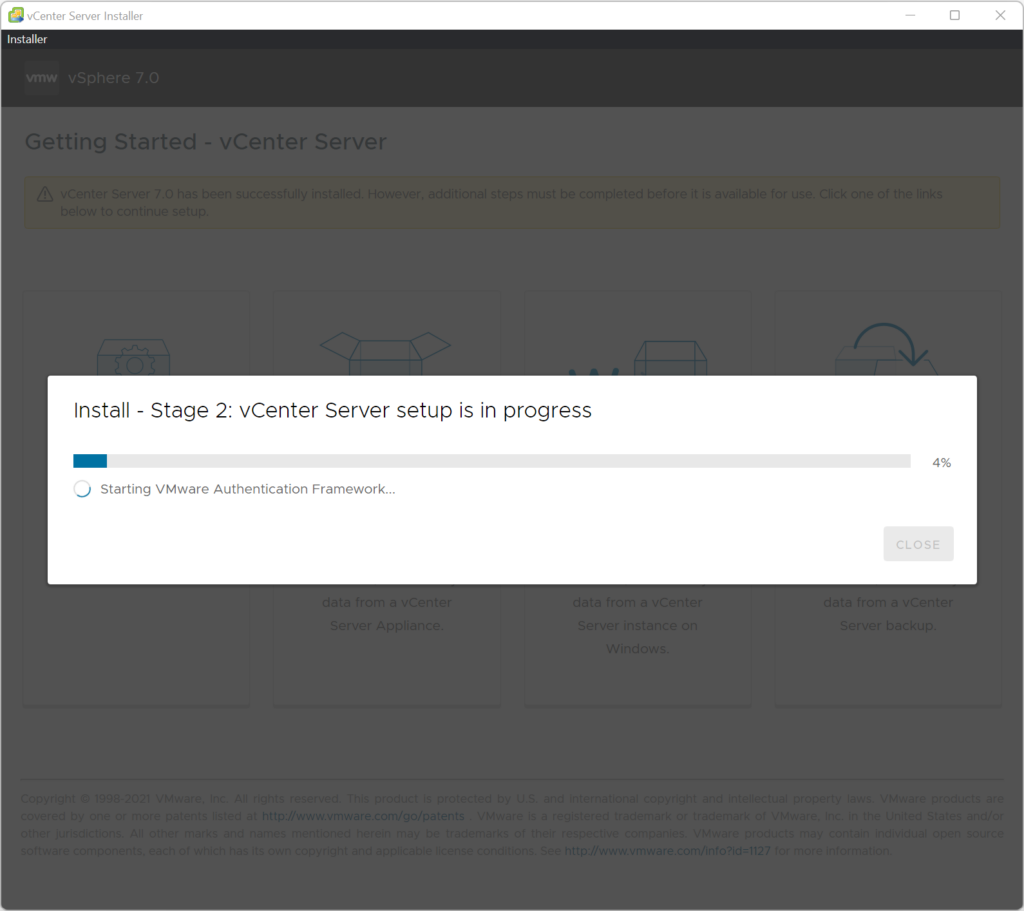
After successfully configuring the vCenter settings, the installer will start vCenter services.
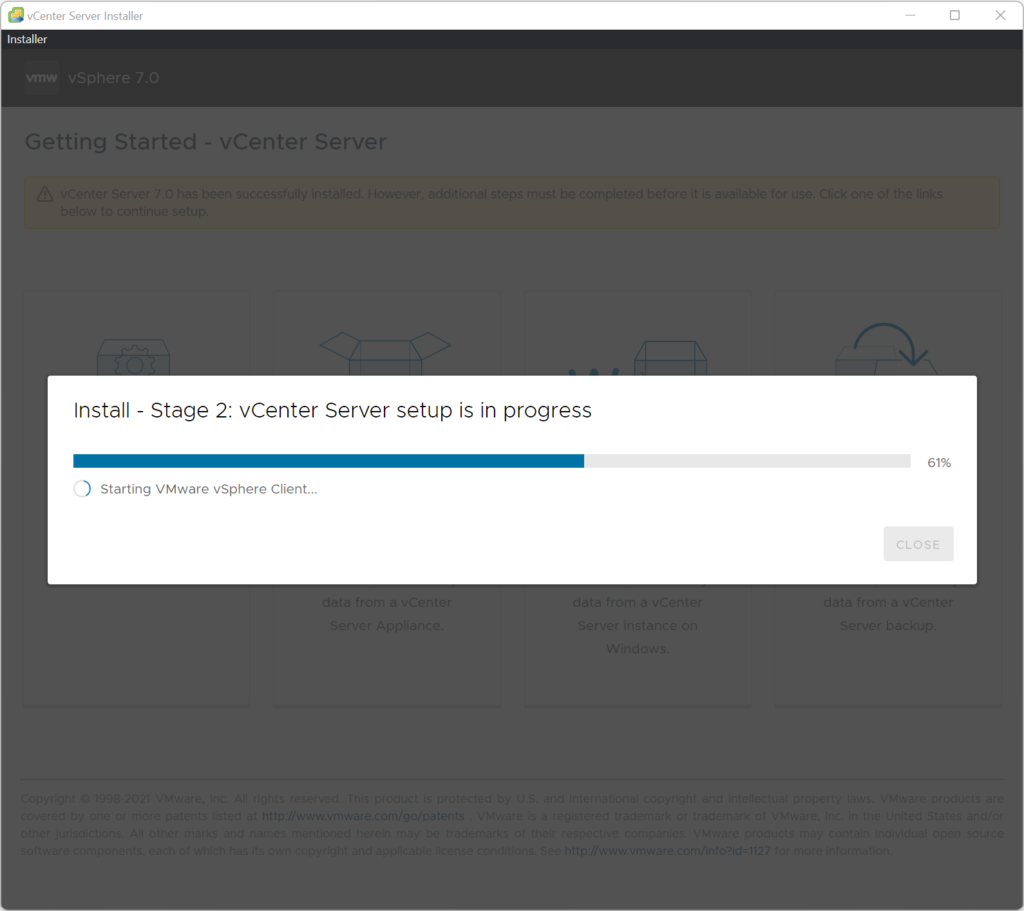
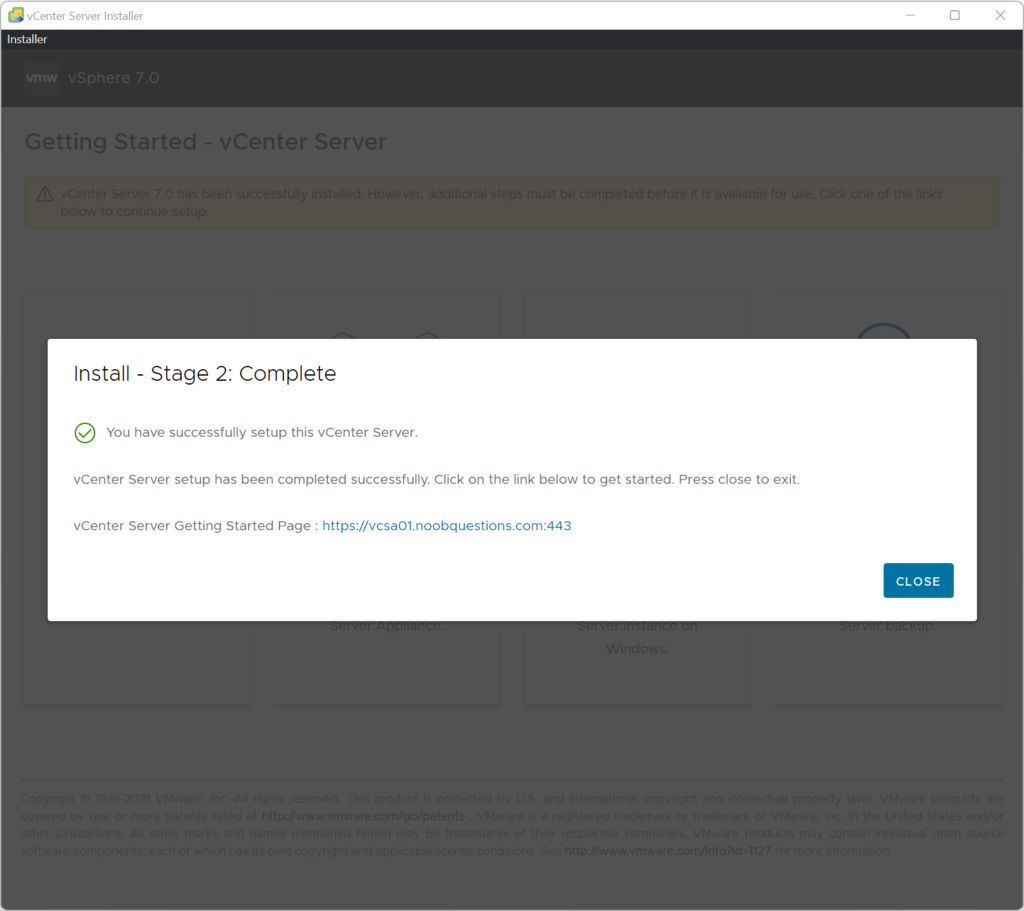
Finally, stage 2 will be completed after vCenter services are started.
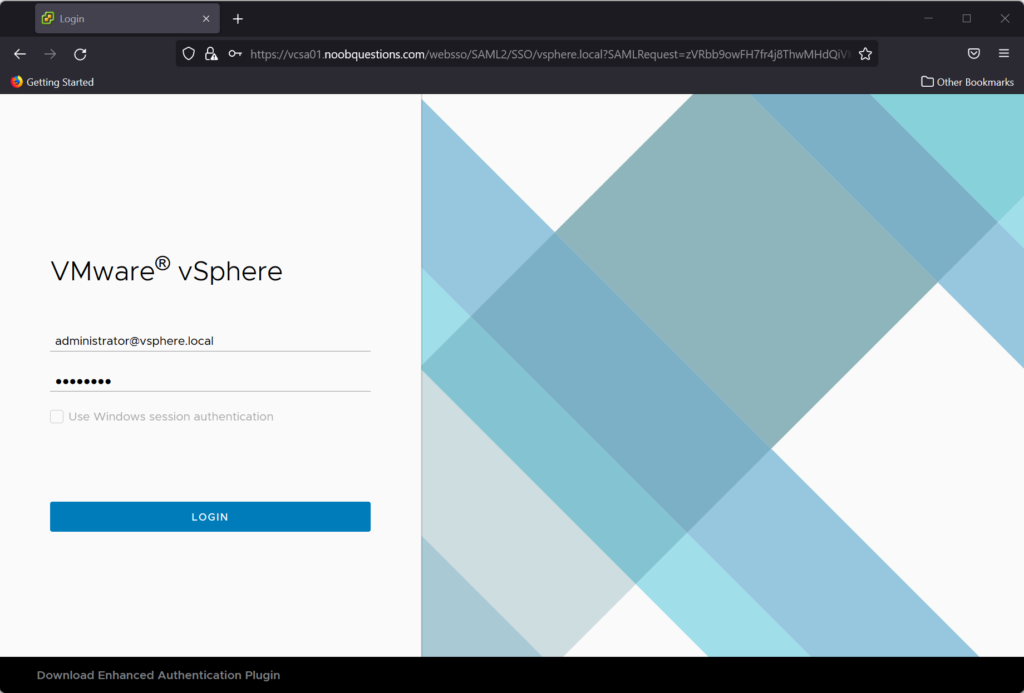
Stage 6: Login vCenter Web Console
After the appliance has been successfully deployed and configured, you can then log in to the vCenter web console.
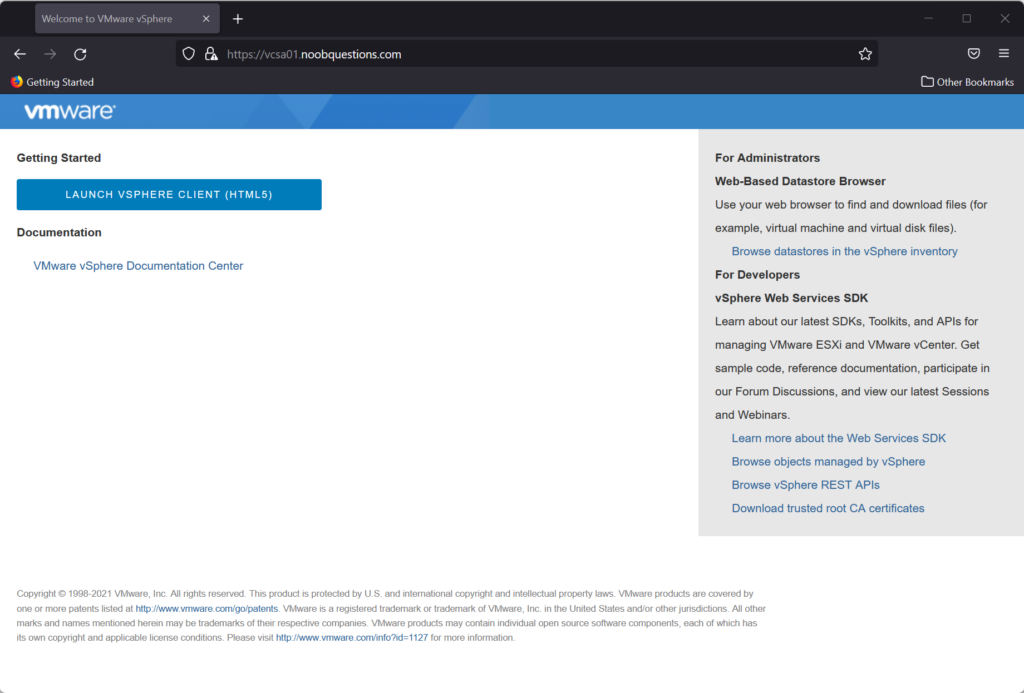
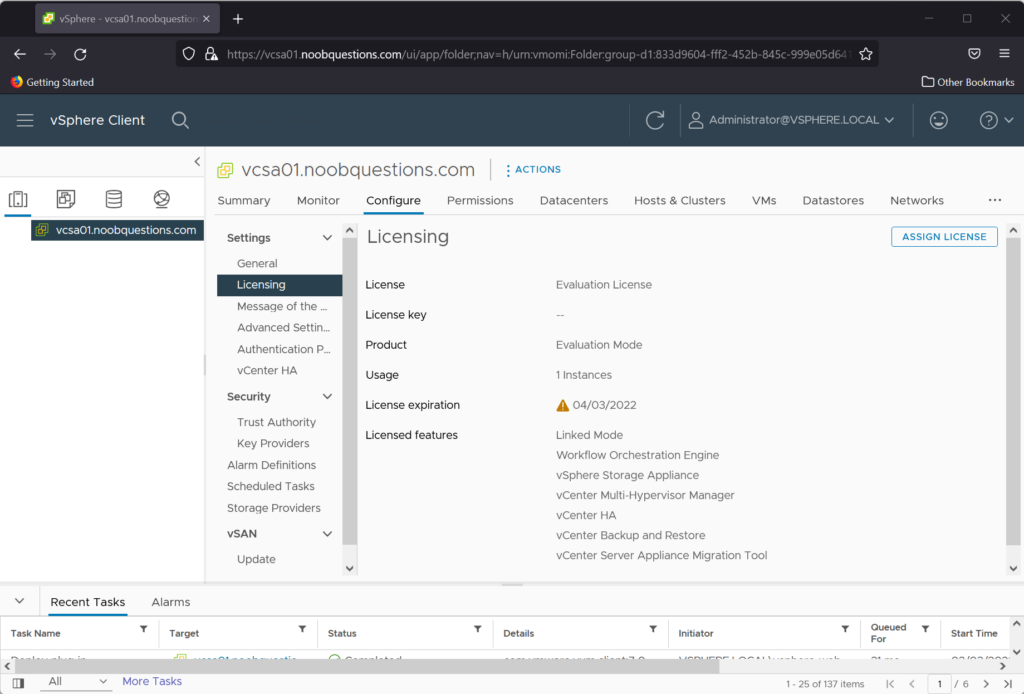
VMware offers 60 days evaluation license for you to try vCenter
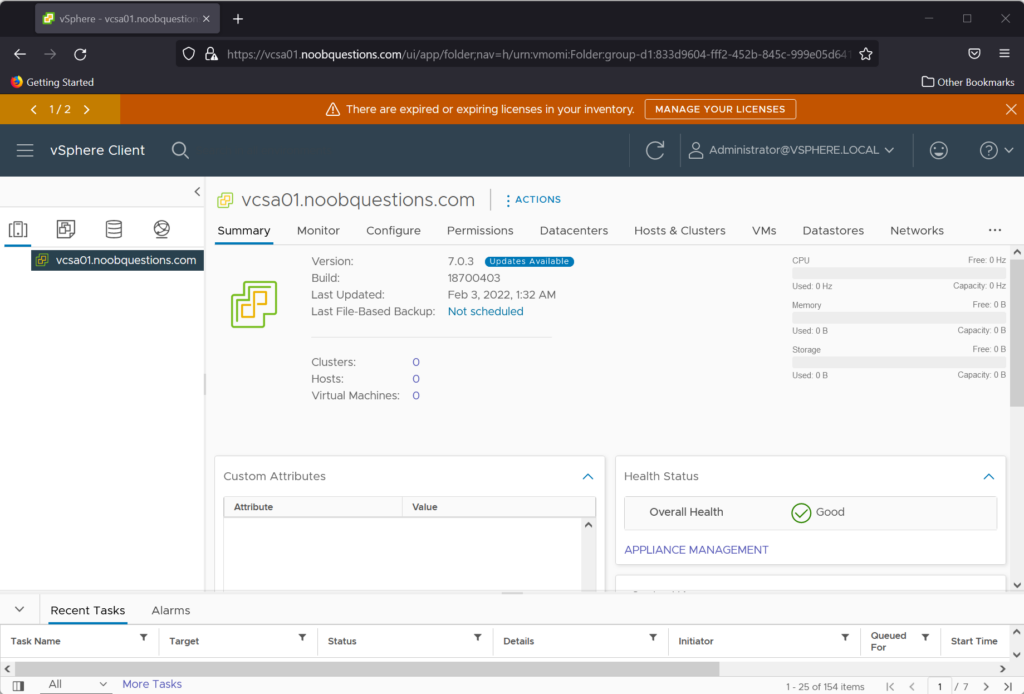
Stage 7: Add ESXi Hosts and Manage them via vCenter
vCenter Server is now ready to manage ESXi hosts.
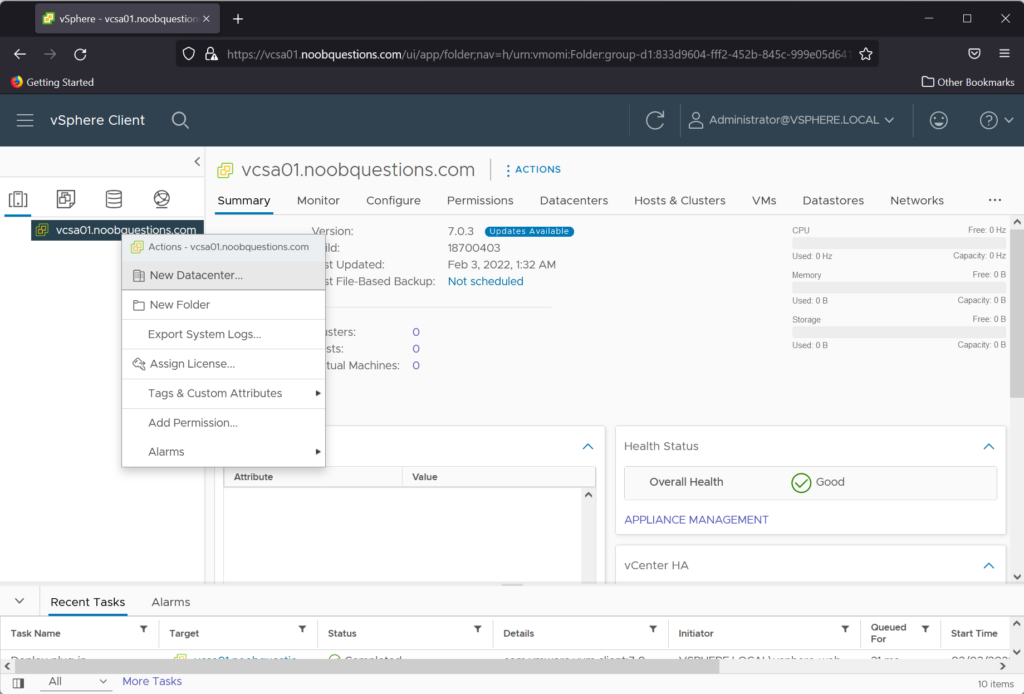
To begin with, create a new object – data center under the vCenter object.
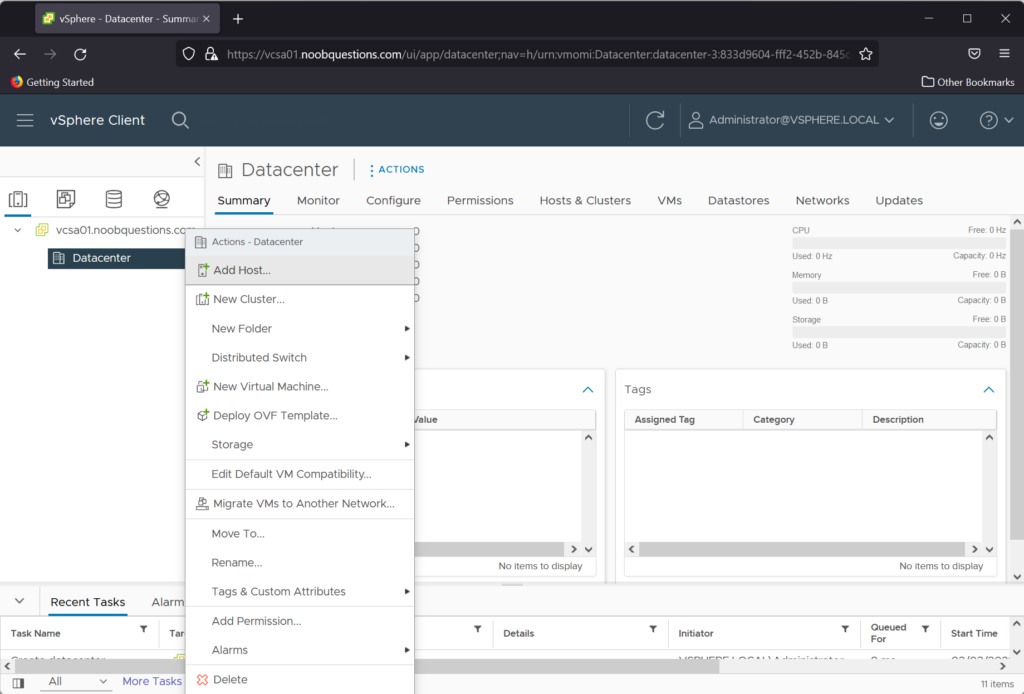
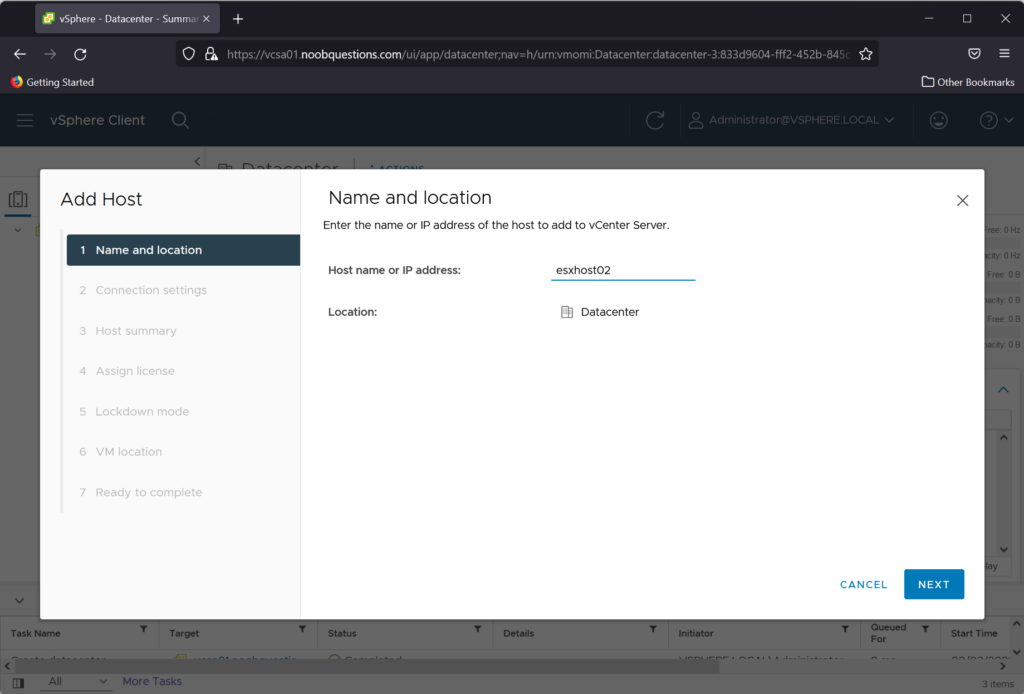
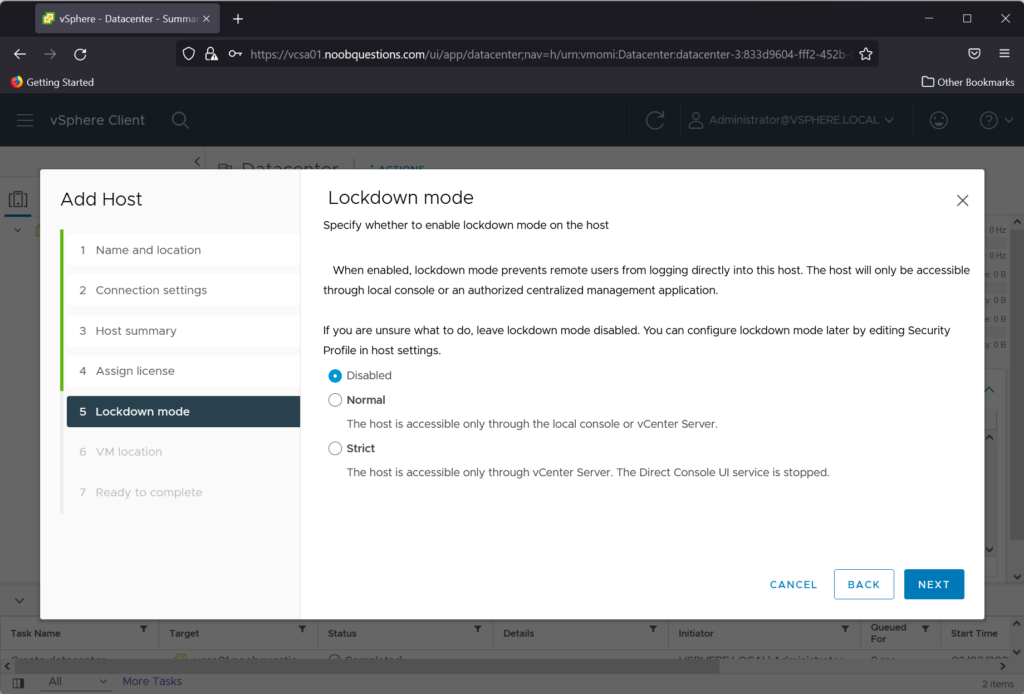
You have the option to enable lockdown mode for the ESXi host when adding a host to vCenter.
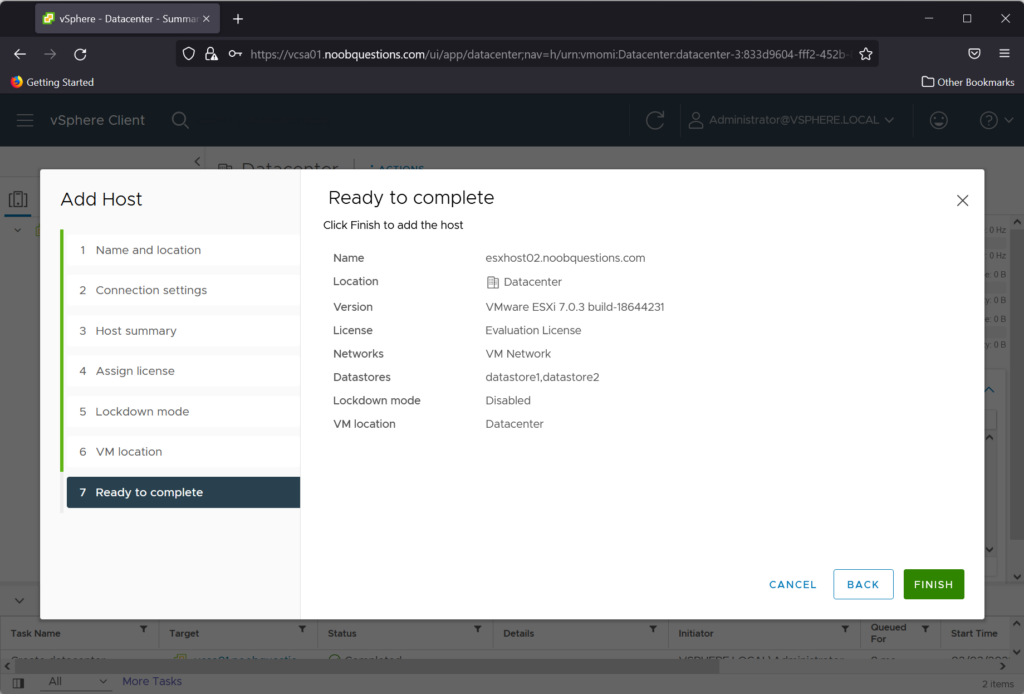
After successfully adding the host, the host and VM information will be displayed accordingly.
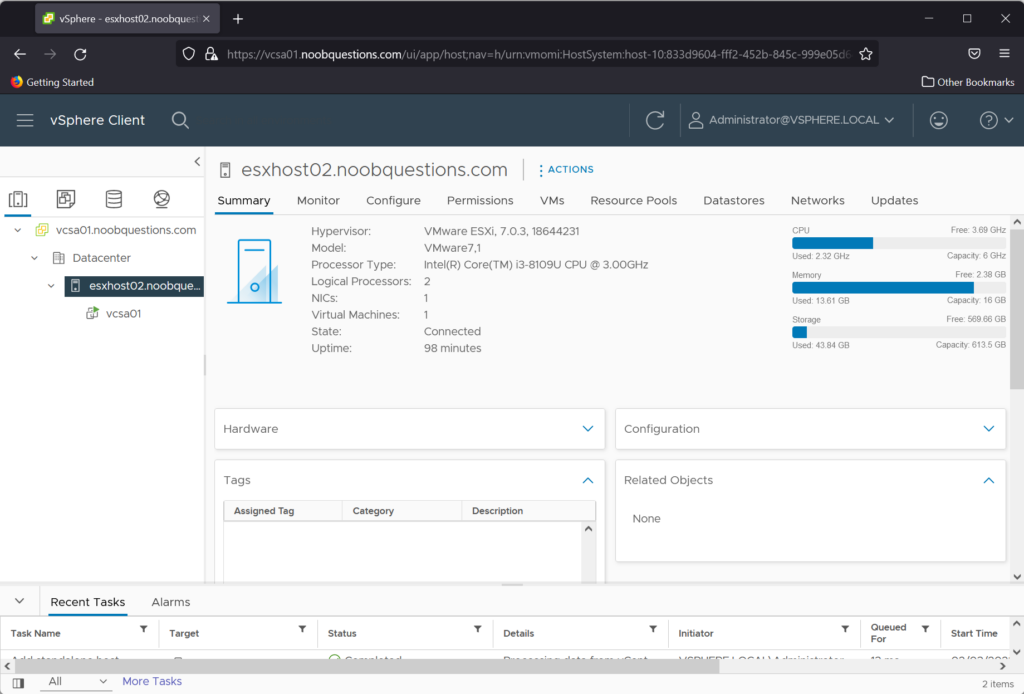
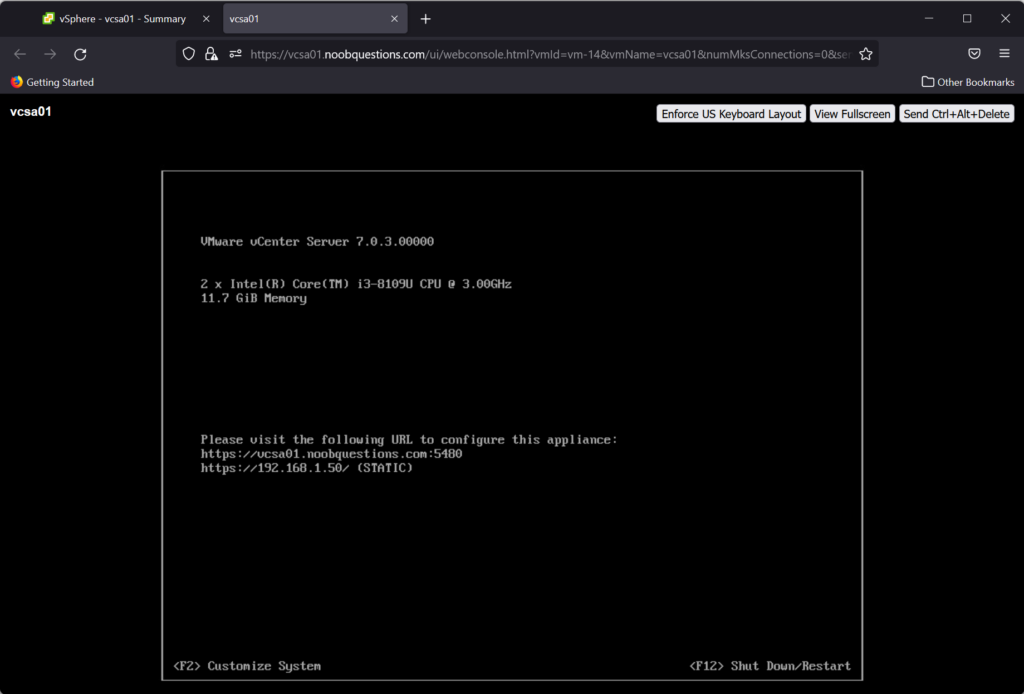
You can then see that a VCSA VM (vcsa01) is residing on the ESXi host which you specified in the vCenter UI installer. Open a remote console window on vCenter to view the information of the VM.
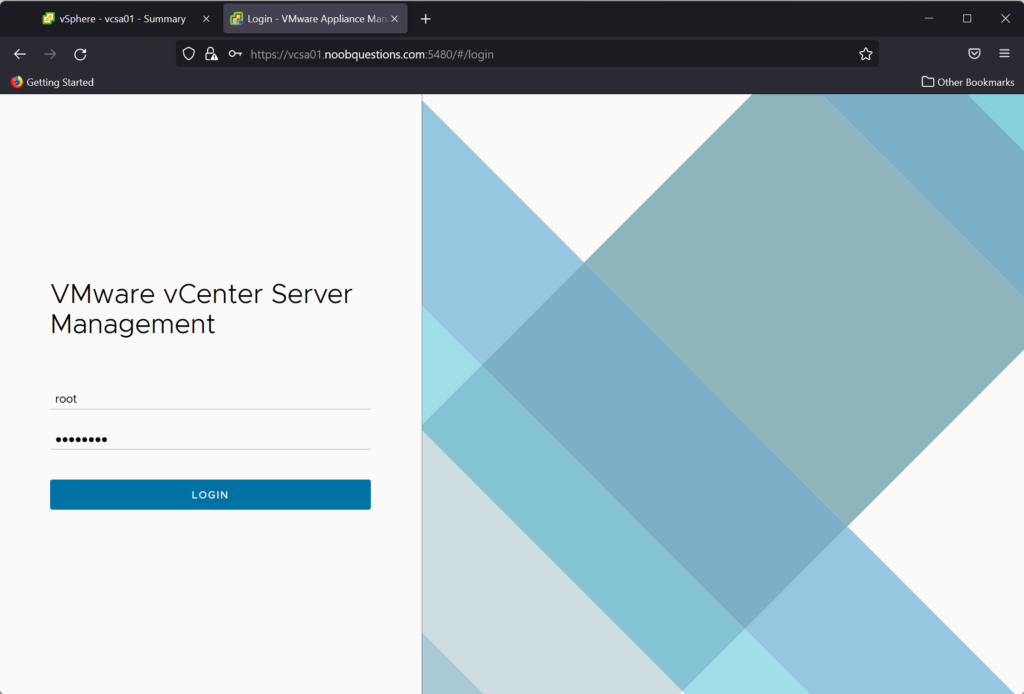
Stage 8: Login vCenter Sever Management Interface
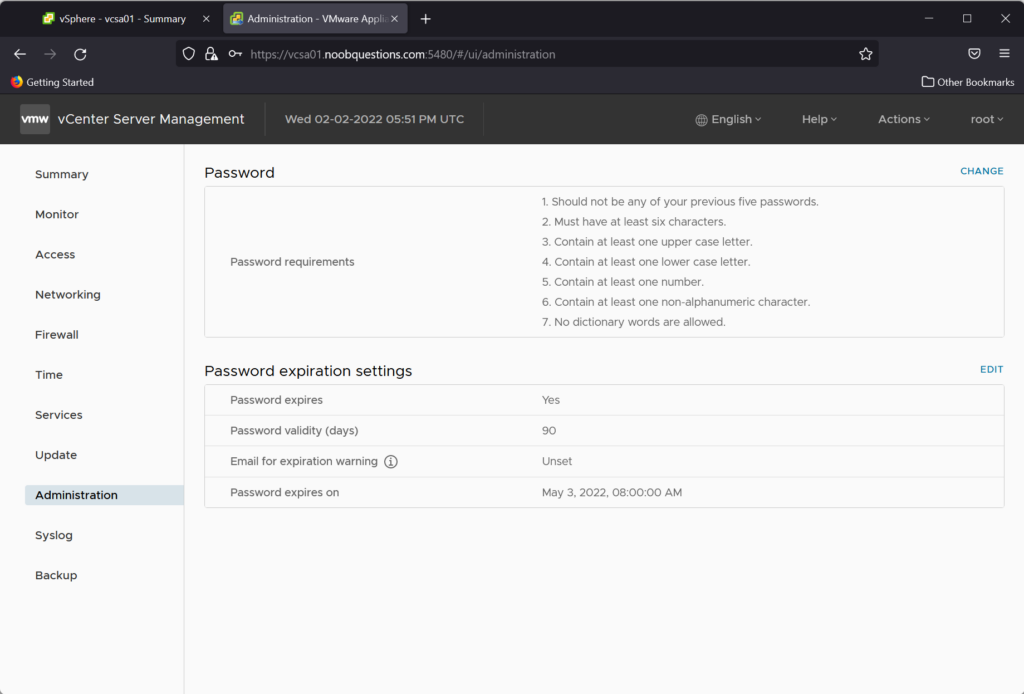
For managing vCenter Server configuration such as the NTP server and root password, as well as checking the health status of vCenter services, you can login to vCenter Server Appliance Management Interface on port 5480.
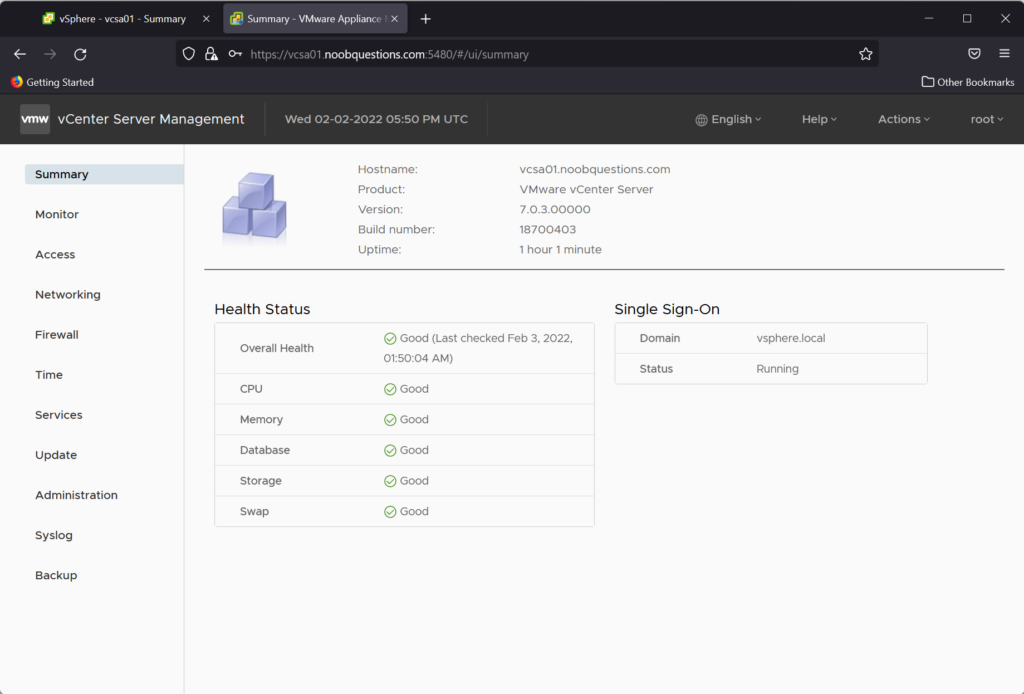
You can view the hostname, build number, and overall health status of the vCenter Server appliance on the main page after login.
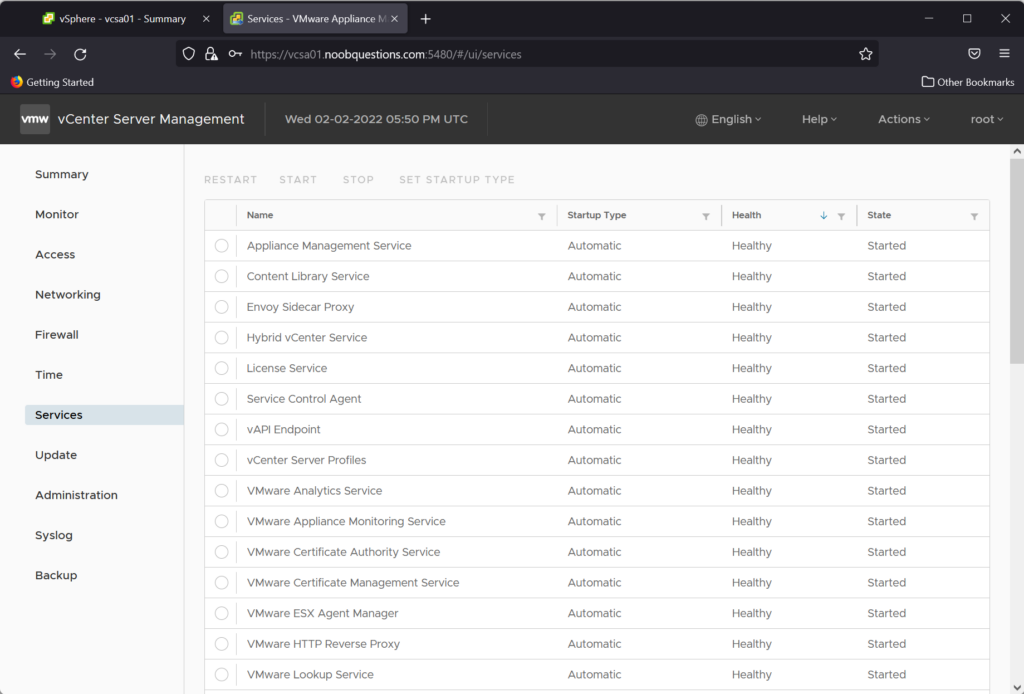
For the health status of all running services, navigate to the “Services” tab.
You can also see that the password validity for the root password is set to 90 days by default. You can edit the password policy and change the root password on the management interface. Note that the root password for the VCSA is different from the SSO password for the vSphere Client. For changing the SSO password of the vSphere Client, you should do so on the vSphere Client itself (not the management interface on 5480 port).
Conclusion
This tutorial explored the steps to install and configure the vCenter Server. vCenter provides management capabilities for system administrators to manage multiple ESXi hosts. It is a virtual machine and runs on Photon OS – a Linux container host. In fact, vCenter could be installed on Windows Server and run as a service years ago. However, the deployment model has been phased out. The installation and configuration of the vCenter Server can be mostly done via the UI Installer. The most important areas are to ensure that the hardware and network requirements can be satisfied. Make sure to visit VMware official knowledge base for best practices prior to installing vCenter.