VMware ESXi Management Network provides traffic between an ESXi host and clients. After installing an ESXi hypervisor on a server, an ESXi management IP is obtained via Dynamic Host Configuration Protocol (DHCP). You may want to configure a static management IP and configure the hostname for the ESXi host. Follow the guide below to configure ESXi Management Network so that you can enter the ESXi host client via a domain name, rather than a random IP address.
Step 1: Create Forward and Reverse Domain Name System (DNS) Records for the ESXi Host
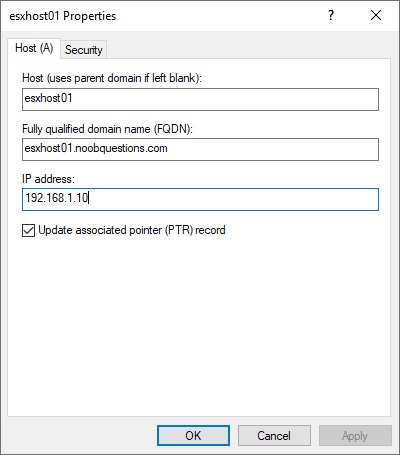
To bind the hostname and the static IP for an ESXi host, you should first assign a forward and reverse DNS record on a DNS server. As an example, the following record is created on Windows DNS Manager, with the suffix – “noobquestions.com”. The fully qualified domain name (FQDN) for the ESXi host is “esxhost01.noobquestions.com”. An IP address – “192.168.1.10” is reserved for the ESXi host.
Step 2: Enter Configuration Page on the ESXi Direct Console User Interface (DCUI)
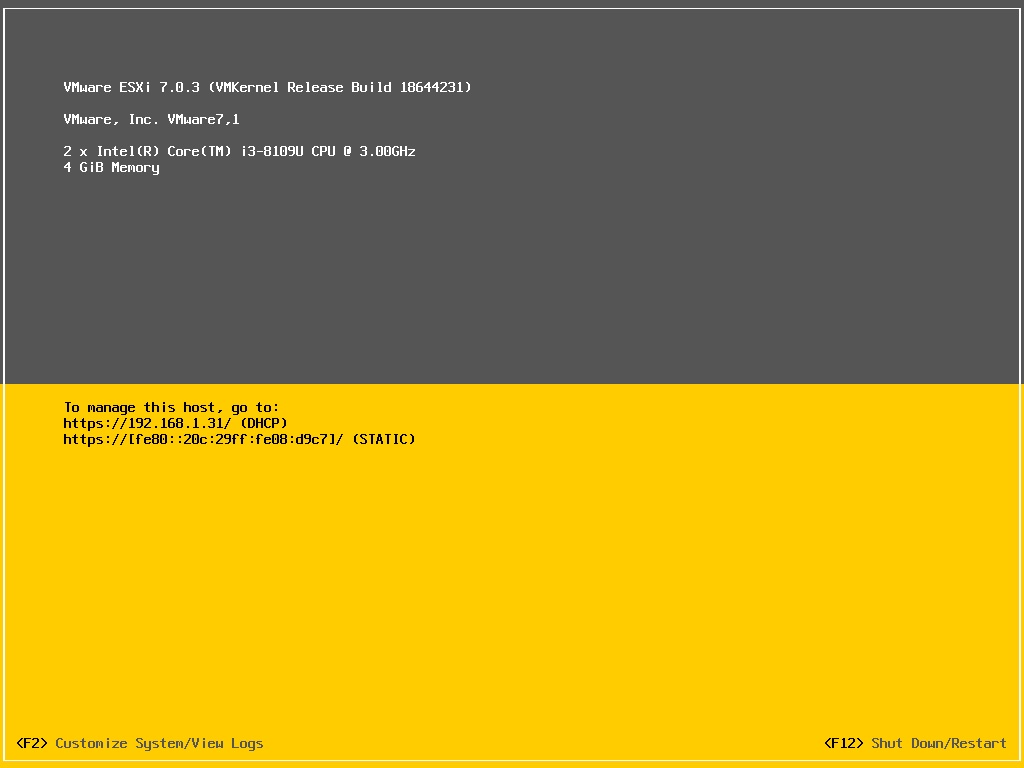
By default, ESXi obtains a management IP via DHCP when it boots up. Note that (DHCP) is displayed next to the management IP (192.168.1.31). Press “F2” to enter the system configuration page.
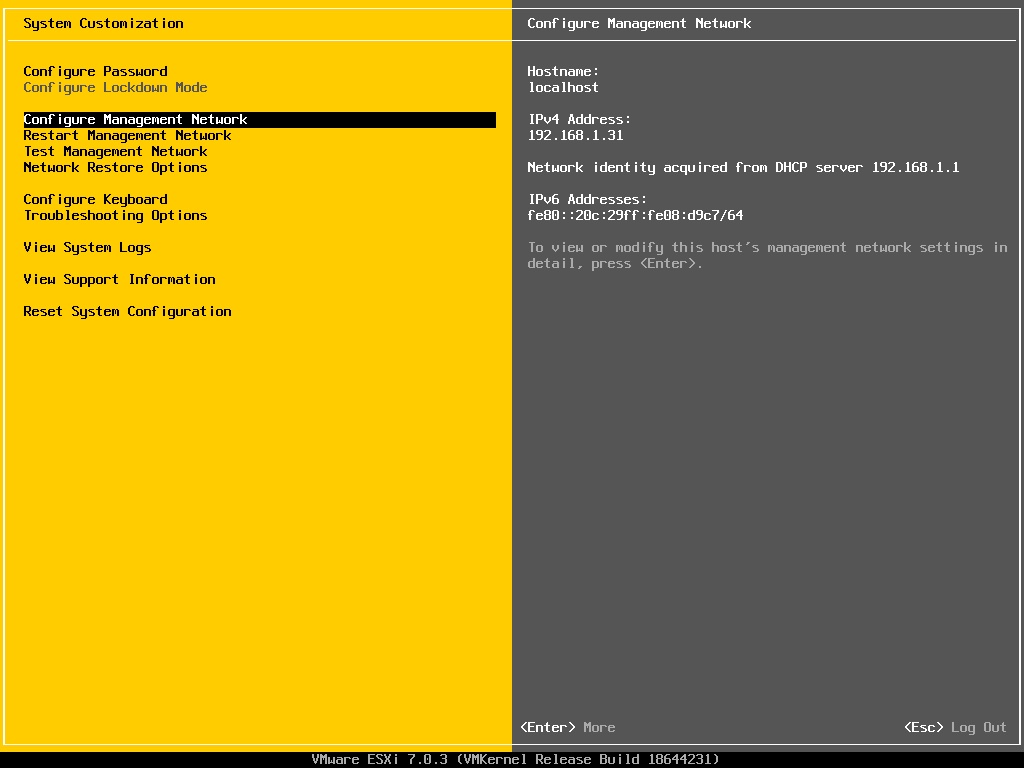
After entering the root credential, navigate to the option – “Configure Management Network”.
Step 3: Configure a Static IP for ESXi Management Network
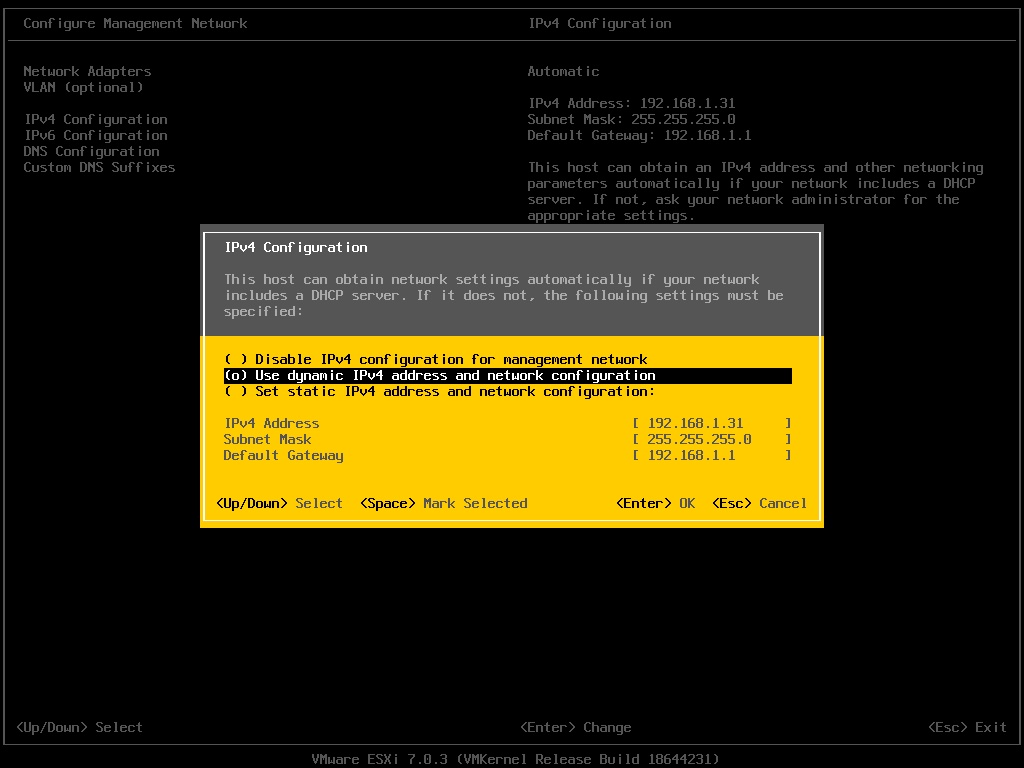
Select “IPv4 Configuration”. The current setting is displayed on the right-hand side.
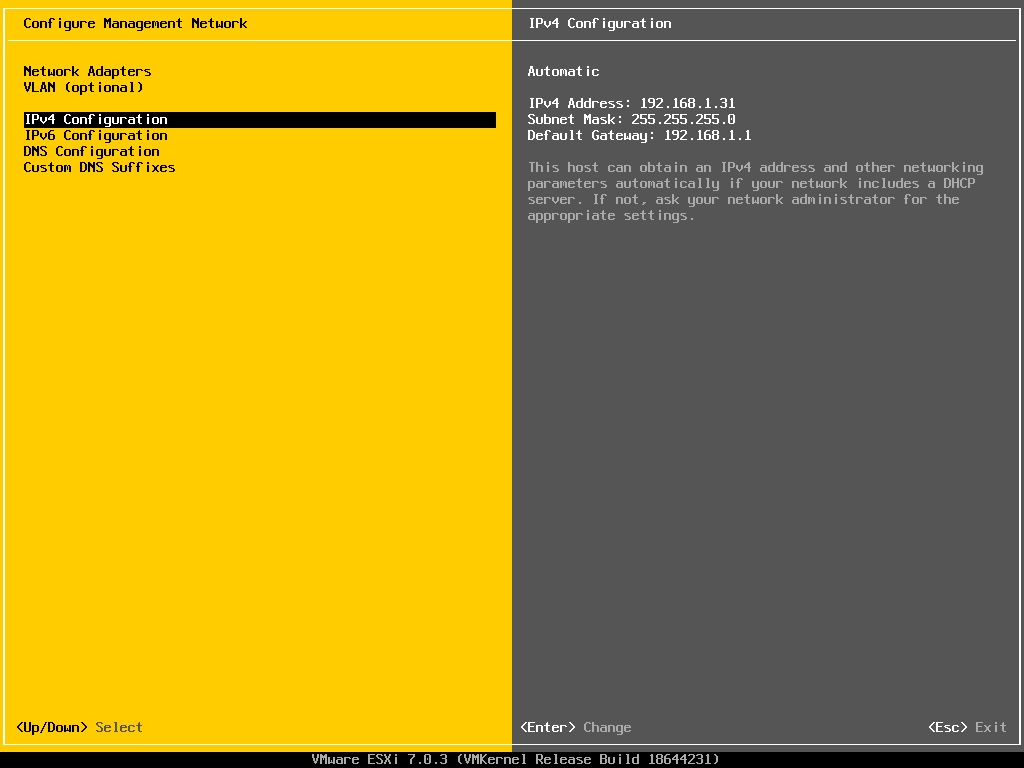
After entering the “IPv4 Configuration” page, you can see that the option “use dynamic IPv4 address and network configuration” is selected by default.
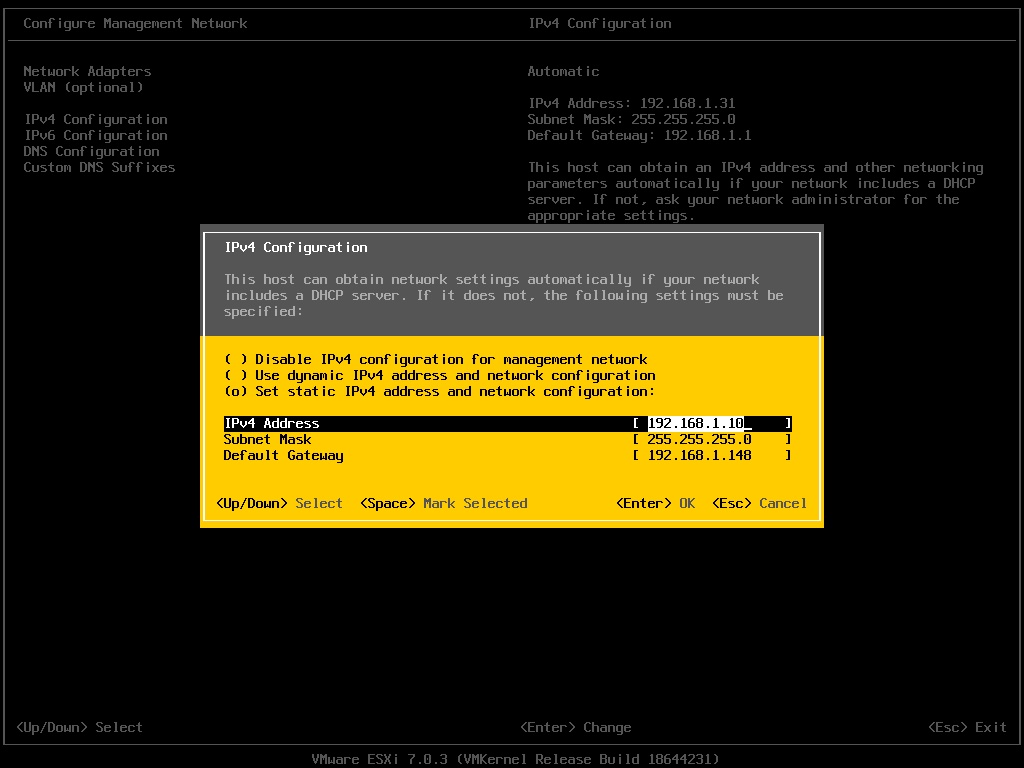
Select the option “Set static IPv4 address and network configuration” and enter information including IPv4 address, subnet mask, and default gateway according to your network environment. In this example, I have entered the IP address as per the DNS server configuration.
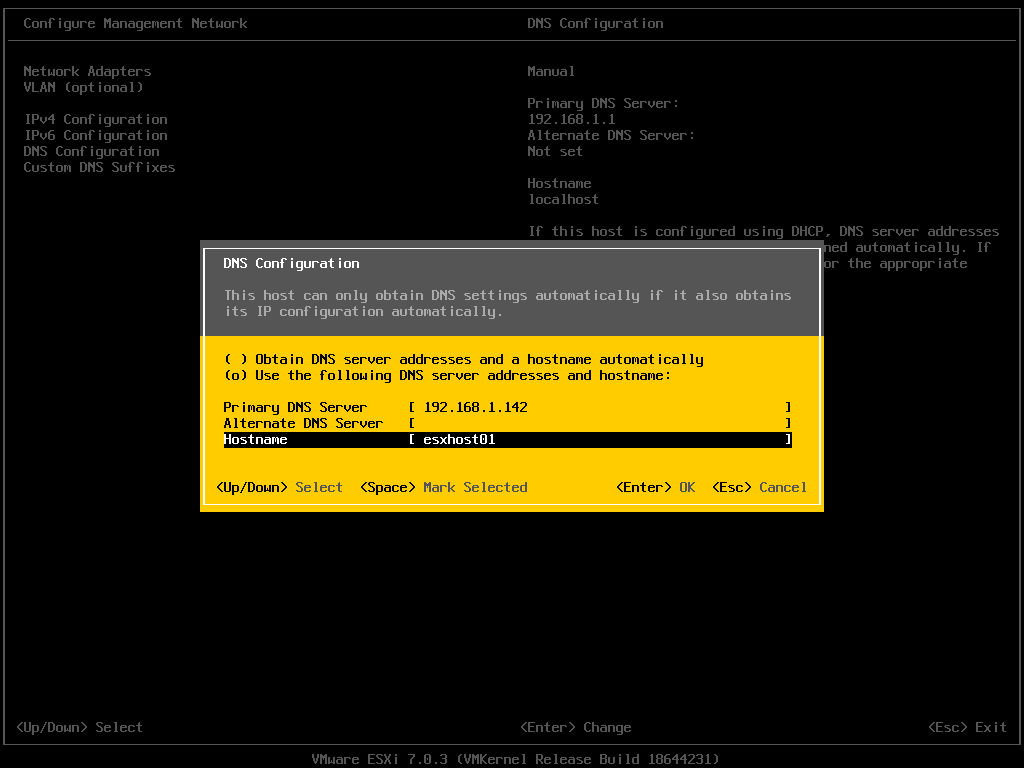
Step 4: Configure DNS Server Address and Hostname for ESXi Host
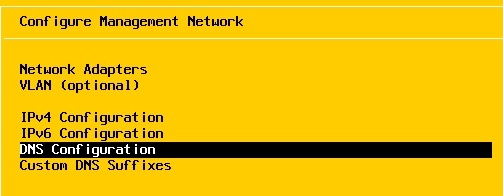
After setting up a static IP, select “DNS Configuration” to assign a DNS server and hostname for the ESXi Host.
The original DNS configuration is usually the default gateway of the network. The hostname is set as “localhost” by default.
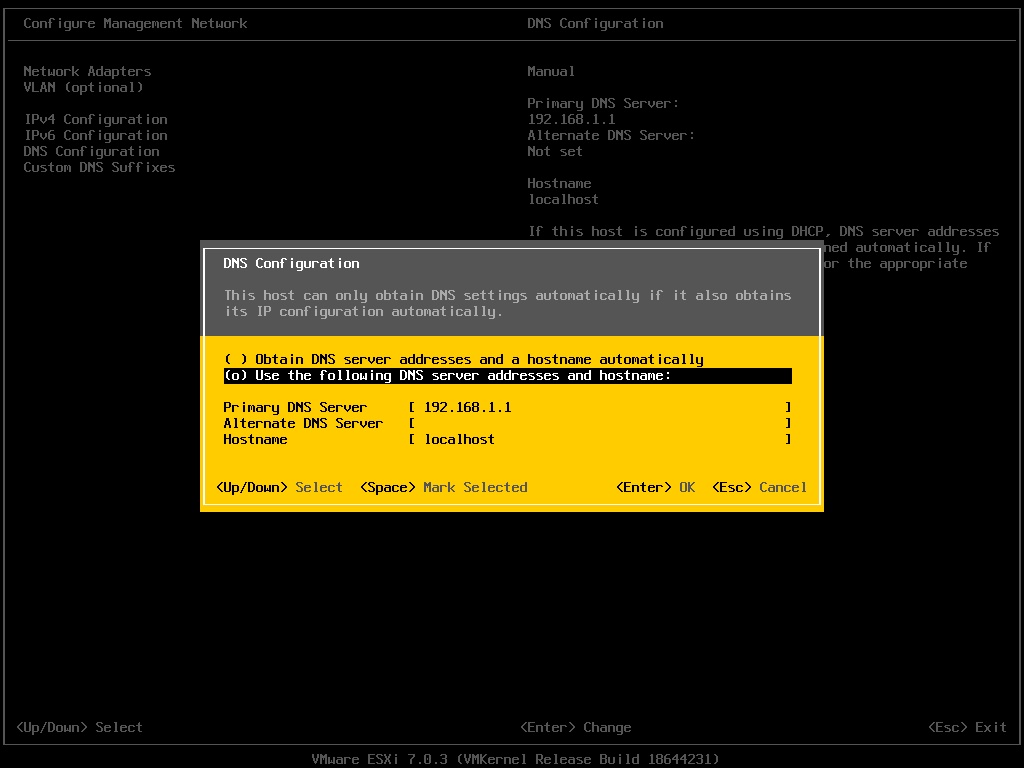
In this example, I change the DNS server to the IP address of the Windows DNS Server. The hostname also aligns with the one in the DNS record – “esxhost01”.
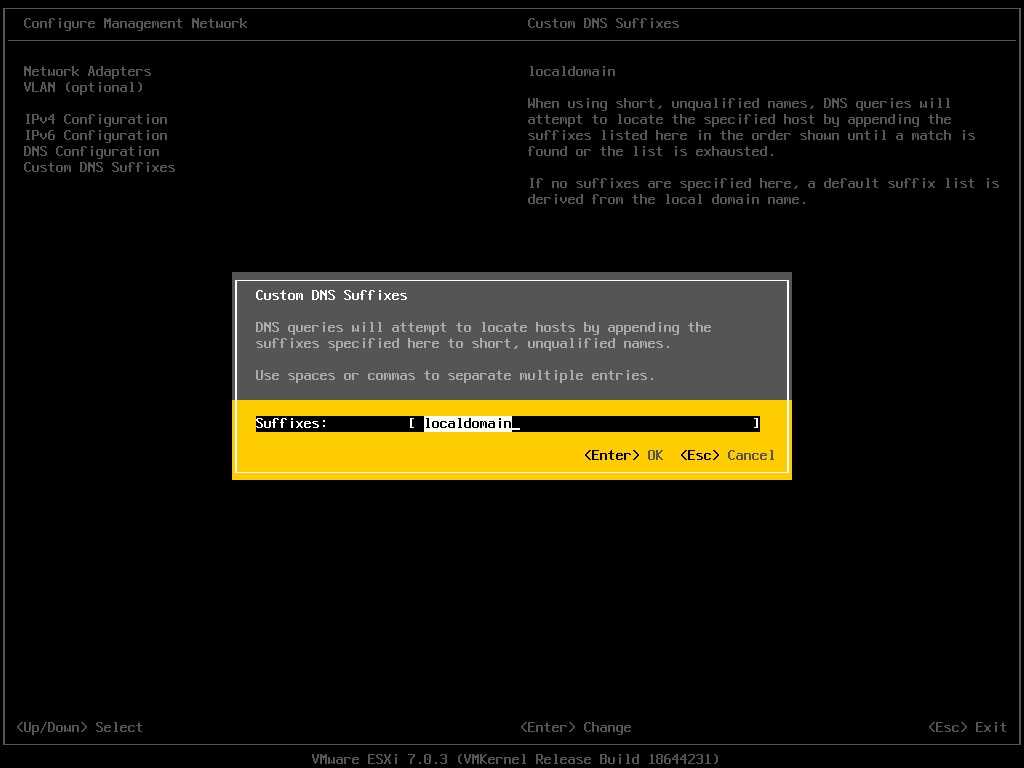
Step 5: Configure DNS Suffixes for the ESXi Host
Finally, select “Custom DNS Suffixes” on the “Configure Management Network” page.

By default, the DNS suffixes are set as “localdomain”.
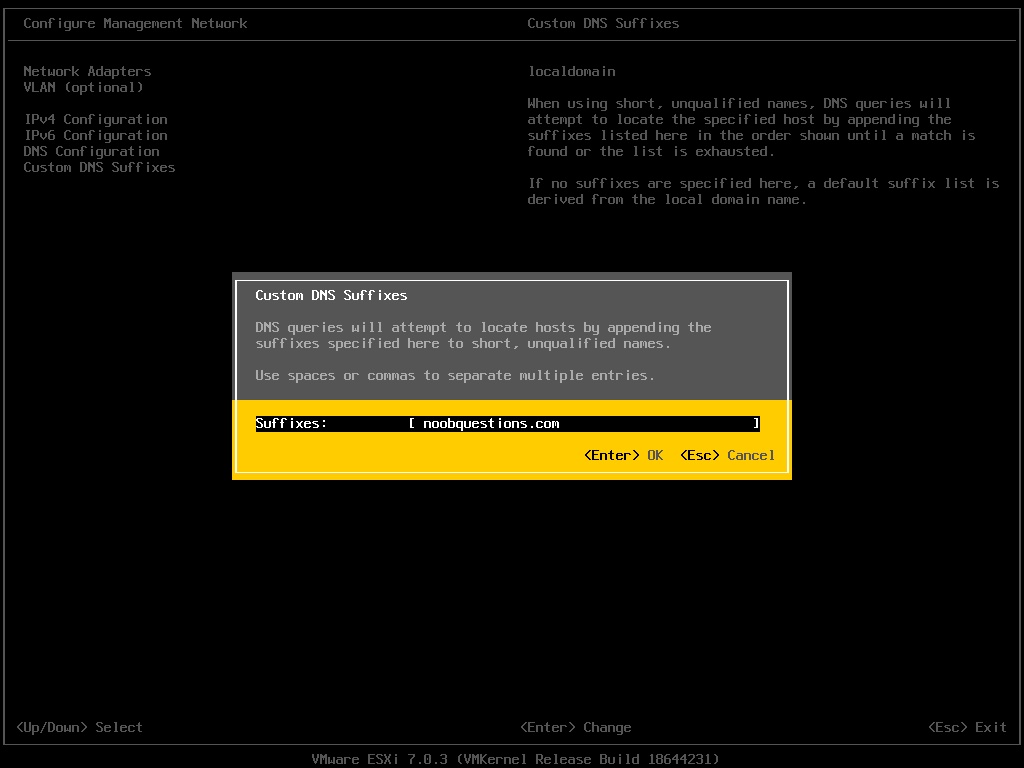
Change the DNS suffix according to the DNS server configuration. In this example, “noobquestions.com” is assigned.
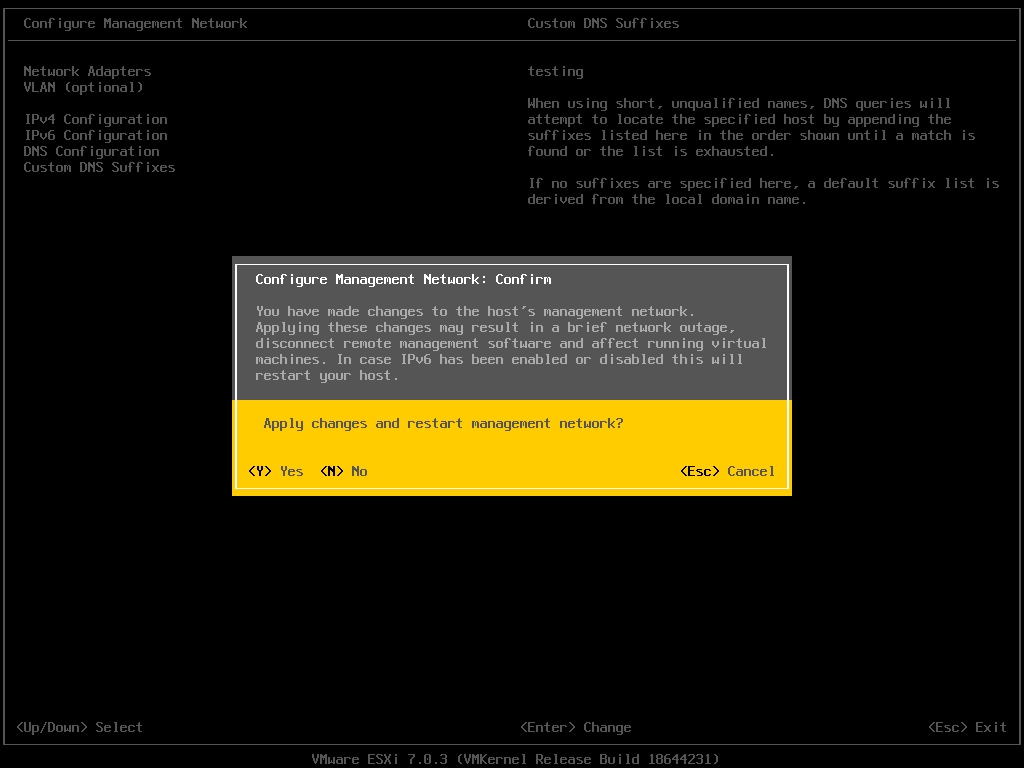
Step 6: Restart Management Network
After applying the management IP, hostname, and DNS suffixes settings, hit “Esc” on the “Configure Management Network” page and restart the management network accordingly.
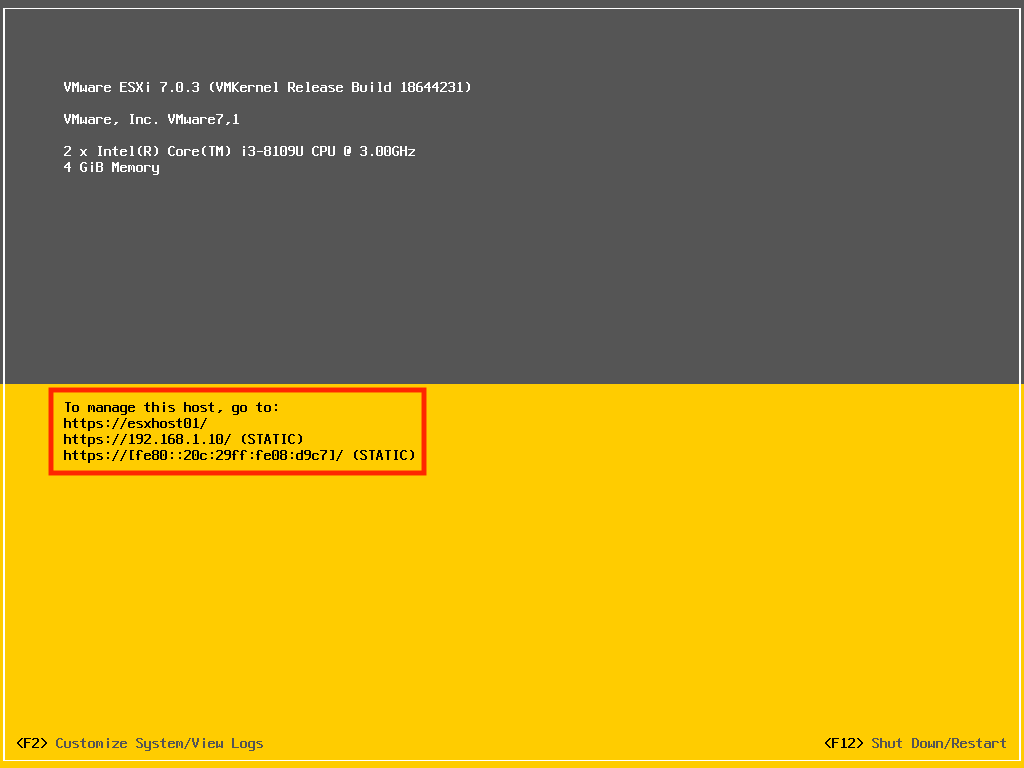
Step 7: View the Result on the Main Page
Upon restarting the management network, you can go back to the main page to see if the management IP has been changed. It should now display “(STATIC)” next to the IP address. The hostname is also shown above.
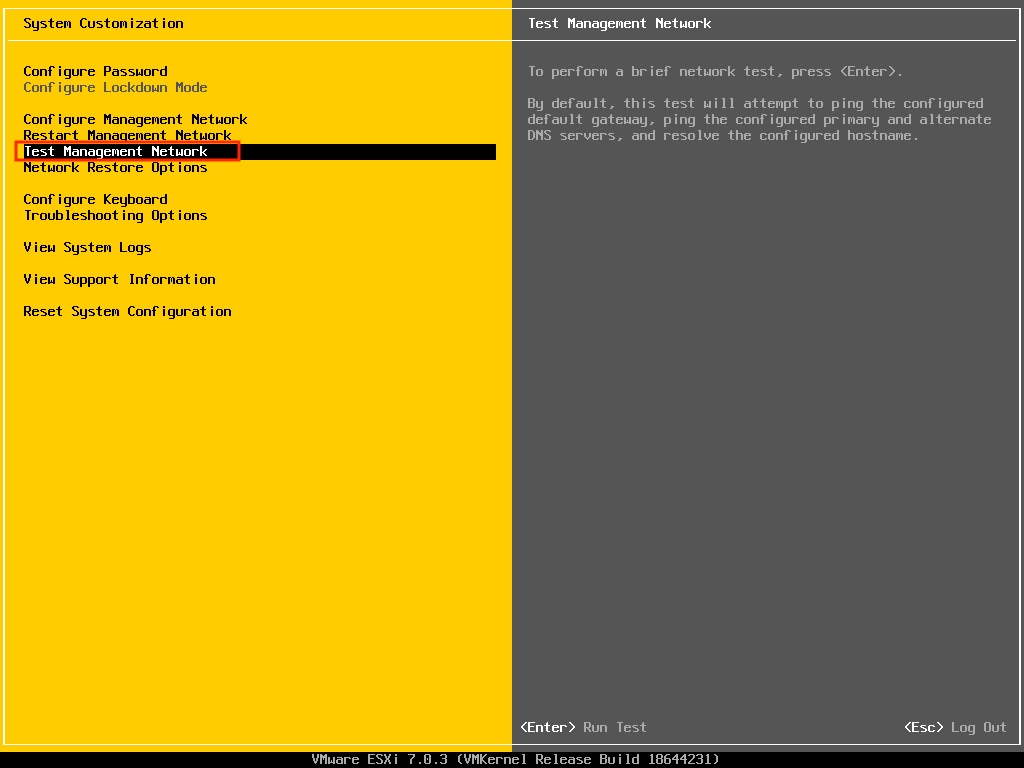
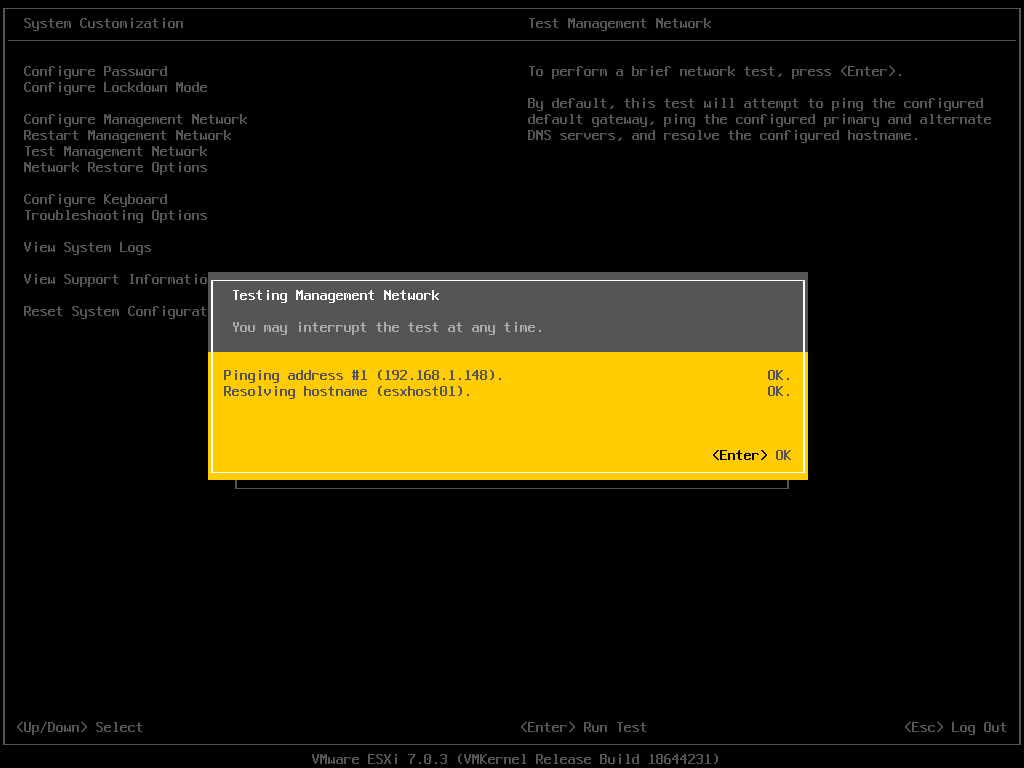
Step 8: Test Management Network on the DCUI
To ensure the ESXi network is reachable to clients and the DNS server, and that the hostname can be resolved, navigate to the option – “Test Management Network” on the DCUI.
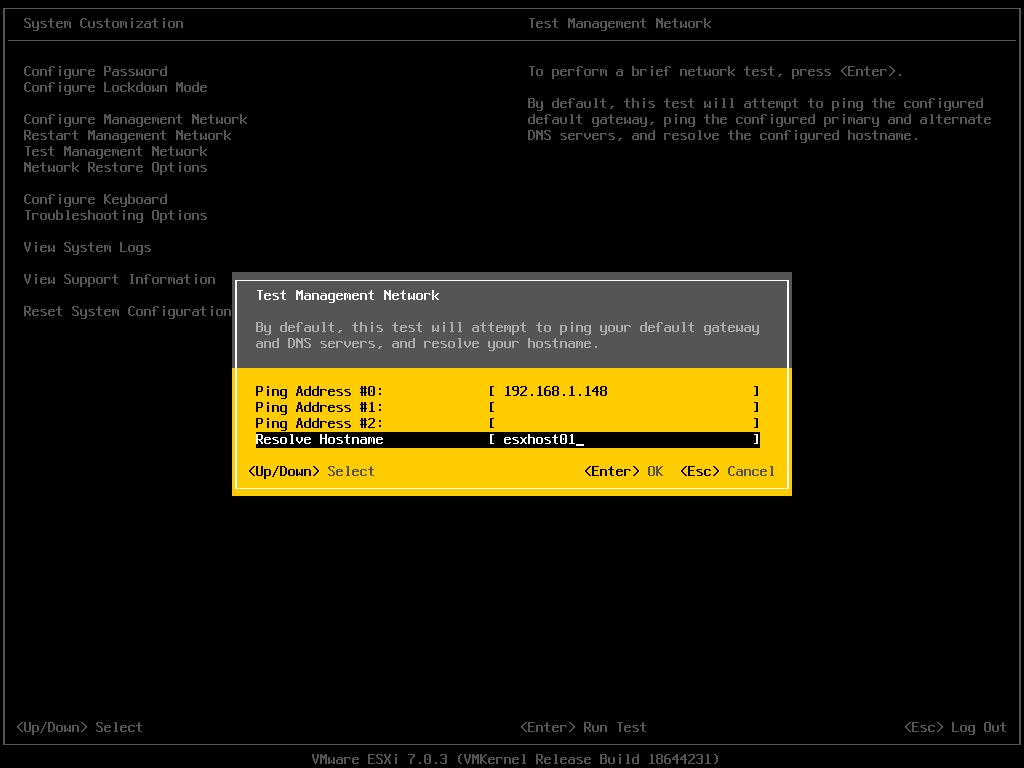
Enter the IP address to perform the ping test and the hostname to resolve.
Step 9: Validate DNS and Network Connectivity on Client Device
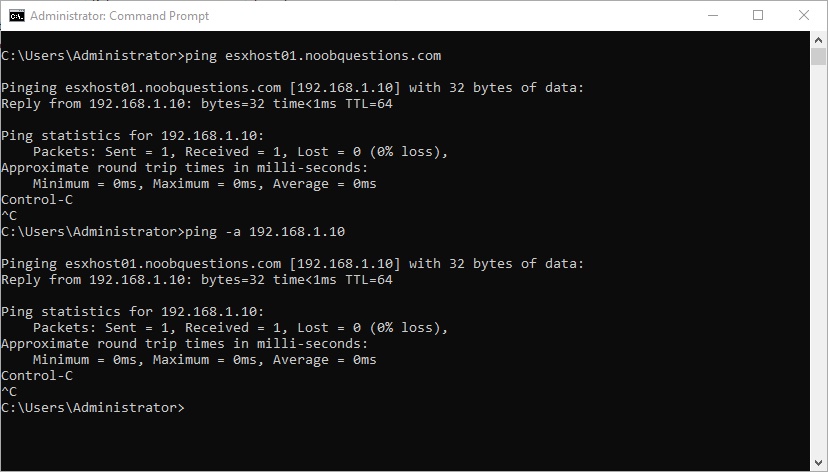
Upon configuring the management network and related DNS options, perform a ping test from a client device on the domain. You should ensure that forward and reverse DNS lookup is functional by using the “ping -a” command. The domain name should translate to the desired IP address, and vice versa. As per VMware DNS requirements, always “ensure that DNS reverse lookup returns an FQDN when queried with the IP address of the host machine”
Conclusion
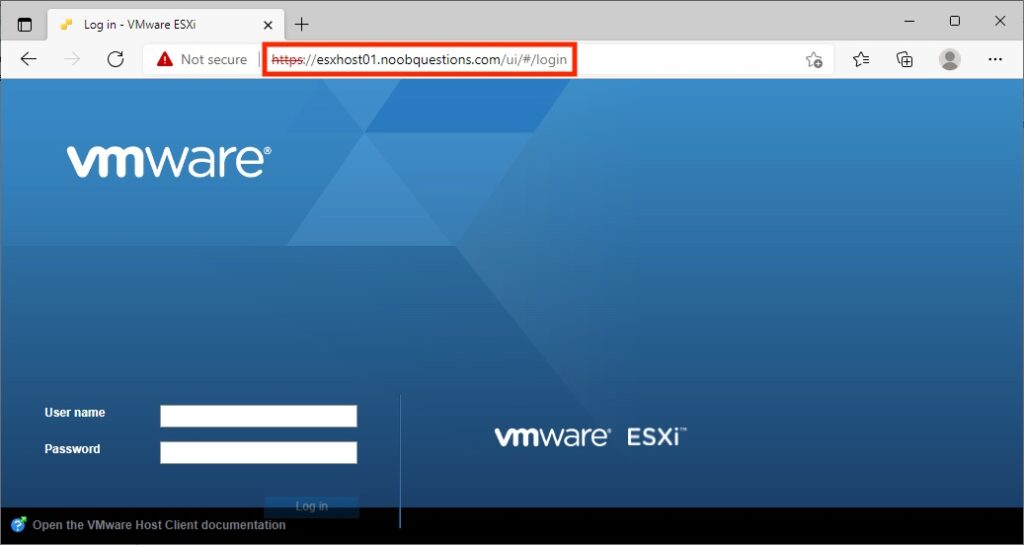
It is simple to configure the ESXi host management network on the DCUI. After installing ESXi and configuring DNS settings for the host, you should always test the FQDN from both the ESXi host and the client devices.