
An Introduction to using Splunk for Malware Analysis
Splunk is one of the most widely used SIEM tools in enterprises.
On this page
Splunk is one of the most widely used SIEM tools in enterprises. It offers centralized log management and analytics. Based on the log data collected by Splunk, security researchers can perform malware analysis. As a threat intelligence tool, SIEM software like Splunk helps organizations manage and investigate cyber threats like ransomware. This article explains the steps to analyze events aggregated by Splunk by looking at the challenges in a TryHackMe Room titled “PS Eclipse.”
TryHackMe Room: https://tryhackme.com/room/posheclipse
Q1: Finding a suspicious executable
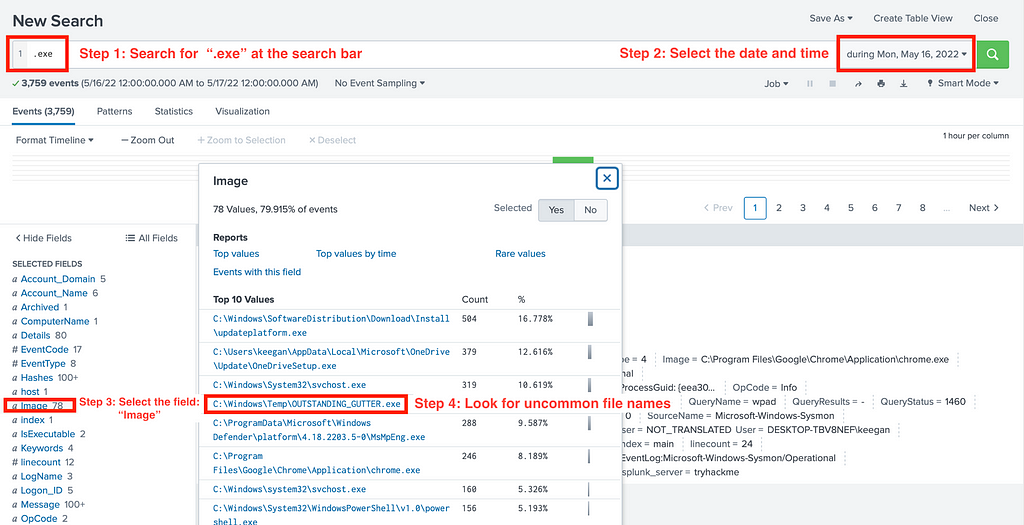
To find an executable file, enter “.exe” on the search bar, and specify the date of an event.
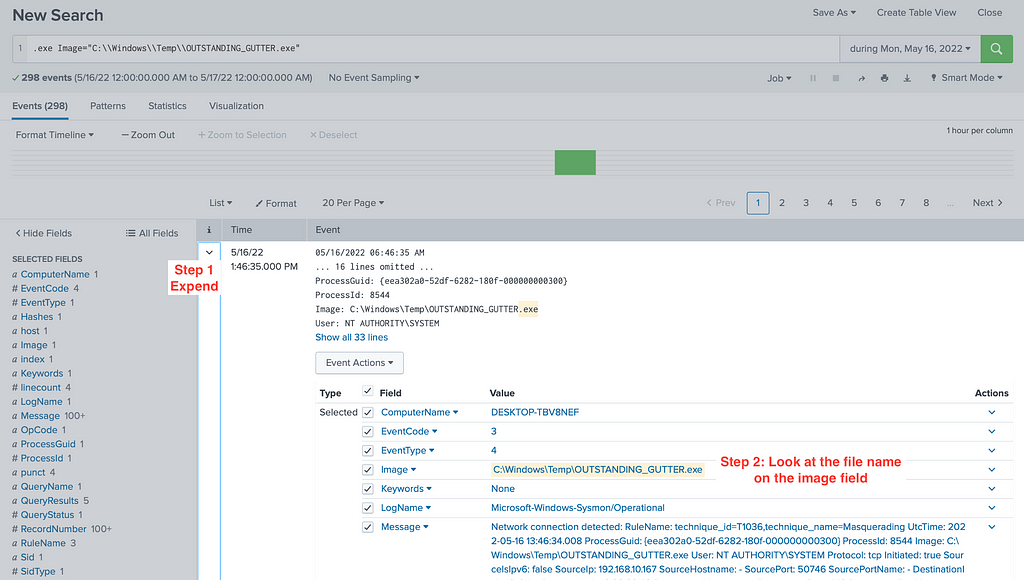
After the query result is displayed, click the “Image” field. Various exe files will be displayed. Look for non-default Windows executables. Click on the executable name to search for more events related to that file.
Q2: Finding the source address of the executable
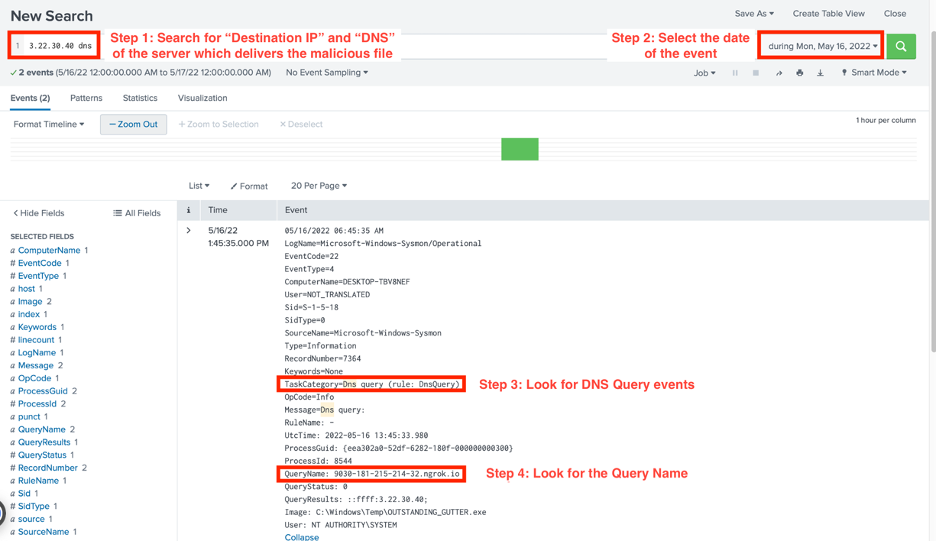
As we notice that the destination IP of the server which offers the executable is “3.22.30.40”, we can search for events related to that IP address. To find events relevant to the domain name of the server, add the keyword: “DNS” to the query.

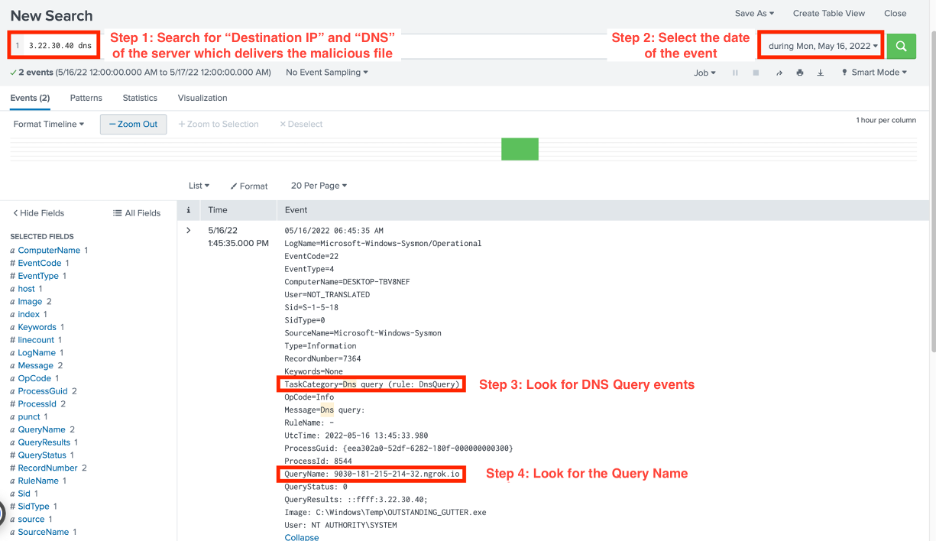
Look for other related events to find out all possible query names.
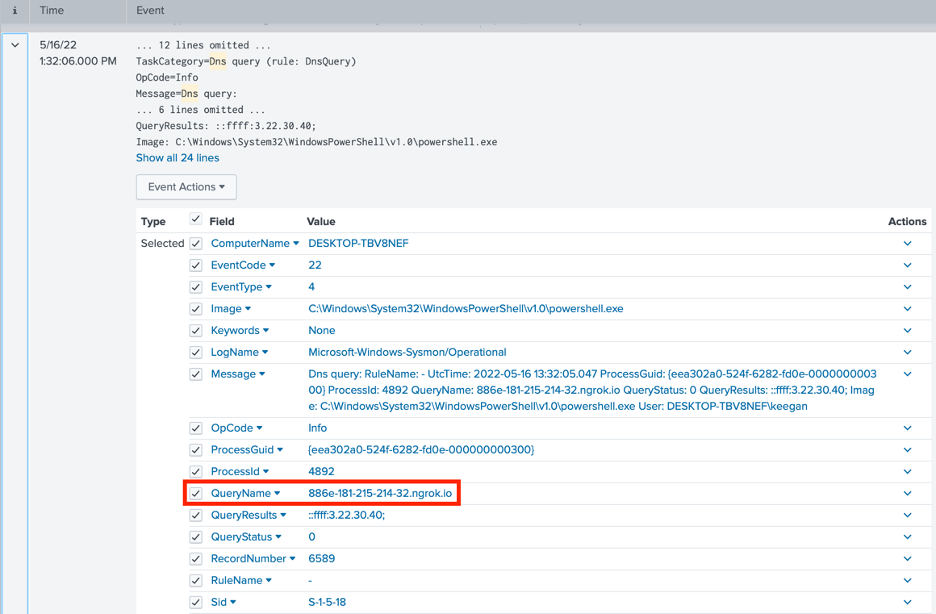
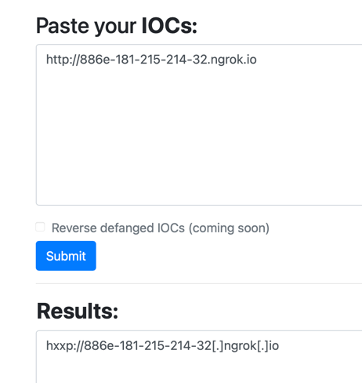
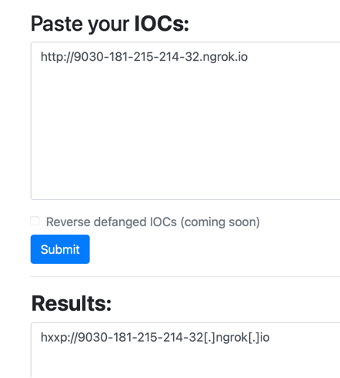
Use an online tool to defang the URL.
Q3: Finding the file path of the executable
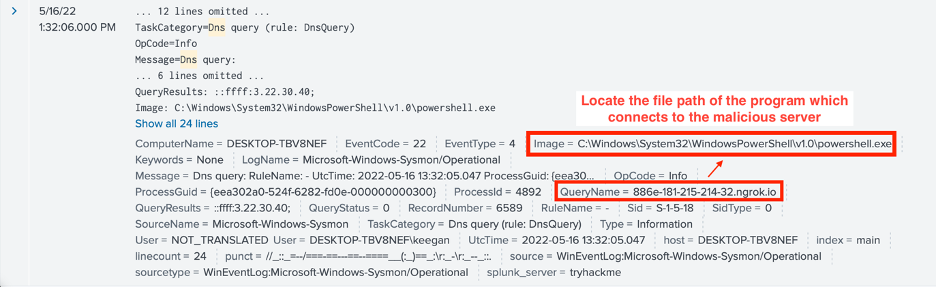
As we know the IP address and domain name of the suspicious server, we can identify the program which downloaded the malicious executable by looking at the “image” field. The file path of the program and the executable (powershell.exe) will be displayed.
Q4: Finding Events related to Escalation of Privilege
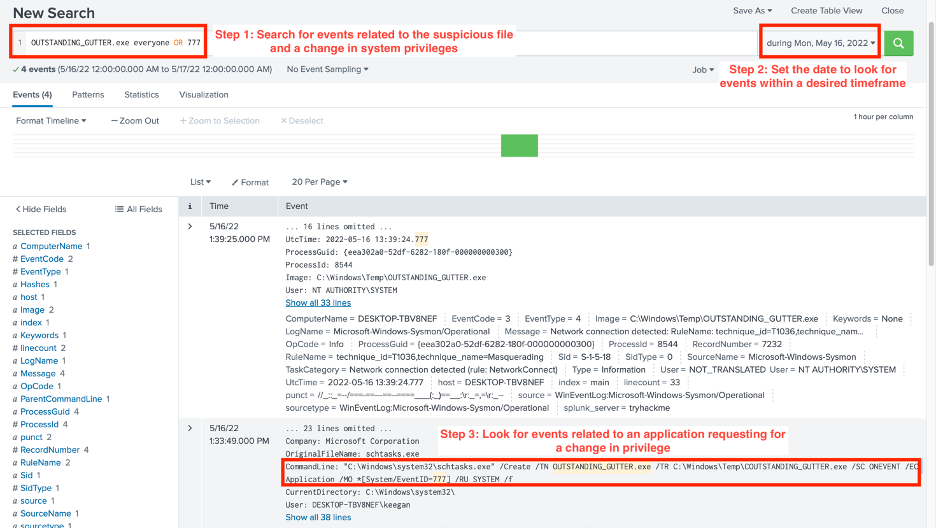
Search for events related to the suspicious file and a change in system privileges (e.g., everyone, 777)
Q5: Finding the permissions that the suspicious binary run as
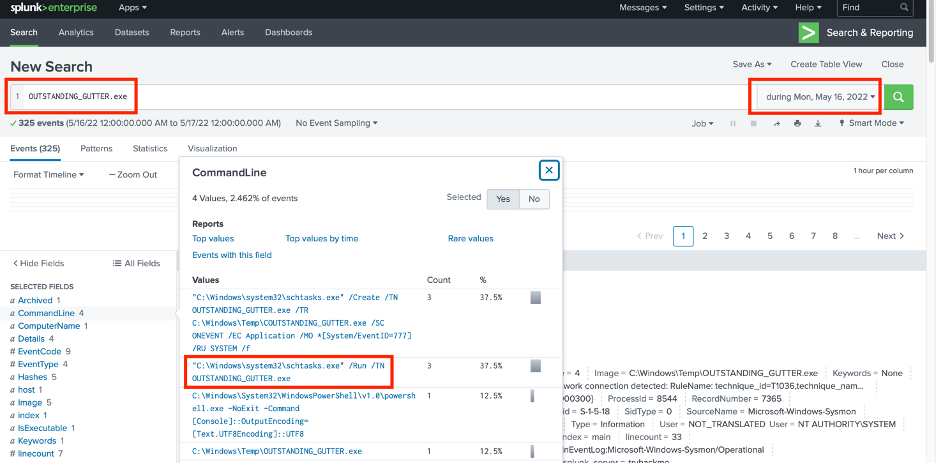
Using the same query as above, we can find that the user which runs the exe file is “NT Authority\System”.
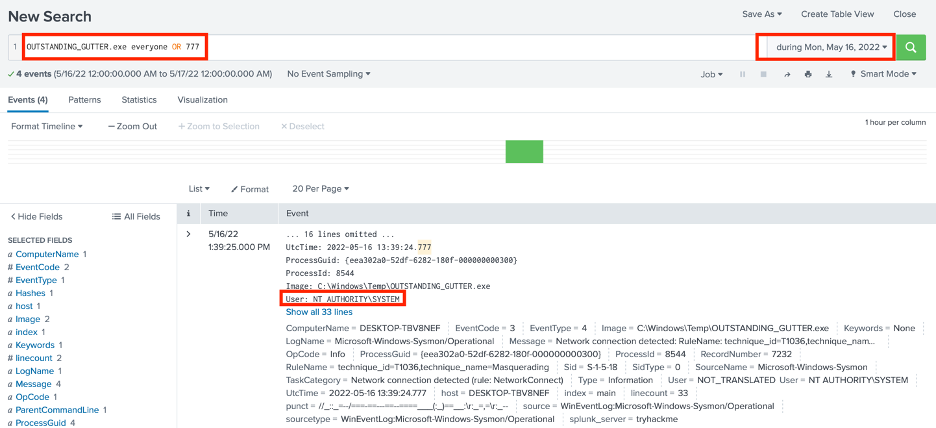
Looking at the executable within the specified date, we can identify several commands which may be used to set the permissions that the executable run as.
Q6: Finding the address which the suspicious binary connects to
Similar to the step in Part 2, we can search for the IP of the remote server with the keyword “DNS” to see what action is performed by the suspicious file. The second result shows that the binary connects to 9030–181–215–214–32.ngrok.io.
Using an online converter, the query address can be defanged as:
Q7: Look for a PowerShell Script using Splunk
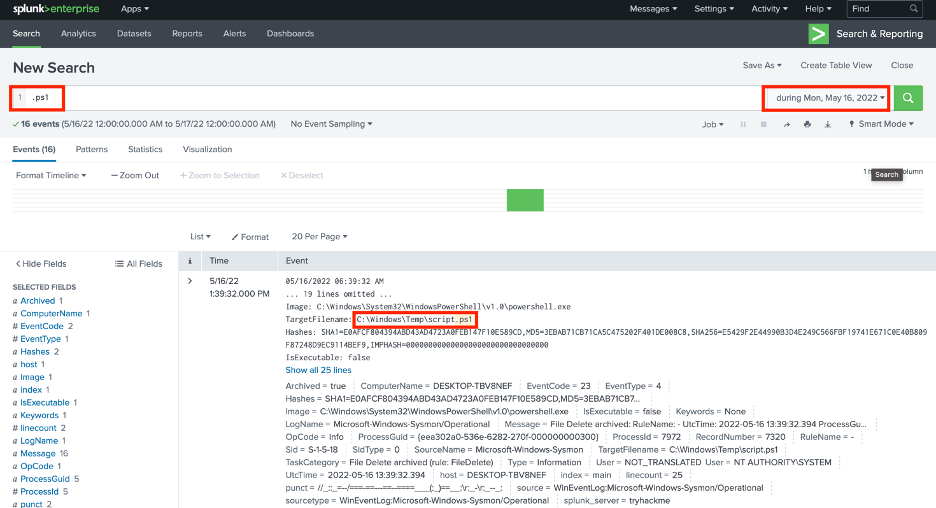
Search for the extension: .ps1 to locate all the files related to PowerShell.
Q8: Look for the real name of a malicious script
Certain keywords can be used to search for ps1 scripts executed by Powershell
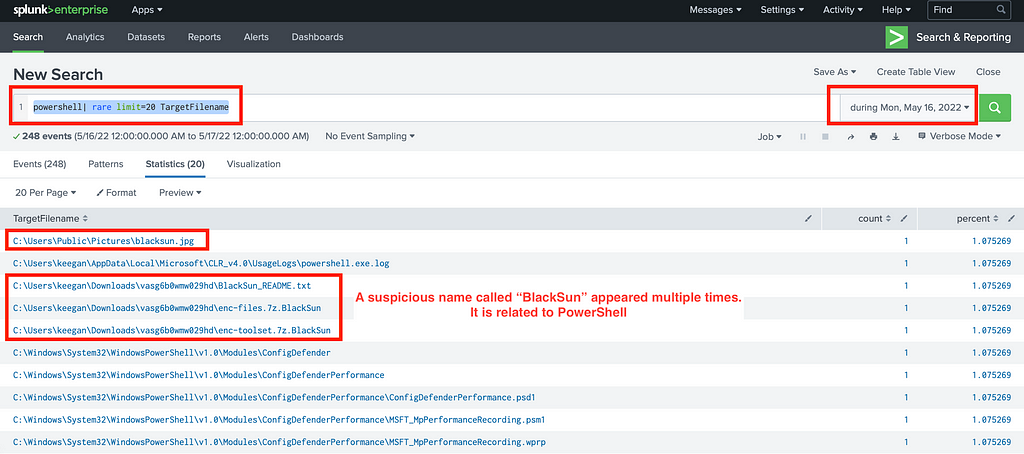
As an example, “powershell| rare limit=20 TargetFilename”
In this case, “BlackSun” is repeated multiple times. It can indicate where an attacker hides the real name of the script executed by Powershell.
Q9: Locate a text file left by an attacker
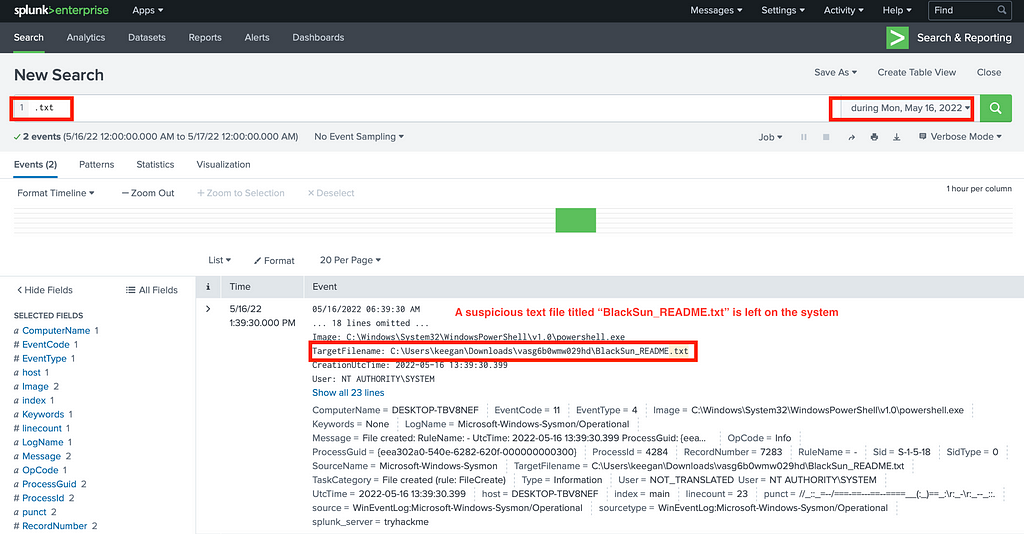
Look for events related to the file extension: “.txt”
Q10: Locate an image file left by an attacker
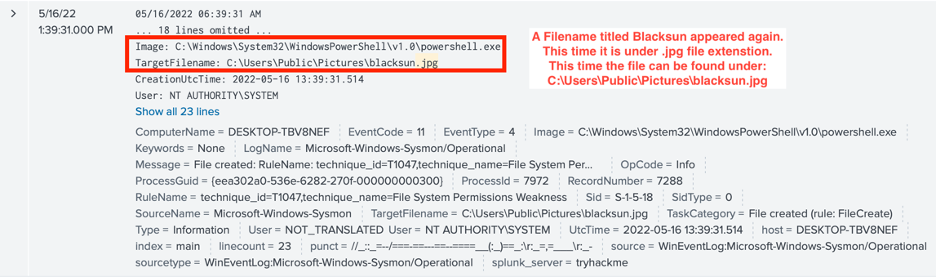
Look for events related to the file extension: “.jpg”

We can find that the name “BlackSun” appears again. This time it is in the .jpg extension.
About this resource · sources, dates & scope
Attribution: Kelvin Ling. Original publication: .
The original technical writing is preserved. Software-specific procedures can reflect older versions; consult current official documentation before operational use.
Community discussion
Comments
Ask a question or share a practical note. Comments publish immediately after verification and spam checks. Do not post personal or confidential information.
Loading comments…